The ‘Wet Sponge’ Trick for Testing Shower Waterproofing Before Tiling
The Wet Sponge Trick for Testing Shower Waterproofing Before Tiling
I spent three days grinding concrete on a job last month just so the floor wouldn’t click like a castanet. Most guys skip the leveling compound because they think the underlayment or the tile thin-set will hide the dip. It won’t. If the substrate is not within one eighth of an inch over a ten foot span, the tile will eventually crack or the grout will powder out. This same level of obsession applies to shower waterproofing. I have seen guys throw tile over greenboard like it is 1985, thinking a little bit of grout sealer will save them. It is a disaster waiting to happen. The wet sponge trick is a simple but effective diagnostic tool to verify if your liquid-applied membrane is truly ready for the heavy load of a tile installation.
The physics of the impermeable barrier
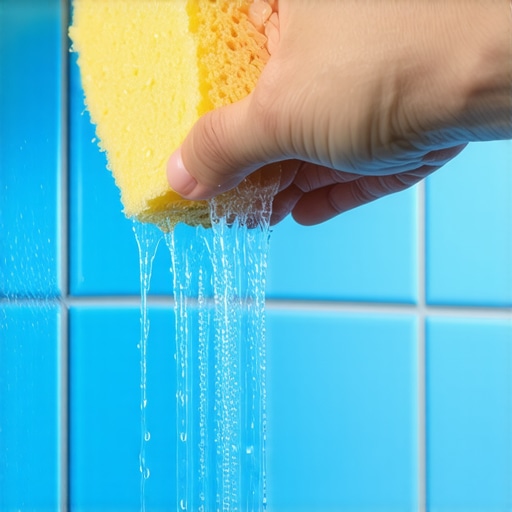
The wet sponge trick for testing shower waterproofing involves placing a saturated sponge on the cured membrane to check for surface tension and wicking. If the membrane is properly applied and cured, the water should bead or remain on the surface without changing the color of the underlying material or softening the bond. This test ensures the hydrophobic properties of the waterproofing system are fully active before thin-set application. You cannot afford to guess when it comes to the integrity of a shower pan. Water is a persistent enemy that finds the path of least resistance through capillary action. When you are looking at a liquid-applied membrane, you are looking at a polymer-based coating that must form a continuous, monolithic film. If that film has pinholes or if the mil-thickness is too thin, the sponge test will reveal it. I have walked onto jobs where the membrane looked dry but the wet sponge turned the surface into a gummy mess within ten minutes. That tells me the installer didn’t wait for the chemical cross-linking to complete. In a humid environment like Florida or the Gulf Coast, curing times can double. You do not rush the chemistry. You wait for the bond to become absolute.
“A floor is only as good as the subfloor beneath it; deflection is the enemy of every joint.” – Master Flooring Axiom
Why your shower pan is actually a chemistry experiment
Shower waterproofing systems rely on polymer-modified thin-sets and liquid membranes to create a watertight assembly. The wet sponge trick works because it simulates the constant hydrostatic pressure that a shower floor experiences during daily use. If the water from the sponge penetrates the membrane, it indicates a chemical failure or mechanical gap in the application. Most people think they can just slap on a coat of blue or red liquid and call it a day. They ignore the manufacturer’s requirements for a specific mil-thickness. I use a wet film gauge to make sure I am hitting the numbers. If you are not hitting 30 to 50 mils depending on the product, you are just painting the walls. The wet sponge trick is the final exam. If the sponge sits there and the membrane stays hard and dry, you have passed. If it gets soft, you are looking at a future mold farm behind the tile. I have seen $20,000 bathroom renovations destroyed in six months because someone didn’t want to wait 24 hours for a second coat to cure. The chemistry of these products is fascinating. They use long-chain polymers that must weave together as the water evaporates. If you introduce more water too early, you disrupt that weaving process. It is like trying to build a bridge while the concrete is still soup.
The hidden dangers of floor leveling and transition zones
Floor leveling is the foundation of every successful tile or laminate project, especially in areas adjacent to waterproofing zones. When you transition from a waterproofed shower floor to a laminate or carpet install in the master bedroom, the subfloor height must be perfectly calculated to avoid threshold tripping hazards. I have seen installers forget to account for the thickness of the leveling compound and the underlayment, leading to a half-inch jump at the door. That is bush-league work. You need to map the floor with a laser level. Find the high spots and the low spots. If you have a concrete slab with a 3/4 inch dip, you cannot expect your flooring to bridge that gap. Laminate will bounce and eventually the locking mechanisms will snap. Carpet will show the divot like a sore thumb. While most people want the thickest underlayment, too much cushion actually causes the locking mechanisms on LVP to snap under pressure. You want a high-density, low-compression underlayment that provides support. In the shower, the leveling is even more critical because of the slope. You need a consistent 1/4 inch per foot drop toward the drain. If the subfloor isn’t level before you start the mud bed, your slope will be wonky and you will end up with standing water. Standing water is the precursor to membrane failure and grout rot.
| Waterproofing System | Material Type | Perm Rating | Cure Time (Hours) |
|---|---|---|---|
| Liquid Applied | Polymer Resin | 0.5 – 0.8 | 12 to 24 |
| Sheet Membrane | Polyethylene | 0.1 – 0.3 | Immediate |
| Cementitious | Portland Cement | 1.0 – 2.0 | 24 to 48 |
The ghost in the expansion gap
Expansion gaps are the most misunderstood part of flooring installations and shower waterproofing. Every material on a job site moves with temperature and humidity changes. Tile expands, wood expands, and even the concrete subfloor breathes. If you do not leave a gap at the perimeter, the floor will eventually cup or tent. In a shower, this movement can tear the membrane at the wall-to-floor transition. This is why we use band reinforcement or cove base details. The wet sponge trick can help identify if the corners are properly sealed. If you put a wet sponge in the corner and water disappears into the wall cavity, your waterproofing is a lie. I don’t care how much silicone you use later. The membrane must be the primary defense. I have walked into high-end homes where the solid oak floors were buckled because the installer didn’t leave a 3/4 inch gap at the drywall. They thought the baseboard would hide it, so they pushed the wood tight. Six months later, the summer humidity hit and the floor rose up like a mountain range. It is the same in the bathroom. You need that movement joint at the change of plane. If you don’t have it, the grout will crack and the water will find its way to the subfloor.
“Waterproofing is not a suggestion; it is a structural mandate for the longevity of the dwelling.” – Master Flooring Axiom
The installer’s mandatory pre-flight checklist
Professional flooring installers follow a strict protocol to ensure the subfloor is ready for waterproofing or finish material. You cannot skip steps and expect a high-performance surface. Here is how I handle every job from the ground up.
- Check moisture content of the subfloor using a pinless meter to ensure it is below 12 percent for wood or 4 percent for concrete.
- Grind down high spots and fill low spots with a high-strength self-leveling underlayment.
- Vacuum the entire surface to remove every speck of dust, as dust is the ultimate bond breaker.
- Apply the waterproofing membrane in thin, even coats, checking mil-thickness as you go.
- Perform the wet sponge trick on all transitions and drain assemblies after 24 hours of curing.
- Verify the slope to the drain is at least 1/4 inch per foot using a dedicated transit or long level.
- Ensure all internal corners are reinforced with alkaline-resistant mesh or dedicated corner tapes.
By following these steps, you eliminate the variables that lead to failure. I have seen guys try to save an hour by not vacuuming. They apply the thin-set and it just peels off the concrete like a scab because of the layer of dust. That is unacceptable. You have to treat the substrate with respect. If you are doing a carpet install, the same rules apply. You don’t want to stretch carpet over a floor that has a layer of grit underneath it. It will act like sandpaper on the backing of the carpet every time someone walks on it. Do it right or don’t do it at all.
The 1/8 inch that ruins everything
Precision measurements are the difference between a master installer and a handyman. When I say a floor needs to be flat within 1/8 inch, I mean it. If you have a large format tile, any deviation in the subfloor will cause lippage. Lippage is when the edge of one tile is higher than the edge of the adjacent tile. It is a trip hazard and it looks terrible. In a shower, lippage can prevent the water from reaching the drain, leading to pooling and mineral buildup. The wet sponge trick can even help identify these low spots. If the water from the sponge doesn’t move toward the drain, you have a birdbath. You need to fix that before the tile goes down. I once had to rip out a whole floor because the previous guy thought he could just build up the thin-set to level the tile. Thin-set is for bonding, not for leveling. It shrinks as it dries. If you have a thick bed in one spot and a thin bed in another, the tiles will pull at different rates and you will end up with a mess. Use the right tools for the job. Get a screed bar. Get a laser. And for the love of the craft, use a wet sponge to make sure you are not building a leak. Your reputation is only as good as the floor you leave behind. If that floor fails in two years, nobody will remember how fast you were. They will only remember that you cost them a fortune. Keep your tools clean, your subfloor level, and your membranes tested. That is how you survive twenty-five years in this business without a single callback for a leaking shower pan. It is about the physics of the install and the chemistry of the bond. Master those, and the rest is just aesthetics.{“@context”:”https://schema.org”,”@type”:”HowTo”,”name”:”Testing Shower Waterproofing with the Wet Sponge Trick”,”step”:[{“@type”:”HowToStep”,”text”:”Apply the liquid waterproofing membrane to the shower substrate and allow it to cure for at least 24 hours.”},{“@type”:”HowToStep”,”text”:”Saturate a clean sponge with water and place it on a critical area of the membrane, such as a corner or near the drain.”},{“@type”:”HowToStep”,”text”:”Leave the sponge for 10 to 15 minutes to allow for potential absorption.”},{“@type”:”HowToStep”,”text”:”Remove the sponge and inspect the membrane for color change, softening, or water penetration.”}]}