The ‘Pencil Trick’ for Perfect Laminate Cuts Around Door Frames
The ‘Pencil Trick’ for Perfect Laminate Cuts Around Door Frames
Most guys skip the leveling compound. They think the underlayment will hide the dip. It won’t. I spent three days grinding concrete on a job last month just so the floor wouldn’t click like a castanet. I walked into a house where the previous installer had simply ‘eyeballed’ the door jambs. The result was a series of jagged gaps filled with cheap, mismatched caulk that looked like a five-year-old had been playing with toothpaste. The homeowner was furious, and rightly so. A floor is a structural performance surface, not a rug you just throw down and hope for the best. If you do not respect the physics of expansion and the geometry of the door frame, the floor will eventually fail. I have spent twenty-five years with sawdust under my nails and a moisture meter in my pocket, and if there is one thing I have learned, it is that the details you cannot see are the ones that will ruin your reputation.
The 1/8 inch that ruins everything
Laminate flooring requires a precise expansion gap to account for the hygroscopic movement of its high-density fiberboard core. When humidity levels fluctuate, the wood fibers inside the plank absorb moisture and expand at a molecular level. If the plank is pinned against a door frame because your cut was too tight, the internal pressure has nowhere to go. This leads to peaking, where the planks lift at the joints, or buckling. The ‘pencil trick’ is the industry secret to ensuring that your cut is not only aesthetically perfect but also mechanically sound. It involves using a scrap piece of flooring and a pencil to create a perfect scribe of the door casing’s profile. This allows the plank to slide under the jamb, maintaining the necessary room for movement while hiding the edge of the cut completely from view.
“A floor is only as good as the subfloor beneath it; deflection is the enemy of every joint.” – Master Flooring Axiom
Why your subfloor is lying to you
Subfloor leveling is the most critical and most ignored step in any laminate or carpet install replacement. You might think a concrete slab looks flat, but concrete is a porous material that settles and shifts over time. When you pull up an old carpet install, you are often looking at a disaster zone of divots and ridges. Laminate flooring is a floating system, meaning it relies on the flatness of the surface below to maintain the integrity of its locking mechanisms. If there is a dip of more than 3/16 of an inch over a ten-foot span, the tongue-and-groove joints will flex every time someone walks over them. This constant deflection causes fatigue in the HDF core, eventually snapping the click-lock mechanism and leaving you with a floor that moves under your feet like a trampoline.
The scribe that saves the day
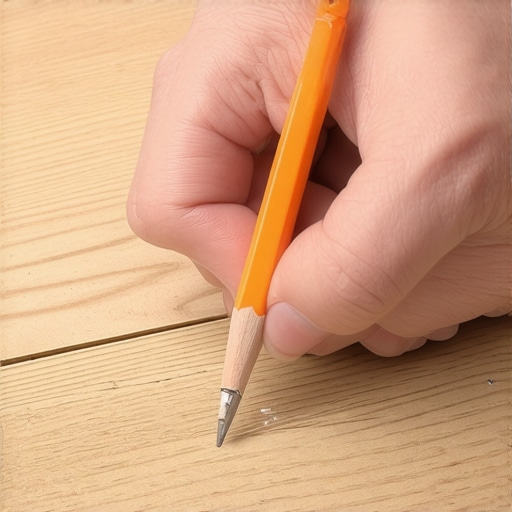
The pencil trick works by using the thickness of the material itself as a guide for the cut. You start by laying a scrap piece of laminate, including the underlayment, flat against the door jamb. This gives you the exact height needed for your undercut saw. Once the jamb is undercut, you take your full plank and position it alongside the door frame. By placing a pencil flat against the casing and drawing a line onto the plank, you create a mirror image of the frame’s contour. This is not just about looks. It is about precision engineering. The graphite line represents the exact boundary where the wood meets the air. Using a jigsaw with a fine-toothed blade, you cut along this line, ensuring you leave that 1/4 inch of breathing room hidden behind the undercut. It is a simple tool for a complex problem.
| Metric | Laminate Specification | Requirement |
|---|---|---|
| Expansion Gap | Perimeter and Jambs | 1/4 inch to 3/8 inch |
| Subfloor Flatness | ASTM F710 Standard | 3/16″ in 10 feet |
| Wear Layer | AC Rating | AC3 (Residential) / AC4 (Commercial) |
| Acclimation Time | Environment Prep | 48 to 72 Hours |
| Moisture Limit | Calcium Chloride Test | 3 lbs / 1,000 sq. ft. |
The myth of the waterproof click lock
Installing laminate near showers or in bathrooms requires a level of moisture management that goes far beyond the marketing claims on the box. Manufacturers love to use the word ‘waterproof,’ but as a professional, I know that water always finds a way. In a bathroom, the danger is not a spill on the surface; it is the humidity and the standing water near the shower base. When steam rises, it can penetrate the expansion gaps at the perimeter. To prevent the core from swelling, you must use 100% silicone sealant in the expansion gaps around the perimeter of the room and any door frames. This creates a flexible, watertight barrier that allows the floor to move while preventing liquid from reaching the vulnerable HDF core. Without this, your ‘waterproof’ floor will be a pile of mush within two years.
“Wood-based flooring materials must be allowed to reach a moisture content equilibrium with the environment before installation.” – NWFA Technical Guidelines
The physics of the floating floor
Floating floors are dynamic systems that react to the thermal and hygroscopic changes in their environment. Unlike a glued-down hardwood or a stapled-down carpet install, laminate moves as a single unit. This means the friction between the underlayment and the subfloor matters. If you use an underlayment that is too thick or too soft, it creates too much vertical movement. This is a common mistake made by DIYers who think more cushion equals more comfort. In reality, too much cushion causes the locking joints to rub against each other, creating heat and mechanical wear. Over time, this wears down the wax coating on the joints, leading to the dreaded ‘floor creak.’ You want a high-density underlayment that provides sound dampening without sacrificing the structural rigidity of the floor system.
- Check subfloor moisture with a pinless meter before opening boxes.
- Acclimate the planks in the room for at least 48 hours at 65 to 75 degrees Fahrenheit.
- Undercut door jambs using a scrap piece of the actual flooring as a height guide.
- Use a 2B pencil for scribing to ensure the line is visible on dark wear layers.
- Vacuum every inch of the subfloor to prevent grit from causing ‘crunching’ sounds.
- Maintain a consistent expansion gap around all vertical obstructions.
The final walk through
A perfect installation is defined by the absence of visible gaps and the silence of the planks. When you finish the ‘pencil trick’ and slide that final piece under the door jamb, it should fit like a glove. There should be no need for wood filler or colored caulk. The transition from the laminate to the tile in the showers or the remaining carpet in the bedrooms should be managed with proper T-moldings or reducers. These transitions are not just decorative; they are functional joints that allow different flooring materials to expand at different rates. If you skip these steps or try to ‘caulk it in,’ you are fighting against the laws of physics. And in the flooring world, physics always wins. Treat every cut as an architectural necessity, and your floors will last a lifetime.