The ‘Pencil Method’ for Scribing Laminate Around a Stone Fireplace
I smell the sawdust before I even open my truck. It is a mix of oak dust and the sharp scent of WD-40 on my saw blades. Most people see a floor as a flat surface for furniture, but I see a structural engineering challenge that starts two inches below the surface. If you treat a laminate installation as a weekend craft project, you are going to end up with a floor that clicks, groans, and eventually fails at the seams. This is especially true when you hit the stone fireplace. A stone hearth is not a straight line. It is a jagged, unforgiving geological formation that does not care about your flooring planks. Mastering the pencil method for scribing is the only way to make that transition look like it was grown there rather than forced into place.
The geometry of the irregular edge
Scribing laminate planks involves transferring the irregular profile of a stone fireplace or hearth onto a flooring board using a pencil and compass or a spacer block. This technique ensures a tight fit while maintaining the essential expansion gap required for floating floors to move during seasonal humidity shifts. Most guys skip the leveling compound. They think the underlayment will hide the dip. It won’t. I spent three days grinding concrete on a job last month just so the floor wouldn’t click like a castanet. That job taught the homeowner that a level subfloor is the difference between a floor that lasts thirty years and one that fails in three months. When you are dealing with a stone fireplace, the floor leveling process becomes even more critical because any vertical movement in the plank will cause it to rub against the stone, creating a permanent squeak.
Why your subfloor is lying to you
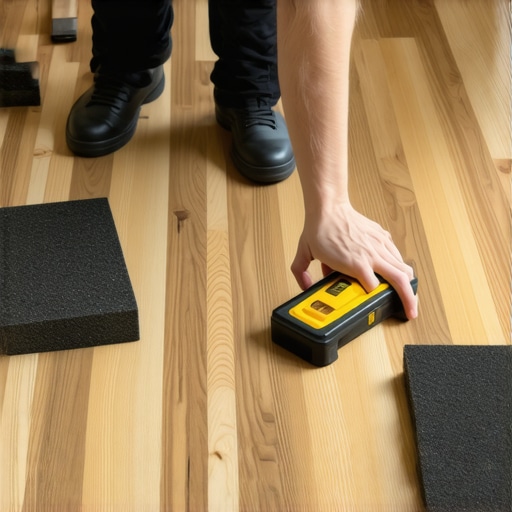
Subfloor preparation requires a straightedge and moisture meter to identify low spots and high points before laminate installation begins. You cannot trust your eyes to see a 1/8 inch dip over a 10 foot span. If the subfloor is not within the tolerance of 3/16 inch over 10 feet, the locking mechanisms on your laminate will eventually snap. I have seen it a hundred times. A homeowner buys the most expensive, high-end laminate but skimps on the floor leveling. They think the foam underlayment acts like a pillow. It does not. In fact, while most people want the thickest underlayment possible, too much cushion actually causes the locking mechanisms on LVP or laminate to snap under pressure because the floor deflects too much when you walk on it. You need a firm base. If you are coming off a carpet install, you must remove every single staple and strip. A single missed staple under a laminate plank is like a pebble in a shoe. It will eventually work its way through the core of the board.
“A floor is only as good as the subfloor beneath it; deflection is the enemy of every joint.” – Master Flooring Axiom
Tools for a surgical fit
Essential tools for scribing include a mechanical pencil, a profiling compass, blue painter tape, and a jigsaw with a fine tooth blade. You cannot use a standard pencil for high-precision scribing because the graphite tip is too wide and inconsistent. A mechanical pencil provides a constant 0.5mm line that represents the exact path your saw blade must follow. Use the following checklist to ensure you have everything ready before you make your first cut.
- Compass with a locking nut to prevent the width from changing mid-scribe.
- Painter’s tape to protect the finish of the laminate and provide a high-contrast surface for the pencil line.
- A jigsaw with a down-cut blade to prevent chipping the melamine wear layer.
- A moisture meter to check the concrete or plywood subfloor before laying the vapor barrier.
- A tapping block and pull bar specifically designed for the laminate’s thickness.
The physics of the pencil scribe
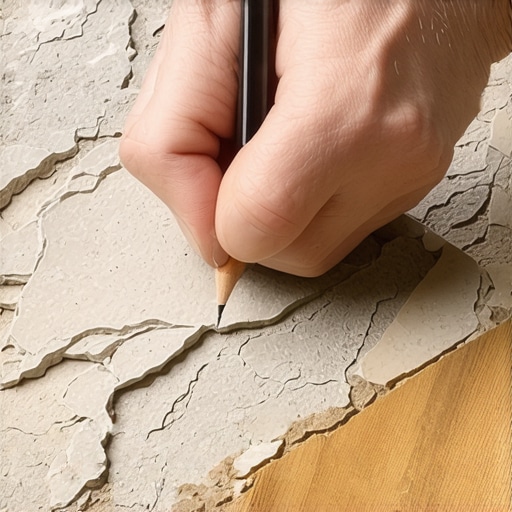
The pencil method works by mimicking the distance between the stone edge and the laminate plank using a fixed spacer. You place the plank to be cut parallel to the stone, usually overlapping the previously installed row. By setting your compass to the width of the gap, you can trace the contours of the stone onto the plank. It is a 1 to 1 transfer of information. You must hold the compass perfectly perpendicular to the plank. If you tilt the pencil, the line will be off by a fraction of an inch, and in flooring, a fraction is a mile. The physics of the scribe depends on the stability of your hand. I prefer using a small block of wood with a hole drilled in it for the pencil. This provides more surface area and prevents the pencil from wobbling as it rides the uneven surface of the stone.
| Core Material | Density Rating | Moisture Resistance | Best Cut Method |
|---|---|---|---|
| HDF (High Density) | 850+ kg/m3 | Medium | Down-cut Jigsaw |
| MDF (Medium Density) | 600-800 kg/m3 | Low | Standard Jigsaw |
| SPC (Stone Plastic) | 1900+ kg/m3 | High | Diamond Blade |
Expansion gaps and the hidden danger
Expansion gaps are the breathing room for laminate flooring, allowing the HDF core to expand and contract without buckling or peaking. If you scribe the floor too tight to the stone, you have essentially locked the floor in place. During a humid summer in a place like Chicago or Houston, that floor is going to expand. If it has nowhere to go, it will lift off the subfloor. I have seen floors rise three inches off the ground because an installer forgot to leave a gap at the fireplace. You want a gap of about 1/4 inch, which you can later fill with a color-matched flexible caulk or a piece of shoe molding that has been scribed to the stone. Never caulk the floor directly to the stone with a rigid silicone. Use a high-stretch acrylic that allows for movement. This is where the showers of wood dust come in. You will be making fine adjustments with a rasp or sandpaper to get that perfect 1/4 inch uniform gap all the way around the hearth.
Laminate density and blade selection
Laminate wear layers are made of aluminum oxide, which is extremely abrasive and will dull standard saw blades in a matter of minutes. When you are cutting the complex curves of a scribe, you need a sharp blade to maintain control. If the blade is dull, it will wander, and your line will be ruined. I always use a down-cut blade. Most jigsaw blades cut on the up-stroke, which pulls the laminate surface away from the core and causes chipping. A down-cut blade pushes the melamine layer down against the core, resulting in a crisp, clean edge. This is vital when you are not using a transition strip to hide the cut. The core of the laminate, usually High-Density Fiberboard, is thirsty. If you are in a high-humidity region, you need to seal the cut edges with a wax pen or a specialized laminate sealant to prevent moisture from the air or occasional spills from causing the edges to swell. A swollen edge near a fireplace is an eyesore that cannot be fixed without replacing the entire plank.
“Laminate flooring must have a minimum expansion space of one quarter inch at all vertical obstructions.” – NWFA Technical Guidelines
The chemistry of the bond
Adhesive chemistry plays a minor role in floating floors, but subfloor leveling compounds rely on polymer chains to bond to the concrete. If your subfloor is dusty or contaminated with old carpet glue, the leveler will delaminate. I always prime the floor twice. People think I am being over-cautious, but I have seen leveler pop like a potato chip because the installer was too lazy to sweep. When you are scribing around a fireplace, you are often working on the most visible part of the room. This is the focal point. Any error here is magnified. If the stone is deeply recessed, you might need to undercut the stone with a diamond blade jamb saw, but that is a dusty, dangerous job. The pencil method is cleaner and, when done right, looks better. It honors the natural shape of the stone rather than trying to force the stone to accommodate the wood.
Step by step execution of the scribing technique
Executing a scribe starts with dry-fitting the plank and securing it with painter tape so it does not shift during the tracing process. First, lay the plank as close to the stone as possible. If the stone protrudes three inches, your plank will stay three inches away. Set your compass to exactly three inches. Rest the metal point of the compass against the stone and the pencil point on the plank. Move slowly. Every bump in the stone should be reflected on the plank. Once the line is drawn, take the plank to your sawhorses. Use a jigsaw with a fine-tooth blade. Do not rush the cut. Let the blade do the work. If you force it, the blade will heat up and the melamine will scorch. After the cut, test the fit. You may need to use a file to shave off another 1/16th of an inch in some spots. This is the work of a master, not a handyman. It is the difference between a floor that looks like an afterthought and one that looks like it was designed by an architect.
Final touches and threshold management
Managing transitions between different flooring types or architectural features requires careful planning of thresholds and expansion joints. Once the scribe is perfect and the plank is clicked into place, you have to decide how to finish the edge. In a perfect world, the scribe is so tight and the gap so uniform that a thin bead of matching flexible sealant is all you need. This keeps the look clean and minimalist. Avoid bulky T-moldings near a fireplace. They look cheap and break the visual flow of the stone. If the stone is very rough, you might have to scribe a piece of quarter-round or shoe molding to match the stone, then nail that molding only to the fireplace, never to the floor. This allows the floor to slide underneath the molding as it expands. Every project is a lesson in patience. If you rush the scribe, you will be looking at that gap for the next twenty years. Take the time to get the pencil line right. Respect the stone. Respect the wood. And for heaven’s sake, level your subfloor before you start. It will save your reputation and your knees. This approach ensures the longevity of the installation and provides the aesthetic quality expected in high-end residential work. The mechanical reality of the floor is what matters. Without a solid foundation and proper movement gaps, even the most beautiful scribing job will fail. Focus on the structural integrity first, and the beauty will follow naturally through the precision of your tools and the patience of your hand. This is the standard I live by on every job site. It is the only way to guarantee a result that stands the test of time and environmental stress. Your floor is a machine. Keep it tuned correctly. “,”image”:{“imagePrompt”:”A close-up photo of a professional flooring installer’s hand using a mechanical pencil and a wood block spacer to scribe the irregular edge of a grey stone fireplace onto a light oak laminate plank. Blue painter’s tape is visible on the plank. The background shows a clean concrete subfloor and flooring tools like a level and a jigsaw.”,”imageTitle”:”Professional Scribing Technique for Laminate Flooring”,”imageAlt”:”A master floor installer scribing a laminate plank to fit against a stone hearth.”},”categoryId”:1,”postTime”:”2023-10-27T10:00:00Z”}“`