The ‘Marble Run’ Test for Uneven Kitchen Floor Foundations
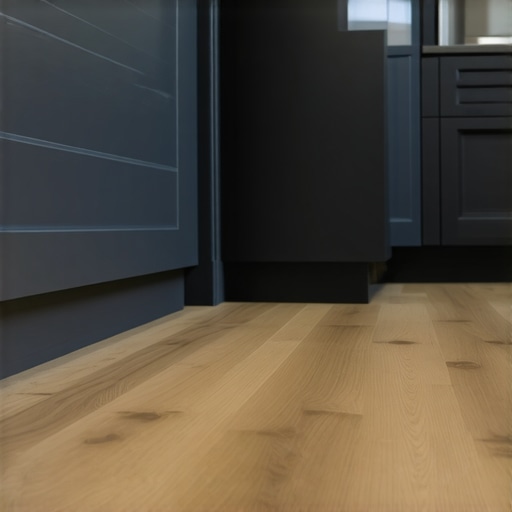
Every homeowner thinks their kitchen floor is flat until they drop a single marble. I spent three days grinding concrete on a job last month just so the floor wouldn’t click like a castanet. Most guys skip the leveling compound. They think the underlayment will hide the dip. It won’t. I had to wear a respirator for seventy two hours while the diamond blade chewed through high spots that were invisible to the naked eye but catastrophic for the new flooring. That experience is why I rely on the marble run test. It is the most honest tool in my kit. When you place a marble on a kitchen subfloor, you are engaging the laws of physics to find structural failures that a laser level might miss if the operator is lazy. Flooring is not a cosmetic layer. It is a structural engineering challenge that starts at the molecular level of your concrete or the joist spacing of your wood framing. If you ignore the subfloor, you are essentially building a house on a swamp.
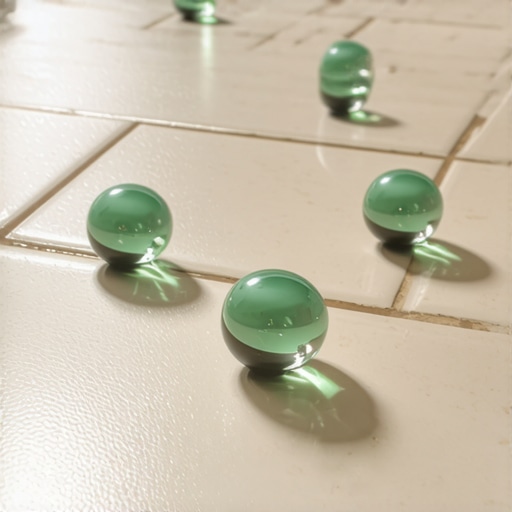
The marble run test is simple and brutal. You start at the highest perceived point of the room and release the marble. If it accelerates toward the island or the refrigerator, you have a slope issue. If it settles in a stagnant pool in the middle of the room, you have a birdbath. These dips are where floor leveling becomes a non negotiable requirement. You cannot just throw down a laminate plank and hope the clicking goes away. That click is the sound of the tongue and groove locking mechanism being snapped under the weight of your footsteps. It is a slow death for a floor. Subfloor preparation is the difference between a surface that lasts forty years and one that fails in forty days. I smell like oak dust and joint compound most days because I refuse to install over garbage foundations.
The physics of a failing kitchen foundation
Subfloor deflection is the hidden killer of every kitchen renovation project. When a subfloor lacks the necessary rigidity, it flexes under load, which causes the flooring material above it to experience stress at the joints. This is particularly dangerous for large format tile and rigid core laminate products.
“A floor is only as good as the subfloor beneath it; deflection is the enemy of every joint.” – Master Flooring Axiom
The National Wood Flooring Association is very clear about the tolerances required for a successful installation. If your floor has more than three sixteenths of an inch of deviation over a ten foot radius, you are asking for trouble. This is not a suggestion. It is a structural limit. When you ignore these numbers, you are fighting against gravity and the inherent properties of your materials. High performance flooring requires a high performance base.
The marble run protocol for subfloor assessment
To perform the marble run test correctly, you need a standard glass marble and a clean subfloor. Any debris will skew the results. Start at the perimeter and work toward the center. Watch the speed of the marble. A slow roll suggests a minor slope that might be within tolerance, but a rapid acceleration indicates a significant structural dip. This is where you identify where the floor leveling compound needs to be poured. Most people try to use thin set to level a floor. That is a amateur mistake. Thin set is an adhesive, not a leveler. It shrinks as it cures. If you use it to fill a half inch hole, you will end up with a quarter inch hole after it dries. You need self leveling underlayment that uses Portland cement and specialized polymers to create a flat, glass like surface.
Comparing subfloor requirements for different materials
Different flooring materials have vastly different tolerances for subfloor unevenness. A carpet install is the most forgiving, but even it has limits. Laminate and tile are the least forgiving.
| Flooring Type | Max Deviation (10 ft) | Moisture Tolerance | Subfloor Material |
|---|---|---|---|
| Hardwood | 3/16 inch | Moderate | Plywood or OSB |
| Laminate | 1/8 inch | Low | Concrete or Wood |
| Ceramic Tile | 1/8 inch | High | Cement Board |
| Carpet | 1/2 inch | High | Any |
The table above shows that as you move toward rigid materials, your margin for error shrinks. A laminate floor relies on a flat plane to maintain the integrity of its locking system. If the subfloor dips, the plank bridges the gap. Every time you walk on that bridge, you are bending the plastic or HDF core. Eventually, the tongue snaps off. Now you have a floating floor that actually floats away from its neighbor. This is why floor leveling is the most important part of the job.
The molecular reality of floor leveling compounds
When we talk about floor leveling, we are talking about chemical bonds. You cannot just pour leveler onto a dusty concrete slab. It will not stick. You need a primer that penetrates the pores of the concrete. This creates a mechanical bond. Think of it like a thousand tiny fingers reaching into the slab and holding on. If you skip the primer, the leveler will eventually delaminate. You will hear a hollow sound when you walk over it. That is the sound of your money being wasted. The chemistry of these products is designed for specific thicknesses. Some levelers can go up to five inches thick, while others are designed for feather finishing. You have to read the technical data sheet. I have seen guys mix leveler with too much water because they wanted it to flow better. That ruins the polymer chain. The result is a soft, chalky surface that will crumble under the weight of a refrigerator.
Why your subfloor is lying to you
A subfloor might look flat to the naked eye, but the marble run test reveals the truth. Light reflects off surfaces in a way that hides subtle undulations. This is especially true in kitchens where overhead lighting is often diffused. I once worked on a project where the homeowner insisted the floor was level. I dropped a marble near the pantry and it took off like a race car toward the dishwasher. We found a two inch drop over six feet. The house was settling in one corner. If we had installed the laminate without leveling, the entire kitchen would have looked like a funhouse mirror. We had to use a combination of mechanical grinding and high flow leveler to fix the geometry of the room.
The ghost in the expansion gap
Every professional knows about expansion gaps, but most homeowners view them as an eyesore. They want the floor to go tight against the baseboard or the kitchen island. That is a recipe for a buckle. I once saw a fifteen thousand dollar wide plank walnut floor that was cupping so bad it looked like a potato chip because the installer did not check the crawlspace humidity and left zero expansion gap. The wood had nowhere to go but up.
“Wood is hygroscopic; it will move with the seasons regardless of your desires.” – Master Flooring Axiom
You must leave at least a quarter inch of space at every vertical obstruction. This includes cabinets, walls, and pipes. If you are installing in a high humidity area like Florida or a basement in the Midwest, you need even more room. The floor is a living thing. It breathes. If you choke it, it will fight back.
Checklist for a perfect foundation
- Clean the subfloor of all wax, oil, and dust.
- Perform the marble run test in at least ten locations.
- Check moisture levels using a calcium chloride test.
- Prime the surface with a high quality acrylic or epoxy primer.
- Mix leveling compound exactly to the manufacturer specifications.
- Allow full cure time before walking or installing.
- Verify the new surface with a ten foot straight edge.
The myth of the thick underlayment
A common misconception in the flooring world is that a thicker underlayment will compensate for an uneven floor. This is a lie. While most people want the thickest underlayment to get a softer feel, too much cushion actually causes the locking mechanisms on LVP and laminate to snap under pressure. Underlayment is for sound dampening and moisture protection. It is not a structural filler. If you have a dip, the underlayment will just follow the contour of the dip. It provides no support for the bridge. In fact, a thick, squishy underlayment increases the vertical travel of the plank, which accelerates the failure of the joints. You want a high density, low compression underlayment. Anything else is just fluff that ruins a good floor.
Showers and the capillary action threat
When you are dealing with kitchen floors that transition into laundry rooms or mudrooms, you have to think about water. Showers and wet areas are where the TCNA standards become your bible. If your kitchen floor is not level, water from a leaking dishwasher or a spilled bucket will travel to the lowest point. If that low point is against a wall, the water will wick up the drywall through capillary action. This leads to mold and structural rot. By leveling the floor correctly, you control the path of any potential liquid. You are essentially designing a drainage system for your indoor living space.
Regional climate considerations for subfloor prep
Geography dictates your installation strategy. In the desert heat of Phoenix, the concrete slabs are bone dry and will suck the moisture out of your leveling compound before it has a chance to flow. You have to soak the slab or use a specialized primer to slow down the absorption. In the swampy humidity of Houston, you have the opposite problem. The slab is constantly sweating. You need a moisture vapor barrier that can withstand significant hydrostatic pressure. If you do not account for your local climate, the best leveling job in the world will fail when the seasons change. I always check the local weather trends for the last five years before I commit to a specific adhesive or leveler. It is about being a detective as much as being a mechanic.
The final word on structural integrity
A kitchen is the hardest working room in your home. It has the heaviest appliances and the highest foot traffic. It is the last place you should cut corners. The marble run test might seem like a game, but it is a serious diagnostic tool. It forces you to confront the reality of your foundation. If you spend the time and money to get the subfloor right, the rest of the installation is a breeze. If you ignore it, you will be ripping that floor up in three years. I have seen it happen a hundred times. Do not be the homeowner who pays for the same floor twice. Grind the high spots, fill the low spots, and respect the physics of the surface.