The ‘Cardboard Trick’ for Checking Door Clearance on New Laminate
The ‘Cardboard Trick’ for Checking Door Clearance on New Laminate
You’ve spent weeks picking out the perfect wide-plank oak laminate. You’ve cleared the furniture, ripped up the old, dusty carpet, and you’re ready to transform your home. But then, it happens – the DIY nightmare scenario. You install the first few rows, reach the bedroom door, and realize with a sinking heart that the door won’t close. Or worse, you’ve spent hours meticulously cutting the laminate to fit around the door jamb, only to realize it looks like a jagged, amateur mess with a half-inch gap that no amount of caulk can hide.
I’m Mo Fazl, Managing Director at Canadian Flooring & Renovations (CFR) in Vancouver. Over the last decade, I’ve seen thousands of flooring projects, and the most common mistakes aren’t made during the installation itself – they happen during the preparation. Before you lay a single plank, you must account for the vertical height of your new floor. Today, I’m going to teach you the “Cardboard Trick,” a professional secret that costs zero dollars but will save you hours of frustration and potentially hundreds of dollars in ruined materials. This simple pre-installation check ensures your doors swing freely and your door jambs are undercut with surgical precision.
Why Door Clearance is the #1 DIY Laminate Fail
The biggest oversight in DIY flooring is simple math. Homeowners often look at a 12mm laminate plank and think, “That’s thin enough; it will fit under the door.” They forget the crucial second variable: the underlayment. Whether you are using a standard foam roll, a high-density rubber pad, or an acoustic cork layer, that underlayment adds 2mm to 5mm of height. When you combine a thick laminate with a premium underlayment, you are suddenly raising your floor height by nearly three-quarters of an inch. If your old floor was thin linoleum or low-pile carpet, your doors are almost guaranteed to strike the new surface.
Researching common flooring pitfalls on platforms like Reddit and DIY forums reveals a recurring tragedy: the “cut-around.” This is what we in the industry call an “idiot move.” Instead of undercutting the door jamb (the vertical wood frame of the door), the installer tries to trace the shape of the jamb onto the laminate and cut the plank to fit around it. Because laminate is an expansion-based floating floor, you must leave a gap. This results in an ugly, visible perimeter around the door frame. Professional results require the floor to slide under the jamb. If you don’t check your clearance first, you might find that your drain service near me or other home maintenance tasks become much harder because you’ve essentially “locked” your doors or created trip hazards at every threshold. Proper planning prevents this architectural eyesore and ensures your home remains functional and beautiful.
Step-by-Step: The ‘Cardboard Trick’ (and the Scrap Wood Alternative)
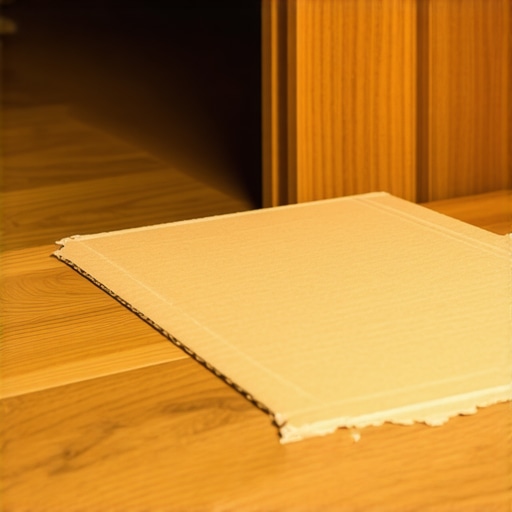
The “Cardboard Trick” is the ultimate low-tech solution for high-stakes renovation. Here is how you execute it like a pro. First, find the box your laminate was shipped in. This cardboard is usually the perfect thickness to act as a “safety buffer.” If you want to be even more precise, use a scrap piece of your actual laminate flooring and tape a small piece of your chosen underlayment to the bottom of it. This creates a perfect 1:1 physical template of your future floor’s height.
- The Template: Take your scrap laminate/underlayment sandwich (or your cardboard template) and place it on the subfloor directly in the path of the door’s swing.
- The Swing Test: Slowly swing the door over the template. If the door clears the template with at least 1/8th of an inch to spare, you are in the clear. If it rubs or stops, you know immediately that you’ll need to shave the door. This is also a good time to check for levelness; if the door clears in one spot but hits in another, your subfloor might have a high spot that needs grinding before you proceed. This is as critical as ensuring your plumbing surrey bc is up to code before a bathroom reno.
- The Jamb Test: Move your template against the door jamb. This is where the magic happens. Instead of guessing where to cut the wood frame, you use the template as a guide for your saw.
For the most accurate results, I recommend using the The ‘Pencil Trick’ for Perfect Laminate Cuts Around Door Frames. By placing a pencil flat on top of your scrap laminate template and marking the jamb, you get a perfect line that accounts for the floor, the underlayment, and a tiny bit of “breathing room” for the plank to slide underneath. If you encounter any resistance or notice moisture while working near these entryways, it might be time to call a plumber vancouver to ensure there are no hidden leaks under the door thresholds.
Beyond the Floor: Checking Your Home’s Systems
One of the benefits of a flooring renovation is that it exposes the “bones” of your home. While you have the old flooring up and are performing your clearance checks, it is the absolute best time to inspect for underlying issues. In Vancouver’s damp climate, a hidden water leak can rot a subfloor long before it shows up on your baseboards. If you notice any staining or soft spots near your kitchen or bathroom transitions during your “Cardboard Trick” tests, do not ignore them.
Before the new laminate goes down, I often advise clients to consider a full home “health check.” This includes air duct cleaning vancouver to remove the construction dust that inevitably settles in the vents. Furthermore, if your subfloor feels damp, professional leak detection is a mandatory step. It is much cheaper to pay for drainage repairs now than to rip up your brand-new laminate in six months. Whether you need a plumber burnaby or a specialist for plumbing surrey bc, addressing these issues while the subfloor is bare is the mark of a truly professional renovation. Remember, a beautiful floor is only as good as the dry, stable surface it sits upon.
How to Undercut Door Jambs Like a Pro
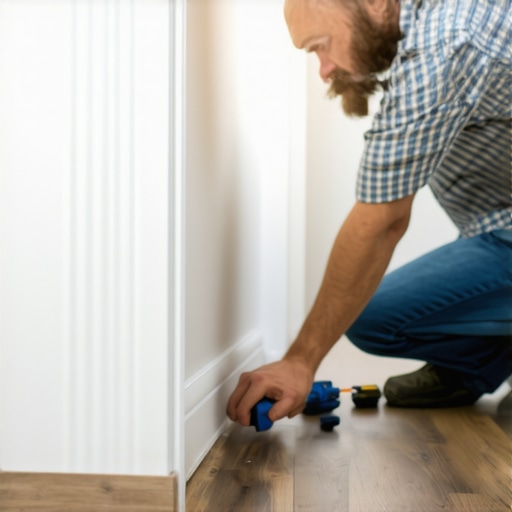
Once you’ve used your cardboard or scrap template to mark your lines, it’s time to cut. Professionals use an oscillating multi-tool or a dedicated flush-cut jamb saw. You lay the blade flat against your scrap flooring template and cut horizontally into the door jamb and the casing. This creates a pocket exactly the height of your new floor.
The goal is to allow the laminate to slide roughly 1/2 inch under the wood. This provides a seamless, “built-in” look and allows the floor to expand and contract naturally without buckling. If you’ve ever wondered How to Hide Ugly Gaps in Laminate Under Your Door Frames, this is the answer. You don’t hide the gaps; you prevent them by tucking the floor under the frame. While you are working on these intricate details, ensure your workspace is safe. If you find yourself needing a plumbers in coquitlam bc for a nearby radiator or a plumbing north van expert to check a nearby laundry line, make those calls before the final planks are locked in. Precision in the jambs reflects the quality of the entire project.
Also, keep in mind that Why Your Kitchen Island Should Never Be Bolted Through Laminate Floors is a rule that applies to door jambs too – never nail the laminate to the subfloor or the jamb. It must be free to move. If you find the floor “bouncing” after installation, check out our guide on How to Stop Your Laminate Flooring from Bouncing Near the Baseboards.
What to Do if the Door Doesn’t Clear
So, you’ve done the swing test with your cardboard template and the door is definitely going to hit. Don’t panic; you have three professional options.
Option 1: Shaving the Door. This is the most common fix. You’ll need to pop the hinge pins, remove the door, and place it on a pair of sawhorses. Using a power planer or a circular saw with a fine-tooth blade, you can trim 1/4 inch off the bottom. Remember to seal the raw wood edge afterward to prevent warping. In Vancouver, where humidity fluctuates, an unsealed door bottom can absorb moisture and swell, leading to more sticking issues. If your home’s climate feels off, it might be worth contacting an hvac company Vancouver to check your humidity controls or ensuring your furnace repair vancouver is current.
Option 2: Hinge Adjustments. Sometimes, you only need a millimeter of clearance. You can occasionally “shim” the bottom hinge by placing a small piece of cardboard (the trick strikes again!) behind the hinge leaf. This slightly tilts the door upward at the handle side, which might be just enough to clear the new floor.
Option 3: Transitions and Thresholds. If you are using T-moldings at your doorways, remember that these sit higher than the laminate itself. You must account for the T-molding height in your “Cardboard Trick” template. If you’re working near a kitchen, this is also the perfect time to ensure your garburator fix is handled or to call for emergency services plumbing if you spot any corrosion in the lines. Even your heating system plays a role; if you have baseboard heaters or radiators, check if you need boiler repairs near me to ensure consistent heat that prevents the laminate from excessive expansion.
Before you finish, remember the golden rule of maintenance: Why You Should Never Use a Steam Mop on Your Laminate Floors. Moisture is the enemy of laminate, especially at the freshly cut edges under your door jambs. And don’t forget the The ‘Wait Time’ Mistake That Ruins New Laminate Installations – let your flooring acclimate to the room’s humidity for 48 hours before you start the “Cardboard Trick” and installation.
Conclusion: Measure Twice, Cut Once
The “Cardboard Trick” is more than just a DIY hack; it’s a fundamental part of the professional flooring workflow. By taking five minutes to create a template and test your door clearance, you avoid the heartbreak of a door that won’t close and the aesthetic disaster of “cut-around” jambs. It allows you to identify plumbing risks, HVAC needs, and structural irregularities before they become expensive problems.
At Canadian Flooring & Renovations, we believe that a great floor is built on a foundation of preparation. If you’ve run the “Cardboard Trick” and realized your project is more complex than you anticipated – perhaps due to uneven subfloors or tricky door geometries – don’t hesitate to reach out. Whether you need a professional install or just some expert advice on your next steps, we’re here to help the Vancouver community achieve the homes of their dreams. Measure twice, cut once, and always check your clearance!