I remember the moment vividly—laying down a brand new laminate floor in my living room, only to notice a slight creak and uneven tiles after just a few weeks. That unsettling feeling that I had rushed through an essential step haunted me. It was then I realized that even the slightest oversight in floor leveling could turn a dream upgrade into a costly nightmare. If you’ve ever experienced similar frustrations, you’re not alone. The truth is, many homeowners overlook the crucial groundwork that determines their floor’s durability and appearance.
Start with a Solid Foundation: The Key to Long-Lasting Floors
Every successful flooring project begins beneath the surface. Proper floor leveling isn’t just about making things look neat—it directly influences how long your flooring lasts and how comfortable it feels underfoot. When uneven subfloors are left unaddressed, they can lead to bubbling, cracking, or even structural issues down the line. From experience, I can say that investing in quality floor leveling techniques early on saved me hundreds of dollars on repairs later.
According to flooring expert advice, ensuring a flat, stable surface is essential for maximum durability. Skipping this step or rushing through it often results in more frequent repairs and replacements, defeating the purpose of choosing premium materials like laminate. For comprehensive tips on achieving a flawless base, I recommend checking out [this guide on expert-level floor leveling](https://floorcraftstore.com/expert-floor-leveling-laminate-tips-for-lasting-durability), which breaks down the process in simple, effective steps.
Are Floor Leveling and Laminate Installation Actually Worth the Extra Effort?
It’s tempting to think that a quick, cheap fix will do the trick, especially when you’re eager to see results. I’ll admit, I once skipped a thorough leveling process because I underestimated its importance. That mistake led to uneven wear, and I had to redo parts of the flooring sooner than expected. Trust me—cutting corners in this phase can undo all your hard work and cause bigger headaches. Proper preparation ensures that your investment pays off in long-term beauty and resilience, making every dollar spent worthwhile.
As we move forward, I’ll share tried-and-true strategies for floor leveling and laminate installation that you can confidently implement—saving you time, money, and headaches. So, have you faced challenges with uneven floors or unstable installations? If so, read on, because fixing these issues is simpler than you might think, and I’ll guide you through every step.
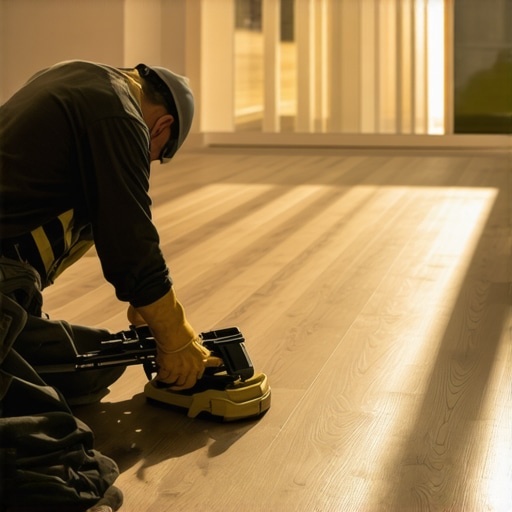
Prep the Surface Thoroughly
Begin by inspecting your subfloor closely. Remove any debris, loose particles, or old adhesive residues that can cause unevenness. Use a broom and vacuum to clean thoroughly, ensuring a smooth base. If there are noticeable dips or bumps, mark them with chalk for reference. This initial step is like preparing a canvas before painting; neglect it, and imperfections will show through your finished floor. I once skipped this step and ended up with a wobbling section, which was costly to fix later. Proper cleaning is essential for adhesion and stability.
Identify and Address Uneven Areas
Use a long straightedge or a level to check the floor’s flatness. Place the tool across different sections, noting where gaps or high spots occur. For dips deeper than 1/8 inch, apply a self-leveling compound or patching filler. Think of this like pouring a thin layer of cement to create a new, even surface—it’s a quick fix that saves headaches down the line. During my project, I mixed a batch of self-leveling compound and poured it into uneven sections, which resulted in a perfectly flat surface. Allow adequate curing time according to the product instructions.
Achieve a Flat Foundation with Proper Troweling
When applying leveling compounds, use a notched trowel or a float to spread the material evenly. Push the compound into low spots and feather the edges to blend seamlessly with existing surfaces. Remember, the goal is to create a uniform plane—like icing a cake smoothly. I once worked with a partner who rushed this step, leaving ridges behind; those ridges became clear flaws once the laminate was installed. Take your time to trowel carefully for a level finish.
Secure and Reinforce the Base
After leveling, reinforce thin sections with a thin-speaking layer of plywood or OSB if needed, especially under heavy traffic areas. Use screws or nails to secure these patches firmly to prevent movement. This is akin to adding support beams underneath a foundation—small, simple steps that prevent future shifts. I learned this the hard way when an area slightly settled after installation, causing creaking. Proper reinforcement eliminates such issues.
Test the Surface Again Before Laying the Floor
Once everything is cured, recheck the surface with a level or straightedge. Run your hand across the surface to feel for any irregularities. Fix minor imperfections with a quick touch-up of leveling compound if needed. Remember, patience at this stage ensures your laminate will lay evenly and look professionally installed. During my last project, I discovered a slight dip after curing; a second application of leveling compound made all the difference.
Finalize with Proper Underlayment
Lay an appropriate underlayment over the leveled floor. It acts as a moisture barrier and provides cushioning. Ensure the underlayment is flat and free of wrinkles—like a bedsheet stretched smoothly over a mattress. During my installation, I encountered wrinkles that caused bumps in the laminate; smoothing the underlayment before installing the planks prevented this. Proper underlayment installation is a small detail that greatly influences the final look and comfort.
 Many homeowners believe that selecting the right material is enough to ensure a lasting renovation, but the real mastery lies in mastering the nuances. For example, a common misconception is that laminate flooring can be installed directly over any existing surface; in reality, improper subfloor preparation, like ignoring the importance of floor leveling, leads to premature failures. Experts highlight that uneven subfloors can cause buckling or gaps over time, a fact often overlooked by DIY enthusiasts. According to professional advice, investing time in proper floor leveling techniques significantly enhances the durability and appearance of your laminate or carpet installations. An advanced mistake I’ve seen is neglecting moisture barriers in shower renovations, which can lead to mold and water damage—something that seems trivial but has serious consequences if overlooked. Did you know that improper waterproofing is one of the leading causes of bathroom deterioration? Make sure to consult expert guides on waterproofing solutions before starting your shower upgrade to avoid costly repairs later. As for carpets, many assume that installation is straightforward, but improper padding choice or failing to prepare the subfloor can cause quick wear and uneven surfaces. The key is ensuring your subfloor is perfectly flat and clean, which many skip believing it’s unnecessary. For a detailed look at best practices, explore tips on how to prepare your subfloor from experts. For more advanced insights on creating a resilient flooring foundation, check out this comprehensive guide on expert-level floor leveling and installation strategies. Remember, rushing through preparation or ignoring these subtle factors often results in frustrations and higher costs down the line. Have you ever fallen into this trap? Let me know in the comments.Maintaining your flooring and shower installations over time is essential to preserve their beauty and functionality. Having the right tools at your disposal can make all the difference in achieving durable, professional results. One of my go-to investments is a high-quality laser level. I personally use the Bosch GLL 3-80, as it delivers precise, 360-degree coverage—crucial for checking the flatness of subfloors or ensuring your tiles are installed perfectly straight. Its durability and ease of use have saved me countless hours during installation and repairs.
For surface preparation, a good rotary hammer drill with chipping function is invaluable. I rely on the Makita HR2020 for removing old adhesive or leveling uneven concrete before applying patches. Its power and maneuverability allow me to prep surfaces efficiently, reducing the risk of future issues like cracks or uneven wear.
When it comes to applying leveling compounds, I recommend a quality notched trowel and an oscillating float. These tools help spread materials smoothly and prevent ridges that could compromise floor integrity. I personally prefer the EDCO Trowel for its ergonomic design and durability, which makes the process less tiring and more precise.
Investing in a moisture meter is another step I take seriously. Pin-type meters like the Protimeter Aquant help me verify moisture levels in concrete slabs before installation—an often overlooked factor that can cause long-term failures in laminate and carpet installations. Regular testing ensures that moisture problems are identified early, avoiding costly replacements down the line.
Looking ahead, I predict that advances in digital measurement tools and automation will further streamline home renovation projects. For example, the integration of smart sensors into subfloor systems could soon alert homeowners and professionals to moisture or structural issues before they become visible problems.
**How do I maintain floors and showers over time?** Consistent inspection and timely repairs are key. Regularly check for signs of water damage or movement, especially in high-traffic or moisture-prone areas. For showers, sealing grout lines annually and replacing damaged caulk extend the lifespan significantly. For floors, maintaining an appropriate cleaning routine and avoiding excessive moisture buildup preserves the integrity of the materials.
Putting these advanced tools and practices into action can dramatically extend the life of your installations. For detailed insights on how to correctly handle floor leveling before installation, I recommend exploring this comprehensive guide on expert-level techniques—it’s full of practical advice that I have personally found invaluable. Try incorporating a high-precision laser level into your next project, and experience the difference it makes in achieving a flawless finish. Your future self will thank you for the effort!
Unearthing Hidden Pitfalls That Cost Me Dearly
One of the most profound lessons I learned was to never underestimate the power of thorough subfloor preparation. Skipping detailed inspections and rushing to lay laminate or tile can lead to uneven surfaces, causing long-term damage and frustration. My biggest mistake was rushing the leveling process, which resulted in costly repairs months later. It made me realize that patience and attention to detail in the initial phase are vital for a lasting finish.
Tools That Transformed My Approach to Flooring and Showers
Investing in high-quality, precise tools like a laser level and moisture meter made all the difference. These gadgets helped me identify subtle issues early, saving time and money. My trusted selections, such as the Bosch GLL 3-80 laser level and the Protimeter Aquant moisture meter, provide reliable accuracy that I rely on for every project. Using the right tools ensures your work stands the test of time, preventing common pitfalls.
Why Giving Extra Time to Preparation Pays Dividends
One lightbulb moment was realizing that preparing your surface thoroughly upfront simplifies the entire installation. It might seem tedious, but taking the time to clean, inspect, patch, and re-check creates a solid foundation for your flooring or shower. This mindset shift turned a stressful weekend into a satisfying accomplishment. Remember, a little extra patience now will save you hours of headaches and repairs later.
Insider Wisdom on Avoiding Common Misperceptions
- Think all subfloors are equal: Each surface requires tailored preparation. Overlooking this can lead to uneven wear and tear.
- Believe shortcuts save time: Rushing through leveling or waterproofing often results in higher costs and frustration down the line. Experts endorse meticulousness at every step.
- Assume materials alone solve problems: The quality of your prep work influences the longevity of your flooring or shower renovation more than the chosen materials alone.
For a comprehensive dive into expert flooring strategies, I recommend checking out this guide on expert-level floor leveling. It consolidates lessons learned and offers practical tips. Remember, small details like proper underlayment placement and moisture barrier installation can make or break your project’s success.
Tools That Keep My Projects on Track
- Laser Level (Bosch GLL 3-80): Ensures perfect flatness and level lines, crucial for laminate and tile work.
- Moisture Meter (Protimeter Aquant): Detects hidden moisture issues in concrete slabs before installation.
- Quality Trowels (EDCO): Distributes leveling compounds smoothly, preventing ridges and dips.
- Power Tools (Makita HR2020): Removes old adhesive and prepares uneven surfaces efficiently.
Embracing these tools has elevated my craft, reducing errors and enhancing durability. As technology advances, I believe smart sensors in subfloor systems and automated leveling solutions will become standard, further simplifying quality assurance in flooring and shower renovations.
Take the Next Step Toward Flawless Floors and Showers
The journey toward durable and beautiful home upgrades begins with careful preparation and a willingness to invest in the right techniques. When you prioritize precise leveling and surface prep, your finished project will not only look better but stand the test of time. Ready to tackle your next project with confidence? Remember, the key to lasting results lies beneath the surface—literally and figuratively.
What has been your biggest challenge in preparing surfaces for flooring or shower installations? Share your experience below—I’d love to hear your stories and help troubleshoot!