How to Stop Your Shower Door from Leaking Onto the Drywall
The 1/8 inch that ruins everything
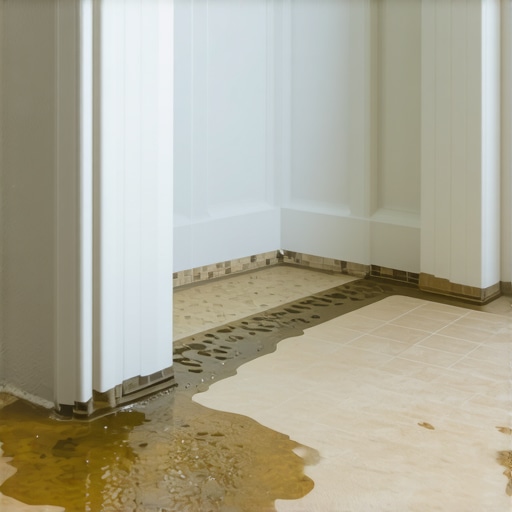
Stopping a shower door from leaking onto drywall requires a perfect marriage of threshold pitch, sweep alignment, and subfloor stability. If the threshold is not sloped inward toward the drain, water will migrate via capillary action. Even a microscopic gap in the silicone or a loose hinge can saturate the drywall and cause structural rot. Most guys skip the leveling compound. They think the underlayment will hide the dip. It won’t. I spent three days grinding concrete on a job last month just so the floor wouldn’t click like a castanet. But that was a cakewalk compared to the job I saw yesterday. I walked into a master bath where the drywall was soft enough to push a finger through. The homeowner thought it was a bad door. It wasn’t. It was a subfloor that deflected half an inch every time they stepped into the shower, breaking the seal between the tile and the door track. If your subfloor moves, your shower leaks. It is that simple. I have spent 25 years on my knees with a moisture meter and I can tell you that a beautiful floor is useless if the engineering fails at the wet line. We are talking about the physics of water tension and the chemistry of bonding agents.
“A floor is only as good as the subfloor beneath it; deflection is the enemy of every joint.” – Master Flooring Axiom
The subfloor secret and the rot it hides
The integrity of your bathroom floor begins with the joist spacing and the thickness of the subfloor material beneath your tile. Most modern builds use 3/4 inch OSB, which is fine for carpet but a disaster for heavy tile installations if the joists are 16 inches on center. When you step near the shower door, the subfloor bows. This microscopic movement snaps the bond of the silicone seal at the door threshold. Water finds that crack and begins its journey into the drywall. I always insist on a minimum of 1 1/8 inches of total subfloor thickness before I even think about laying a tile. This usually means adding a layer of 3/8 inch exterior grade plywood over the existing deck. I glue it and screw it. No nails. Nails pull. Screws hold. When that floor is rigid, the shower door stays put and the water stays where it belongs. I smell like oak dust and old mortar today because I just finished ripping out a floor that failed because the installer thought he could use standard drywall screws to secure a cement board. They rusted out in two years. Use the right fasteners or do not do the job at all.
The physics of a failing threshold
A shower threshold must have a positive pitch toward the drain of at least 1/8 to 1/4 inch across its width. If the threshold is level or, heaven forbid, pitched outward, you are fighting gravity. Water is a relentless invader. It uses surface tension to cling to the bottom of the glass and crawl over the metal track. I have seen guys try to fix this with three tubes of cheap caulk. It never works. The caulk eventually peels because the soap scum and hard water minerals prevent a true chemical bond. You need to strip the area down to the substrate. I use an isopropyl alcohol scrub to ensure the surface is chemically clean. Then I apply 100 percent silicone. Not the ‘siliconized’ acrylic junk you find in the bargain bin. You need the stuff that smells like vinegar and cures into a rubber gasket. The molecular structure of pure silicone allows it to expand and contract with the house. Acrylic caulk turns into a brittle plastic that cracks the first time the temperature drops.
Why floor leveling is the silent killer of shower seals
Floor leveling compound is not a luxury but a requirement for any bathroom transition involving glass doors. If your slab has a dip right where the door sweep meets the floor, you will have a gap. Water will spray right through that gap every time the shower head hits the glass. I use a high flow self-leveling underlayment (SLU) to create a perfectly flat plane before the flooring goes down. This is especially vital if you are transition from tile to something like laminate or carpet. If that transition is not perfectly flat, the door sweep cannot do its job. I see this a lot in ‘builder grade’ homes where they just slapped some carpet down right up to the shower curb. The carpet wicks the water like a sponge and transfers it directly to the baseboards. It is a recipe for black mold and structural failure. You have to understand the L/360 deflection rating. If your floor bends more than the length divided by 360, your grout will crack and your door will leak. For stone, I aim for L/720. I want that floor as stiff as a tombstone.
“Moisture management is not an option; it is a structural necessity for the longevity of the assembly.” – NWFA Technical Guidelines
The war between laminate and the splash zone
Installing laminate flooring in a bathroom is a gamble that most professional installers refuse to take. Even ‘waterproof’ laminate has a weakness: the joints. If your shower door leaks even a tablespoon of water onto a laminate floor, it will find the HDF (High Density Fiberboard) core. Once that wood fiber absorbs water, it expands. The edges of the planks will curl up, a phenomenon we call peaking. No amount of weight will push them back down. If you must have the wood look in a bathroom, go with a Stone Plastic Composite (SPC) vinyl. SPC has a limestone core that does not react to moisture. However, even with SPC, you still have to worry about the subfloor underneath. If water gets trapped under a floating floor, it will rot the subfloor while the vinyl looks perfect on top. This is why I always run a bead of silicone around the perimeter of the bathroom before I install the baseboards. It creates a bathtub effect that keeps the water on top of the floor where you can see it and wipe it up.
| Material Type | Water Tolerance | Expansion Rate | Joint Strength |
|---|---|---|---|
| Solid White Oak | Minimal | High | Moderate |
| SPC Vinyl Plank | High | Low | High |
| Laminate Wood | Low | Moderate | Low |
| Porcelain Tile | Absolute | None | Rigid |
The mechanics of the perfect sweep
A shower door sweep is a mechanical seal that must be replaced every two to three years to maintain its effectiveness. These plastic strips become brittle over time. They lose their flexibility and stop hugging the threshold. When I install a new sweep, I make sure it is long enough to cover the entire width of the glass. Any gap at the corners is an invitation for a leak. I also check the hinges. If the hinges have sagged even a millimeter, the door will not sit square. This throws off the entire geometry of the seal. You have to use a level on the glass. Not just ‘eye-ball’ it. If the glass is plumb, the sweep will wear evenly. If it is crooked, the sweep will drag on one side and leave a gap on the other. This is basic geometry, but you would be surprised how many ‘handymen’ ignore it. I also look at the ‘drip rail’ on the inside of the door. If it is clogged with calcium deposits, the water will overflow the rail and leak out. Clean your hardware with white vinegar once a month to keep the water flowing where it should.
Checklist for a bone dry bathroom
- Check the threshold pitch with a small level; it must slope toward the drain.
- Inspect the silicone bead at the junction of the door track and the wall tile.
- Verify that the door sweep makes full contact with the floor when closed.
- Test the floor for deflection by standing near the door and watching for movement.
- Ensure the shower head is not aimed directly at the door seams.
- Replace brittle or yellowed plastic seals immediately.
- Seal the grout lines annually to prevent sub-surface moisture migration.
If you follow these steps, you will save yourself thousands in drywall repair and mold remediation. Don’t let a tiny leak turn into a structural nightmare. A floor is a performance surface. Treat it like one. Get the subfloor right, use the right chemicals, and respect the physics of water. It is the only way to build a bathroom that lasts a lifetime. Stop looking at the pretty colors and start looking at the moisture meter. That is the mark of a pro. I am going back to my shop now. I have a pallet of engineered hickory to acclimate, and that wood won’t wait for anyone.