How to Hide Ugly Carpet Seams Without Calling a Professional
Most guys skip the leveling compound. They think the underlayment will hide the dip. It won’t. I spent three days grinding concrete on a job last month just so the floor wouldn’t click like a castanet. When it comes to carpet, that same dip acts like a valley that pulls the seam apart every time you walk over it. You see a line, but I see a structural failure in the foundation. Most homeowners think a visible seam is just a cosmetic glitch. It is actually a sign that the structural bonding of the fibers has failed or the subfloor is putting undue tension on the joint. If you want to fix this without calling me and paying my day rate, you have to stop thinking about aesthetics and start thinking about the physics of thermoplastic resins and yarn geometry.
The physics of the subfloor valley
Floor leveling is the foundation of any carpet install. If the subfloor has a dip greater than 3/16 of an inch over 10 feet, the carpet seams will experience vertical shear stress. This causes the thermoplastic adhesive to fail and creates a visible gap or a peaked ridge. You must ensure that the floor beneath the carpet is not flexing. When you walk across a room, a subfloor with too much deflection acts like a see-saw. This motion works the seam back and forth until the latex backing of the carpet cracks. To fix an existing seam, you must first determine if the subfloor is the culprit. If the floor is bouncy, no amount of glue will keep that seam hidden forever.
“A floor is only as good as the subfloor beneath it; deflection is the enemy of every joint.” – Master Flooring Axiom
The molecular bond of thermoplastic tape
Carpet seam tape relies on a thermoplastic adhesive that must reach a specific melt point to create a permanent bond. Most amateurs move the seam iron too quickly, resulting in a cold bond that separates within months. The tape is a multi-layered component consisting of a paper backing, a fiberglass mesh for tensile strength, and beads of hot-melt glue. When the iron, set to approximately 350 degrees Fahrenheit, passes over the tape, the glue transitions into a low-viscosity liquid. This liquid must penetrate the secondary backing of both carpet pieces. If the temperature is too low, the glue only sits on the surface. If it is too high, you risk scorching the polypropylene fibers, which permanently deforms the pile. You are looking for a honey-like consistency that wets out the mesh and the carpet backing simultaneously.
The chemistry of latex edge sealing
Carpet sealer is a synthetic latex compound designed to prevent yarn blossoming and fraying at the cut edge. When you cut a carpet to create a seam, you are severing the tuft lock. Without a chemical sealer, the individual filaments will begin to untwist. This is why seams become fuzzy and prominent over time. You must apply a thin bead of sealer to the edge of the carpet where the pile meets the backing. This creates a waterproof barrier that prevents moisture from the air or cleaning machines from delaminating the carpet layers. In high humidity environments like Houston or New Orleans, this step is non-negotiable. The moisture in the air can actually cause the jute or synthetic backing to swell, which puts immense lateral pressure on the seam. A proper seal keeps the dimensions stable.
| Fiber Material | Heat Tolerance | Bond Strength | Seam Visibility |
|---|---|---|---|
| Nylon | High | Excellent | Low |
| Polyester | Medium | Good | Moderate |
| Olefin | Low | Fair | High |
| Wool | High | Excellent | Low |
The light refraction problem in pile direction
Pile direction or carpet nap determines how light refracts off the surface of the floor. If you join two pieces of carpet with the nap running in opposite directions, the seam will always be visible regardless of how well it is glued. This is known as a reverse pile disaster. Light hits one side and is absorbed by the tips of the fibers, making it look dark. On the other side, light hits the side of the yarn, making it look bright. To verify nap direction before you start your repair, slide a scrap of wood across the surface. The wood will slide easier in the direction the pile is laying. Every piece of carpet in the room must point toward the primary entrance or the main light source. This minimizes the shadows cast by the seam line.
Tools for a professional structural repair
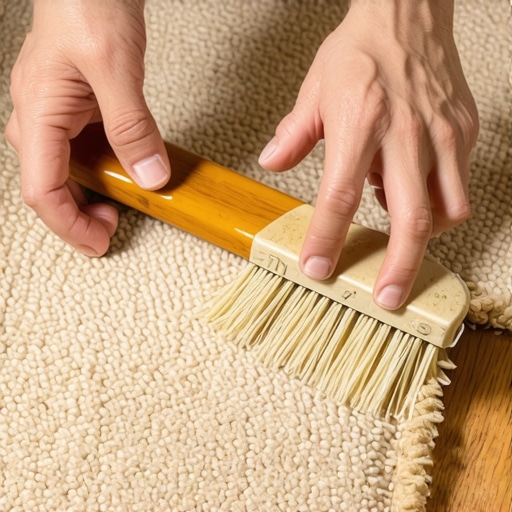
Carpet tools like the star roller and the row finder are essential for manipulating the fiber orientation during a repair. You cannot just push the two edges together with your hands. You need a row finder to spread the tufts apart so you can see the backing. This ensures you are cutting between the rows of yarn rather than through them. Once the glue is hot and the edges are joined, the star roller is used to press the backing into the adhesive while simultaneously knitting the fibers together. The teeth of the roller reach down into the pile and interlock the yarns from both sides. This mechanical interlocking is what makes the seam disappear from view. After rolling, you must place a weighted tool, often called a seam weight, over the area. This draws the heat out of the glue and sets the bond while the carpet is under compression.
“The substrate must be flat to within 1/8 inch in 10 feet to ensure the longevity of the finished surface.” – Structural Installation Standards
- Verify the subfloor is dry and level using a ten-foot straightedge.
- Use a row finder to clear a path for the carpet knife.
- Trim the factory edges to ensure a fresh, clean surface for the adhesive.
- Apply a bead of latex sealer to both edges to prevent fraying.
- Heat the seam iron to the manufacturer’s recommended setting.
- Wait for the glue to smoke slightly before moving the iron forward.
- Follow the iron immediately with a star roller to knit the fibers.
- Weight the seam for at least thirty minutes to ensure a full thermal set.
The 1/8 inch that ruins everything
Expansion gaps and perimeter tension are the silent killers of a clean carpet transition. If the carpet is not stretched tightly enough using a power stretcher, it will eventually develop ripples. These ripples migrate toward the weakest point in the installation, which is usually the seam. A loose floor will cause the seam to peak, creating a visible ridge that catches the light and eventually wears down from foot traffic. You must ensure the carpet is hooked onto the tack strips with enough tension to drum the entire surface. If you can lift the carpet more than a half-inch off the floor in the center of the room, it is too loose. The tension should be uniform across the entire plane of the room. This prevents the seam from being the focal point of the floor’s movement.
Atmospheric impacts on synthetic fibers
Regional climate plays a massive role in how carpet fibers behave during and after a repair. In dry climates like Phoenix, the static electricity buildup can make fibers stand up straight, making a seam more obvious during the work. In these areas, using an anti-static spray can help the fibers lay down so you can see the backing clearly. Conversely, in the swampy humidity of the coast, the fibers are heavy and limp. This requires more aggressive use of the star roller to ensure the pile does not get trapped inside the glue. The temperature of the room also matters. If the room is below 65 degrees, the thermoplastic glue will cool too fast, resulting in a brittle bond that will snap the first time someone steps on it with heavy boots. You need a stable environment to achieve a professional result.