How to Get Rid of That Hazy Film on Your New Laminate Floor
The phantom clouds on your expensive boards
Removing the hazy film from a new laminate floor requires breaking down the chemical surfactants and factory residues left behind during the manufacturing or installation process. You should use a solution of 70 percent isopropyl alcohol mixed with water or a dedicated laminate cleaner that contains no oils or waxes. This haze is often a combination of protective factory coatings, adhesive overspray, and the unintended residue from improper cleaning agents like soap or steam. If you ignore this film, it becomes a magnet for micro-dust, making your brand new floor look decades old within weeks.
I once walked into a house where a homeowner had just spent thousands on a premium wide-plank laminate. Within two weeks, they called me screaming that the floor was defective because every footprint stayed visible. It looked like someone had smeared a stick of butter across the entire living room. After three minutes of inspecting their utility closet, I found the culprit. They were using a ‘natural’ oil-soap cleaner. On a non-porous melamine surface, oil has nowhere to go. It just sits there, attracting every bit of skin cell and pet dander in the air. I spent the next six hours stripping that floor back to its factory finish using nothing but microfibers and a specific alcohol-based blend. This is the reality of the laminate game. It is a high-performance surface, but it is also a chemical mirror that reflects every mistake you make in your maintenance routine. If you treat it like wood, you will ruin it. If you treat it like tile, you will ruin it. You have to treat it like the engineered plastic-resin composite it actually is.
Why your cleaning routine is actually a slow-motion disaster
A hazy floor is usually the result of using too much product or the wrong chemistry for the non-porous top layer of the laminate. Most commercial cleaners contain surfactants that are designed to lift dirt but often leave behind a polymer film if they are not rinsed or if they are applied too heavily. This film creates a dull, streaky appearance that is especially visible in direct sunlight or ‘raking light’ from large windows. People often double down on the cleaning when they see streaks, adding more product and creating a thicker layer of haze that eventually requires a professional-grade reset.
The mechanics of a laminate floor are distinct from natural materials. The wear layer is typically composed of melamine resin and aluminum oxide. This creates a surface that is incredibly hard but also completely sealed. When you apply a cleaner, the liquid cannot penetrate the surface. Instead, the water evaporates, leaving the ‘solids’ of the cleaner behind. Over time, these solids build up into a microscopic mountain range of residue. This is why your floor looks great while wet but cloudy once dry. You are seeing the dried skeletons of your cleaning chemicals. To fix this, you have to go back to the molecular level and use a solvent that evaporates completely without leaving any solids behind.
The molecular chemistry of laminate wear layers
The top layer of your laminate is a wear layer infused with aluminum oxide crystals to provide scratch resistance. This layer is engineered to be chemically inert, meaning it does not react well to traditional waxes, polishes, or oils found in ‘all-purpose’ cleaners. Understanding the Janka hardness is less relevant here than understanding the surface tension of the melamine. Because the surface tension is so high, liquids tend to bead up rather than flow out. This is why cheap cleaners leave ‘beading marks’ or circular streaks that drive homeowners to the brink of insanity.
| Cleaning Agent | Residue Level | Impact on Haze | Recommendation |
|---|---|---|---|
| Oil Soaps | Very High | Creates thick grease film | Avoid entirely |
| Steam Mops | None (Chemical) | Can cause core swelling | Never use on laminate |
| Vinegar/Water | Low | Can dull finish over time | Use sparingly |
| Isopropyl Alcohol | Zero | Dissolves film instantly | Best for haze removal |
| Glass Cleaner | Moderate | Often contains ammonia | Check label first |
How subfloor leveling prevents the microscopic pumping effect
Proper floor leveling is critical because an uneven subfloor causes the laminate planks to deflect or bounce when walked upon. This vertical movement can actually pump air and moisture through the joints, bringing subfloor dust and manufacturing waxes to the surface. If your floor was not leveled within the standard 3/16 inch over 10 feet, the constant clicking and rubbing of the tongue and groove joints can wear down the factory edge sealant. This sealant often contains paraffin wax, which, when ground down by friction, migrates to the surface of the board as a sticky, hazy residue near the seams.
When I talk about floor leveling, I am talking about the structural integrity of the entire system. If the subfloor has a dip, the laminate bridge across that dip is under constant stress. Every time you walk over it, the floor acts like a bellows. It sucks in fine particulates from the underlayment and pushes out factory lubricants. You see this as a stubborn haze that keeps reappearing specifically at the edges of the boards. You might think it is a cleaning issue, but it is actually a physics issue. No amount of mopping will fix a floor that is moving too much. You have to ensure the subfloor is dead flat before the first plank ever touches the ground.
The transition from carpet install to hard surfaces
During a carpet install in an adjacent room, thousands of loose synthetic fibers and latex dust particles are released into the air. These particles often migrate to the new laminate floor and bond with the existing factory haze or oily cleaning residues. This creates a gritty, cloudy texture that is difficult to remove with a simple vacuum. The static charge of a laminate floor actually pulls these airborne carpet fibers down, locking them into whatever film is already on the surface.
- Vacuum the transition strips daily for the first week after a carpet install.
- Use a dry microfiber tack mop to pull static-charged fibers off the laminate.
- Check the ‘T-molding’ gaps for trapped debris that can work its way under the planks.
- Wipe down baseboards where carpet fibers often cling before settling on the floor.
- Ensure the transition from the carpet to the laminate is sealed to prevent ‘dust pumping’.
“A floor is only as good as the subfloor beneath it; deflection is the enemy of every joint.” – Master Flooring Axiom
The vinegar and water myth that ruins finishes
While many recommend vinegar and water as a natural cleaner, the acetic acid in vinegar can eventually etch the melamine surface if the concentration is too high. This etching looks exactly like a permanent hazy film that cannot be wiped away. The goal is to maintain a neutral pH. Laminate manufacturers spent millions of dollars engineering these coatings to resist stains, but they did not design them to be bathed in acid every Saturday morning. If you have used vinegar for years and your floor looks dull, you are likely seeing the result of microscopic surface degradation rather than a simple film.
If you must use vinegar, the ratio should be no more than one cup per gallon of water, and even then, I advise against it. The reality is that alcohol-based cleaners are superior because they act as a solvent for the oils without the acidic bite. When you are dealing with a new floor haze, you are usually dealing with ‘shipping wax’. This is a light coating applied to protect the boards during their journey in a shipping container. Vinegar is a poor solvent for wax. You need something that can break the lipid bonds of the wax and lift it into the microfiber cloth. That is why professional installers keep a bottle of high-purity alcohol in their kits. It is the only way to get that ‘glass’ finish without damaging the core.
Recovering the factory shine without stripping the warranty
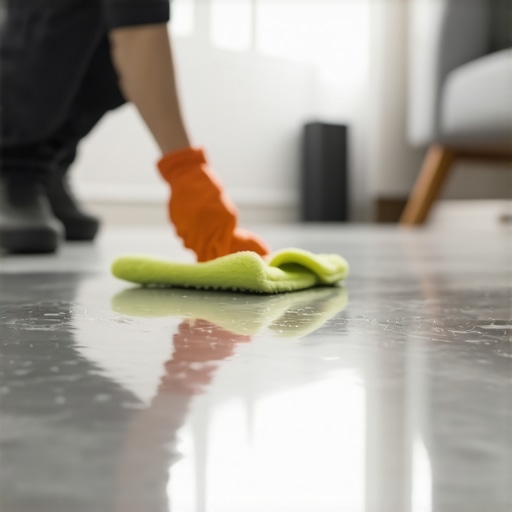
To recover the factory shine, you must perform a ‘deep strip’ using a non-abrasive method that removes all previous chemical buildup without moisture-loading the HDF core. Start by dry-mopping to remove all grit, then use a mist-and-wipe technique with a 50/50 mix of water and 70 percent isopropyl alcohol. Work in small sections, roughly four feet by four feet, and use a fresh microfiber for each section. If the microfiber comes up gray or yellow, that is the haze leaving the building. Do not use a mop bucket. The goal is to keep the floor as dry as possible to protect the joints.
“The beauty of the plank is a lie if the chemistry of the cleaner is a poison.” – Master Flooring Axiom
Finally, consider the environmental factors like humidity. If you live in a coastal area or near heavy showers, the moisture in the air can keep the factory residue in a ‘tacky’ state longer. High humidity slows down the evaporation of cleaning agents, which leads to more streaks. In these environments, you must be even more diligent about using dry microfibers to buff the floor after cleaning. Never leave the floor to air dry if you want to avoid the haze. The manual mechanical action of buffing is what truly clears the clouds. It is hard work, it is boring, and it is the only way to get the floor you actually paid for. Stop looking for a magic mop and start looking at the chemistry of your spray bottle. Your subfloor is stable, your boards are locked, now let the melamine breathe.