I have spent twenty five years on my knees with a moisture meter and a level. I have smelled enough WD-40 and oak dust to last three lifetimes. Most guys skip the leveling compound. They think the underlayment will hide the dip. It won’t. I spent three days grinding concrete on a job last month just so the floor wouldn’t click like a castanet. That same philosophy applies to your carpet. If you see a bubble, it is a structural failure of tension. Most installers today are lazy. They use a knee kicker for the whole room because they do not want to carry a power stretcher from the truck. A knee kicker is a positioning tool, not a stretching tool. When you skip the mechanical stretch, the carpet relaxes. Within six months, you have ripples that look like the Atlantic Ocean. You fix this by understanding the physics of the tack strip and the chemical grip of the latex backing.
The anatomy of a ripple
Carpet bubbles occur when the secondary backing of a synthetic carpet loses its tension against the tack strips. This happens because of poor installation, high humidity, or subfloor moisture. When the SBR latex adhesive inside the carpet delaminates, the material expands and creates wrinkles. You must re-tension the polypropylene layers to restore a flat surface.
Carpet is not just a rug. It is a complex sandwich of materials. You have the face fibers, the primary backing, a layer of latex adhesive, and the secondary backing. If any of these layers lose their cool, you get a bubble. Most people think it is just a loose bit of fabric. It is actually a failure of the mechanical bond between the carpet and the perimeter of the room. When I walk into a house with bubbles, I know exactly what happened. The installer didn’t use a power stretcher. They kicked it in and went home. The carpet was cold when they put it in. Then the sun hit it, the fibers expanded, and now you have a tripping hazard.
“A floor is only as good as the subfloor beneath it; deflection is the enemy of every joint.” – Master Flooring Axiom
The mechanical limits of a knee kicker
A knee kicker is designed to set the carpet onto the tack strip teeth at the starting wall. It provides approximately five percent of the mechanical force required for a long term carpet install. You use the padded end to drive your quadricep force into the tool head, but it cannot stretch a room longer than ten feet. For large spans, the power stretcher is mandatory.
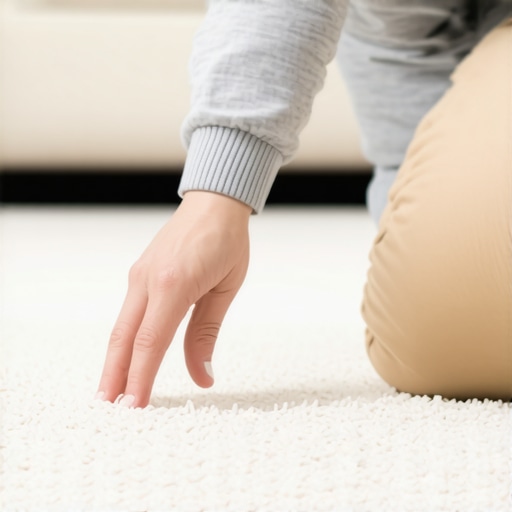
If you have a small bubble, the knee kicker can save you. But you have to know how to use it without shredding your meniscus. You set the teeth of the tool about two inches away from the wall. You want the teeth to bite into the backing, not just the fuzz on top. If you just grab the yarn, you will pull the loops out. That is a permanent ruin. You want to feel the teeth engage the structural grid of the backing. Then you strike. It is a quick, sharp blow. Not a push. A push does nothing. You need the kinetic energy to move the entire mass of the carpet toward the wall. It will buckle if you do it wrong. It will lay flat if you do it right.
Why your subfloor is lying to you
A level subfloor is the foundation of every flooring category including laminate, hardwood, and broadloom carpet. If your floor leveling was done poorly, the carpet pad will bridge low spots. This creates a void where the carpet backing is not supported. Every time you walk over that dip, you stretch the latex, eventually causing a permanent bubble that no knee kicker can fix.
I have seen it a thousand times. A guy pours a bucket of self leveler and doesn’t use a spiked roller. He leaves a hump. Or he doesn’t prime the substrate and the leveler peels up. When you put carpet over a bad floor, you are just masking a disaster. If you have a bubble in the middle of a room, check the floor underneath. Is there a dip? If there is, your carpet is playing a drum on top of a hole. The air trapped in that hole moves. It pushes the carpet up. It creates a pocket. You can kick it all day, but if the floor is not flat, the tension will never stay uniform across the surface.
Humidity and the latex backing failure
Environmental moisture and high humidity are the primary causes of carpet expansion in residential settings. When water vapor enters the SBR latex, the polymer chains relax. This moisture migration is common near showers or unsealed crawlspaces. You must acclimate the flooring material to the ambient temperature of seventy degrees before mechanical stretching begins.
If you live in a swampy area, your carpet is a sponge. It sucks up the moisture in the air. The backing gets soft. The tension you had in the winter is gone by July. This is why I tell people to never install carpet in a basement without a proper vapor barrier. Even then, you are taking a risk. If you have a bubble that only shows up when it rains, you have a moisture problem, not a stretching problem. You need a dehumidifier, not a tool. If you stretch carpet when it is humid and swollen, it will shrink in the winter and pull off the tack strips. Then you have a different mess. Your baseboards will show a gap. It looks cheap. It looks like a DIY job gone wrong.
| Tool Type | Max Room Span | Primary Purpose | Tension Force |
|---|---|---|---|
| Knee Kicker | 10 Feet | Positioning and Tucking | Low |
| Power Stretcher | Unlimited | Structural Tensioning | High |
| Crain 500 | 15 Feet | Intermediate Re-Stretching | Medium |
The 1/8 inch that ruins everything
The tack strip gully must be exactly one eighth of an inch from the baseboard to allow for a clean tuck. If the installer leaves a wider gap, the carpet edge will unhook from the pins. This leads to perimeter failure and surface bubbling. Proper carpet install technique requires a stiff stair tool to lock the backing into the gully securely.
Most guys are sloppy with the gully. They leave it too wide because it is easier to tuck. But then there is nothing holding the carpet. It is like a guitar string that isn’t tied to the peg. It will never stay in tune. You need that tension. When you use the knee kicker, you are trying to shove that extra bit of slack back into that 1/8 inch gap. It is a game of millimeters. If the tack strip is rotten from old pet stains or water from the showers nearby, the pins won’t hold. The whole system collapses. You have to replace the wood strips before you even think about the kicker. Do not be the guy who tries to kick carpet into rotten wood. It won’t work.
“Deflection is not an option when you are dealing with high performance surfaces.” – Structural Flooring Guide
The 10 minute bubble fix checklist
Follow these essential steps to eliminate carpet ripples using a knee kicker and basic hand tools. Ensure the room temperature is stabilized before applying force to the backing material.
- Clear the furniture from the target wall to allow full access to the tack strip.
- Peel the carpet back from the corner using a pair of pliers to see the pins.
- Set the knee kicker teeth depth to match the pile height of your carpet.
- Strike the kicker with your knee while simultaneously pushing the carpet down onto the pins.
- Use a stair tool to jam the excess material into the gully behind the strip.
- Trim any excess carpet with a sharp wall trimmer to ensure a flush fit.
If you do this right, the bubble disappears. If you do it wrong, you just moved the bubble to a different part of the room. You have to work from the center out to the walls. You are essentially chasing the air and the slack. Think of it like a sticker on a phone. You don’t just press the middle. You slide the bubble to the edge. The knee kicker is your finger, and the carpet is the sticker. But the carpet weighs fifty pounds and doesn’t want to move. It takes grit. It takes repetitive motion. It takes knowing exactly how much force to use before the backing snaps.
The ghost in the expansion gap
While carpet does not require the half inch expansion gap needed for laminate or hardwood, it still reacts to structural shifting. If your floor leveling compound was not feathered correctly, the carpet will telegraph the imperfection. This visual ripple is often mistaken for a bubble, but it is actually a subfloor ghost. You cannot stretch out a hump in the concrete.
I’ve had homeowners scream at me because they think I didn’t stretch the carpet. I have to pull the carpet back and show them the mountain of concrete they refused to pay me to grind down. Carpet is thin. It is just a skin. If the skeleton underneath is deformed, the skin will look deformed. This is why I am a stickler for the prep work. I don’t care about the color of the yarn. I care about the moisture content of the slab. I care about the PH level of the adhesive. If those things are wrong, the most expensive carpet in the world will look like trash in two years. You want a floor that lasts twenty years. That starts with the grinder and the level.
{“@context”:”https://schema.org”,”@type”:”HowTo”,”name”:”Fixing Carpet Bubbles with a Knee Kicker”,”step”:[{“@type”:”HowToStep”,”text”:”Clear the perimeter of the room and pull the carpet off the tack strip near the bubble.”},{“@type”:”HowToStep”,”text”:”Adjust the knee kicker teeth to engage the secondary backing without damaging the face fibers.”},{“@type”:”HowToStep”,”text”:”Strike the kicker with the knee to push the slack toward the wall.”},{“@type”:”HowToStep”,”text”:”Secure the carpet onto the tack strip pins and tuck the excess into the gully.”}],”totalTime”:”PT10M”}