The ‘Weight Test’ for Checking if Your Subfloor Is Bouncing Too Much
I have spent twenty five years with sawdust under my nails and a level in my hand. Most people look at a new floor and see a color or a pattern. I see a structural engineering puzzle that begins three inches below the surface. I spent three days grinding concrete on a job last month just so the floor wouldn’t click like a castanet. The homeowner thought I was overcharging for the prep work. Then I showed them the dip. If I had laid that laminate over that hollow spot, the locking mechanisms would have snapped within six months. That is the reality of the business. You can buy the most expensive wide plank white oak in the world, but if your subfloor is bouncing, you are just throwing money into a wood chipper. I have seen fifteen thousand dollar walnut floors cup like potato chips because the installer ignored the crawlspace humidity and the structural deflection. A floor is a performance surface, not a rug. If you do not respect the physics of the subfloor, the physics will eventually destroy your investment. This guide is about the reality of what happens when your house moves under your feet.
The structural reality of deflection
Subfloor deflection measures the vertical movement of your floor under a specific load. It is the primary cause of joint failure in laminate and tile. To pass the weight test, a floor must meet L/360 standards for most materials or L/720 for natural stone installations. When we talk about deflection, we are talking about the distance a joist bends under pressure. Imagine a joist as a bridge. If that bridge dips too low when a truck passes over it, the pavement on top cracks. Your flooring is that pavement. In a laminate install, vertical movement causes the tongue and groove to rub together. This creates that annoying squeak or, worse, a complete shearing of the joint. If you are preparing for a carpet install, you might think bounce is fine because carpet is flexible. You are wrong. Excessive bounce pulls the staples out of the tack strip and causes the carpet to delaminate from its backing over time. I always tell my clients that the weight test is the only way to prove the subfloor is lying to you.
Why your subfloor is lying to you
A subfloor might look flat but hide structural weaknesses that manifest only when you walk across it. This hidden bounce stems from over-spanned joists or improper glue-down techniques. Identifying these gaps before a laminate or carpet install prevents costly repairs and permanent material damage later. Often, the issue is not the plywood itself but the connection to the joists. Builders used to rely on nails alone. Nails shrink. Wood dries. Suddenly, there is a micro-gap between the joist and the subfloor. When you step on it, the board travels that gap and hits the joist. That is the ‘click’ or ‘thud’ you hear. If you are doing floor leveling, you cannot just pour compound over a bouncing floor. The compound is rigid. The floor is flexible. When the floor moves, the rigid compound cracks into a thousand pieces. It is like trying to put a ceramic plate on a trampoline. You must solve the bounce first, usually through sistering joists or adding blocking to the mid-span of the run.
“A floor is only as good as the subfloor beneath it; deflection is the enemy of every joint.” – Master Flooring Axiom
The physics of the weight test
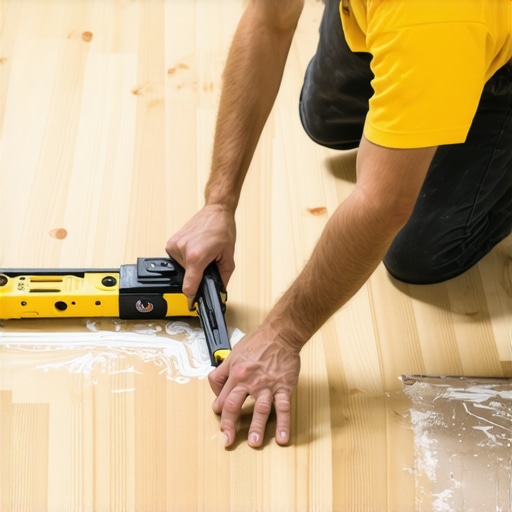
The weight test involves placing a concentrated load at the center of the floor span and measuring the vertical dip. For a standard residential home, this typically requires a two hundred pound localized weight. A professional installer uses a dial indicator to measure travel in thousandths of an inch. You do not need a laboratory to do this. You can fill a five gallon bucket with water, which weighs about forty two pounds, and place it in the center of the room. Observe the perimeter baseboards. If you see the floor pulling away from the wall more than an eighth of an inch, you have a deflection problem. For those planning showers or tile work, the standards are even tighter. Tile has zero flexibility. If the subfloor moves, the thin-set bond breaks. This is why the TCNA is so strict about substrate rigidity. You are looking for a floor that feels like a sidewalk, not a sponge.
| Material Type | Max Deflection Limit | Required Substrate | Acclimation Time |
|---|---|---|---|
| Laminate Flooring | L/360 | 3/4 inch Plywood/OSB | 48 Hours |
| Solid Hardwood | L/360 | 3/4 inch CDX Plywood | 7-14 Days |
| Ceramic Tile | L/360 | Cement Backer Board | None |
| Natural Stone | L/720 | Double Layer Plywood | None |
| Luxury Vinyl Plank | L/480 | High Density Underlay | 24 Hours |
The 1/8 inch rule that ruins everything
Floor leveling requires a surface that is flat within one eighth of an inch over a ten foot radius. Failure to achieve this flatness leads to air pockets under the flooring. These pockets cause the material to flex and eventually fail at the weakest point which is the seam. I have seen guys try to use thick carpet padding to hide a dip. It is a hack move. The padding eventually compresses, and you are left with a valley in your living room. When dealing with floor leveling compounds, the chemistry is vital. Most self-levelers are calcium aluminate based. They dry fast and have high compressive strength. But they have no tensile strength. If the subfloor below them moves, they will turn back into dust. This is why I always check for bounce before I ever open a bag of leveler. If the floor fails the weight test, the leveler is just a temporary bandage on a broken bone.
Laminate joints and vertical travel
Laminate flooring is a floating system that relies on the integrity of the locking mechanism to stay together. Vertical travel caused by a bouncing subfloor puts immense stress on these thin HDF tongues. Over time, the friction creates heat and wear that destroys the locking profile. People buy laminate because it is cheap and easy to install. They think it is ‘waterproof’ and indestructible. But laminate is actually one of the most sensitive materials when it comes to subfloor prep. Because it is not nailed or glued down, it has nothing to hold it in place except its own weight and the baseboards. If the floor underneath is dipping, every step you take is like bending a paperclip back and forth. Eventually, that paperclip is going to snap. I have seen entire rooms of laminate ruined because the installer didn’t want to spend the time to screw down the subfloor or fill the low spots.
Showers and the rigid substrate requirement
Installing tile in showers requires a subfloor with zero perceptible bounce to maintain the integrity of the waterproofing membrane. Any movement in the floor can tear the topical membrane or crack the grout lines. This leads to moisture intrusion and structural rot in the joists below. When I am doing a bathroom, the weight test is non-negotiable. I will often add a second layer of half inch exterior grade plywood, glued and screwed, to ensure the floor is rock solid. The chemistry of the thin-set also matters here. You need a highly modified mortar with polymers that can handle the slight vibrations of a house, but it cannot compensate for a structural bounce. If you feel the floor shake when the door slams, do not put tile in that shower until you have reinforced the joists.
“The subfloor must be structurally sound, dry, and free of any deflection that exceeds industry standards for the specific finish material.” – NWFA Technical Manual
The subfloor preparation checklist
- Check joist spacing to ensure it does not exceed 16 inches on center for standard 3/4 inch subfloors.
- Identify any squeaks and use 2.5 inch deck screws to pull the subfloor tight to the joists.
- Perform the weight test in the center of the largest room span using a concentrated load.
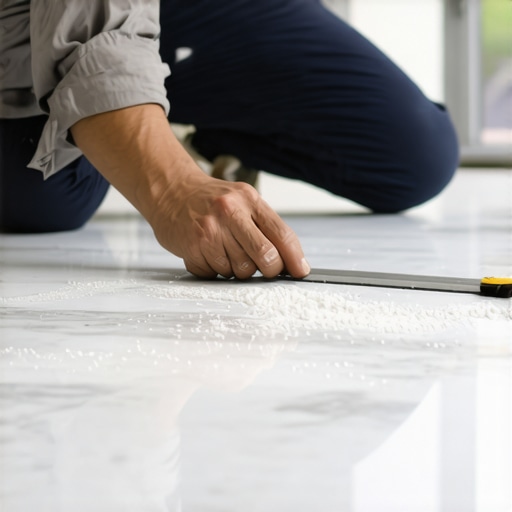
- Measure the flatness using a 10 foot straight edge to ensure no gaps larger than 1/8 inch.
- Test the moisture content of the wood to ensure it is within 4 percent of the flooring material.
- Grind down any high spots or ridges at the plywood seams.
- Apply a primer if using self-leveling compounds to ensure a chemical bond to the wood.
The ghost in the expansion gap
Expansion gaps at the perimeter of the room are necessary to allow for the natural movement of wood and laminate. However, if the subfloor is bouncing, the floor will shift horizontally as well as vertically. This movement can cause the floor to walk right out from under the baseboards. I have walked into houses where the floor was gapping at one wall and tight against the other. The homeowner thought the wood was shrinking. The reality was that the floor was bouncing so much that the vibration was walking the entire floor across the room. We call this ‘ghosting.’ It happens because the friction between the underlayment and the subfloor is lost during the bounce cycle. You can avoid this by ensuring the subfloor is flat and rigid. A stable floor stays where you put it. A bouncing floor has a mind of its own.
The final verdict on structural integrity
You can listen to the salesman at the big box store who tells you that a thick underlayment will fix everything. Or you can listen to the guy who has had to tear out those floors three years later. Subfloor prep is the most boring, expensive, and difficult part of a flooring job. It is also the only part that actually matters for the long term. If you skip the weight test, you are gambling with your house. Take the time to grind the high spots. Take the time to sister the joists. Take the time to do the floor leveling right the first time. The smell of floor wax and the feel of a solid oak floor under your feet are the rewards for a job well done. Do not let a little bit of bounce ruin the legacy of your home. A floor is a foundation. Treat it with the respect it deserves and it will last a lifetime. That is the only way I know how to work. That is the only way a floor should be built.