How to Get a Perfect Carpet Seam on Stairs Without the Line Showing
How to Get a Perfect Carpet Seam on Stairs Without the Line Showing
I have spent twenty five years on my knees with a power stretcher and a row cutter. Most installers treat carpet like a blanket they can just throw over a set of steps. They are wrong. A staircase is a high traffic structural element that requires mechanical precision. I spent three days grinding concrete on a job last month just so the floor would not click like a castanet. Most guys skip the leveling compound. They think the underlayment will hide the dip. It will not. That same logic applies to carpet seams on stairs. If the transition between two pieces of carpet is not architected at the structural level, it will fail within six months. You will see a line. You will feel the gap. Eventually, the friction of foot traffic will fray the edges until the primary backing is exposed. To get it right, you have to look at the chemistry of the latex and the physics of the nap. This is not about aesthetics. This is about engineering a surface that can withstand thousands of pounds of lateral pressure.
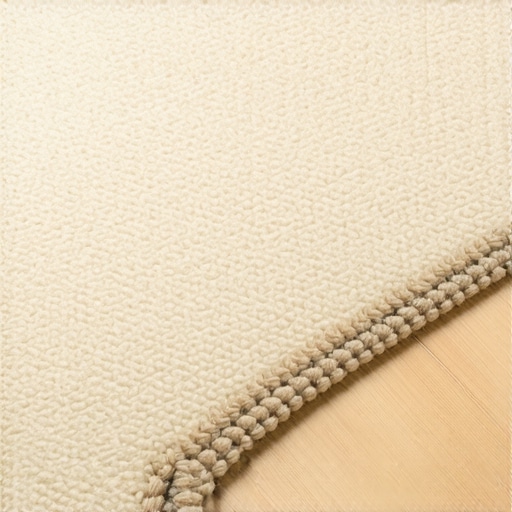
The anatomy of a stair nose transition
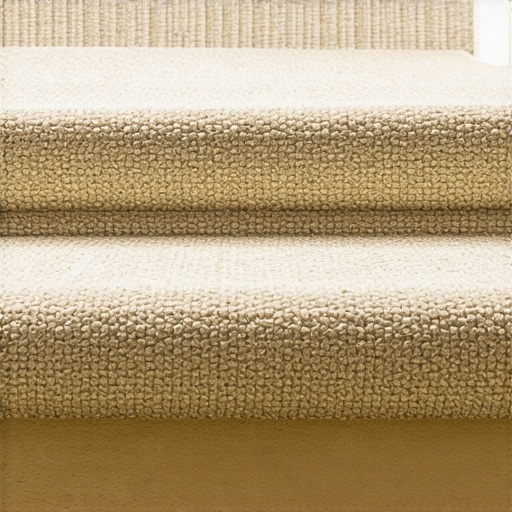
To achieve a perfect carpet seam on stairs, you must align the pile direction toward the bottom of the flight and wrap the material tightly around the tread nose. Using a rowing technique to separate fibers before cutting prevents the shearing of face yarns that causes visible lines. When you wrap carpet over the nose of a tread, the backing is stretched to its absolute limit. If you have a seam at this point, the tension wants to pull that seam apart. You must understand the denier of the yarn. For a high quality nylon carpet, the tufts are packed in rows. If you cut across those rows, you are creating a jagged edge at the microscopic level. Pros use a row spreader to find the valley between the tufts. By cutting only the backing and not the face fibers, you ensure that the yarn remains long enough to fold over the seam and hide the transition. This is the difference between a seam that disappears and one that looks like a scar.
Why your subfloor is lying to you
Subfloor imperfections like a 1/8 inch dip or a loose tread will telegraph through the carpet and padding over time. You must secure every riser and tread with construction adhesive and screws to eliminate the micro-movements that eventually pull seams apart and create unsightly gaps. A staircase is a moving part of a house. Every time someone walks up, the wood flexes. If your tread has even a millimeter of play, it will rub against the riser. This friction generates heat and mechanical stress. Over time, that stress focuses on the weakest point, which is your seam. I always tell my apprentices that if the wood squeaks, the carpet will fail. We use three inch deck screws to pull the treads into the stringers before the pad even touches the floor. If the wood is not dead quiet, the seam will never be invisible. Movement is the enemy of a tight join. Any shift in the substrate will cause the carpet to shift, and once that happens, the fibers will never lay the same way again.
“A floor is only as good as the subfloor beneath it; deflection is the enemy of every joint.” – Master Flooring Axiom
The physics of carpet fiber direction and nap
Carpet nap must always run down the staircase to ensure durability and aesthetic consistency. If you flip the direction on a landing or a seam, the light will reflect differently off the fibers, creating a permanent visual line even if the physical join is tight. This is known as tracking. Every carpet has a natural lean. If you run your hand across it, it feels smooth one way and rough the other. On stairs, the smooth direction must point down. This allows the foot to slide naturally off the step without catching the fibers. If you seam two pieces with opposing nap directions, the light will hit one side and absorb into the other. This creates a shadow line that no amount of brushing will fix. It is a fundamental error in spatial geometry. I have seen fifteen thousand dollar installations ruined because the installer tried to save two yards of waste by flipping a piece of carpet on the landing. It is a rookie mistake that smells like laziness.
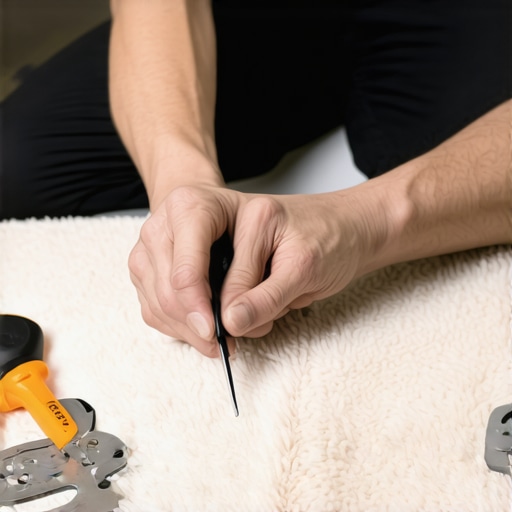
The hidden chemistry of seam sealers and latex
Modern carpet backings are composed of a primary and secondary layer held together by a synthetic latex compound. When you cut a seam for a stair installation, you must apply a thermoplastic or acrylic seam sealer to the cut edges to prevent the yarn from unravelling under tension. When you use a seaming iron, you are essentially welding two pieces of plastic together. The iron should be set between 350 and 400 degrees Fahrenheit. If it is too cold, the adhesive will not penetrate the secondary backing. If it is too hot, you risk scorched fibers or delamination. I prefer a slow melt. You move the iron at a pace of about one inch per second. As the adhesive melts, you press the two pieces into the molten pool. This creates a chemical bond that is stronger than the carpet itself. But on stairs, you also have the factor of the riser angle. You cannot just use tape. You need a bead of liquid sealer along the edge to lock those face fibers into the backing. Without it, the constant kicking of the riser will eventually pluck the yarns out one by one.
Material Performance Comparison for Stair Installations
| Carpet Material | Janka Equivalent Durability | Seaming Method | Stretch Factor |
|---|---|---|---|
| Nylon 6,6 | Very High | Hot Melt Tape and Acrylic Sealer | 1.5 percent |
| Wool Blend | Extreme | Hand Sewn or Latex Bond | 1.0 percent |
| Polyester (PET) | Medium | Hot Melt Tape | 2.5 percent |
| Triextra | High | Reactive Hot Melt | 1.8 percent |
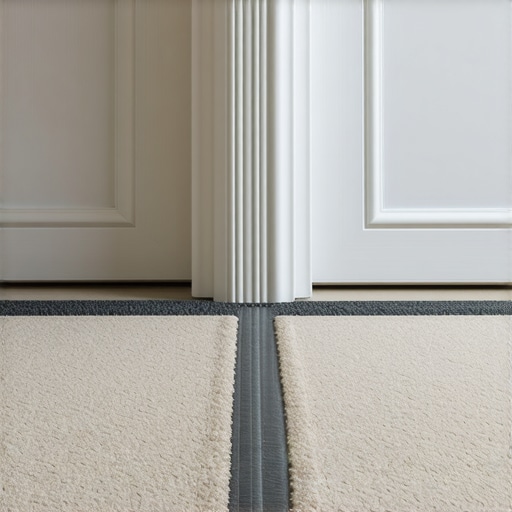
The 1/8 inch that ruins everything
Precision cutting is the only way to avoid the gap that occurs at the crotch of the stair where the riser meets the tread. A gap of only 1/8 inch will collect dust and create a dark line that mimics a failed seam. You must use a stair tool to drive the carpet deep into the crevice. This is a heavy, blunt chisel designed to wedge the material into the tack strip. If you do not have enough tension, the carpet will bridge. Bridging is when the carpet spans the gap between the tread and the riser like a trampoline. When someone steps on that bridge, it puts a massive amount of force on the seams above and below it. Eventually, the carpet will stretch and the seam will pop. I see this in every builder grade home. They rush the install and the carpet looks like a series of soft hills instead of sharp, crisp angles. You want your stairs to look like they were carved out of stone, not wrapped in a sleeping bag.
“Standard carpet installation requires the nap to run down the stairs for safety and wear resistance.” – CRI Installation Standards
Pre-Installation Checklist for Stair Seams
- Verify all tread nosings are rounded to a 1/2 inch radius to prevent fiber shearing.
- Check the moisture content of the wooden treads to ensure it is below 12 percent.
- Ensure the tack strips are placed exactly 1/2 inch from the riser to allow for carpet tucking.
- Vacuum the subfloor twice to remove all grit that could abrade the backing from underneath.
- Double check that the nap direction is uniform across all pieces including the landing.
Thermal management and the seaming iron
Applying the correct heat to a carpet seam is a matter of thermodynamics. The heat must pass through the tape and into the backing without melting the synthetic face fibers on the surface. This is why we use a seam roller immediately after the iron passes. The roller helps dissipate the heat and pushes the fibers together. On a staircase, you are often working in tight quarters. The heat can get trapped, especially on the risers. If the adhesive stays liquid for too long, the seam can shift before it sets. I use a cool tool, which is a weighted block of wood or metal, to sit on the seam for thirty seconds. This sucks the heat out and locks the bond. It is a slow process. If you are doing a flight of fifteen stairs, it might take you all day just to get the seams right. But that is the price of quality. A fast floor is a failing floor. You have to respect the chemistry of the glue. If you rush it, the seam will look like a jagged mountain range under the lights. Keep your iron clean and your movements steady. This is how you build a floor that lasts for decades. The grit and the dust are part of the job, but the result is a performance surface that stands the test of time. Never settle for anything less than a perfect transition. Your knees might hurt, but your reputation will stay intact.