Why Your Shower Floor Feels Gritty and Rough Under Your Feet
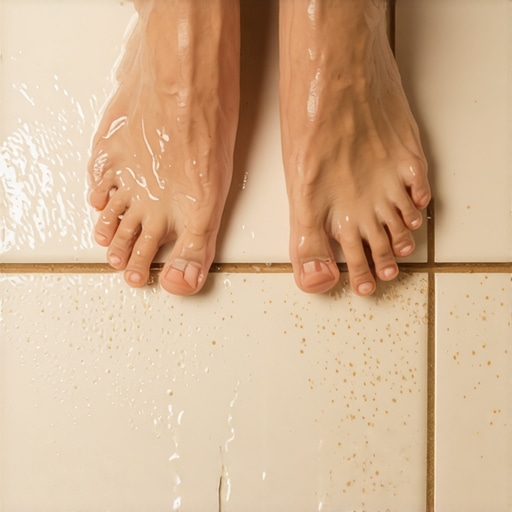
The gritty sensation beneath your toes when you step into the shower is not merely a nuisance. It is a physical manifestation of a chemical or structural breakdown within your tile assembly. The roughness on your shower floor is typically caused by grout erosion, mineral deposits known as efflorescence, or an improper water-to-cement ratio during the installation of the mud bed. When these elements fail, the microscopic bonds of the Portland cement disintegrate, releasing silica sand or mineral salts onto the surface of the tile.
The structural lie of the sandy shower
Most installers skip the self leveling phase and go straight to the mud bed without checking for subfloor deflection. I spent three days grinding concrete on a job last month just so the floor wouldn’t click like a castanet, and that same level of discipline is required for shower pans. If your shower floor feels like sandpaper, you are likely walking on the remains of a failing grout joint. Most guys skip the leveling compound. They think the underlayment will hide the dip. It won’t. When water sits in those low spots, it begins a process of hydraulic mining on your grout lines.
“A floor is only as good as the subfloor beneath it; deflection is the enemy of every joint.” – Master Flooring Axiom
The chemistry of the shower floor is a balance of polymers and aggregates. If the installer used too much water when mixing the grout, they created a porous structure. As you shower, water enters those pores and pulls the cement out. What stays behind is the sand. That is the grit you feel. It is the skeleton of your grout, and it means the waterproof integrity of your floor is now under threat. This is why I always preach about the importance of the TCNA guidelines for moisture management.
Efflorescence and the chemical ghost in your grout
Efflorescence is the migration of a salt to the surface of a porous material, where it forms a coating. In showers, this happens when water stays trapped in the setting bed. As the water evaporates, it carries minerals to the surface of the tile. These minerals crystallize. They feel sharp. They feel gritty. If you rub your hand across the tile and see white powder, you are dealing with a drainage problem, not just a dirty floor. The floor leveling was likely done poorly, leading to what we call a birdbath, a small indentation where water pools and creates a mineral factory.
| Factor | Sanded Grout | Unsanded Grout | Epoxy Grout |
|---|---|---|---|
| Grit Source | Silica sand | Mineral salts | Improper cleaning |
| Texture | Coarse | Smooth | Plastic-like |
| Durability | High | Medium | Extreme |
The relationship between subfloor deflection and surface grit
Structural engineering is the silent partner in every tile job. If your subfloor has too much flex, the grout cannot remain stable. Every time you step on a tile, it moves a fraction of a millimeter. This micro-movement is enough to grind the grout into dust. This is the same reason why a carpet install over a bouncy subfloor feels cheap, or why laminate floor boards separate. In a shower, that dust turns into a abrasive paste when mixed with water. You are essentially standing on a grinding stone every time you wash your hair.
“The installation of ceramic tile is a system that requires a rigid substrate to prevent the failure of the bond between the tile and the mortar.” – TCNA Handbook
The 48 hour protocol for diagnosing grit
To fix the grit, you must first identify its source. Follow this checklist to determine if you are looking at a cleaning issue or a structural failure.
- Perform the white glove test by rubbing a dark damp cloth over the dry grout lines.
- Check for white powdery residue that reappears 24 hours after cleaning.
- Inspect the perimeter for expansion gaps that have been filled with hard grout instead of caulk.
- Measure the slope of the floor to ensure it drops at least 1/4 inch per foot toward the drain.
- Look for pinholes in the grout that indicate air bubbles from a bad mix.
Why your installer skipped the critical leveling phase
In the rush to finish a job, many contractors ignore the pre-slope. They think the top layer of tile will fix any mistakes below. This is a lie. If the subfloor is not level, the mud bed will have varying thicknesses. A mud bed that is two inches thick in one corner and half an inch in another will dry at different rates. This creates internal tension. That tension eventually cracks the grout, releasing sand. The grit you feel is the sound of a floor that was rushed. I have seen fifteen thousand dollar walnut floors cup like potato chips for the same reason, installers ignore the moisture and the levelness of the site.
The sandpaper effect of polymer migration
Modern grouts are packed with polymers designed to make them flexible and water resistant. However, if the grout is worked too much with a wet sponge during cleanup, those polymers are sucked to the surface. They form a thin, brittle film. Over a few months of use, this film breaks apart. It doesn’t wash away. It stays on the floor as a jagged, microscopic debris field. This is the irony of the modern shower, the very chemicals meant to protect it can become the source of the discomfort if the mechanic with the sponge is lazy.
Repairing the texture without a total tear out
If the structural integrity is still there, you can sometimes save the floor. A deep clean with a pH-neutral stone soap followed by a high-quality penetrating sealer can lock down the remaining grout. But if the grit is from efflorescence, you have a drainage problem. No amount of sealer will fix a floor that is holding water like a sponge. In those cases, you are looking at a full removal of the tile and the mud bed to fix the slope. Never let a contractor tell you that a thick layer of thin-set will fix a level issue. It won’t. It will only shrink and crack.