I’ll never forget the morning I stepped into my shower, only to be greeted by a tangled web of cracked grout lines that made me wonder if my bathroom was waging a silent war. That lightbulb moment jumpstarted my journey to understand what causes shower grout to fail and how to fix it before it turns into a costly nightmare. If you’ve ever faced similar frustration—seeing cracks appear out of nowhere and feeling powerless—you know exactly what I mean. The good news? Most of these issues stem from common mistakes, and the solutions are simpler than you might think.
Why Your Shower Grout Cracks Could Be a Sign of Deeper Problems
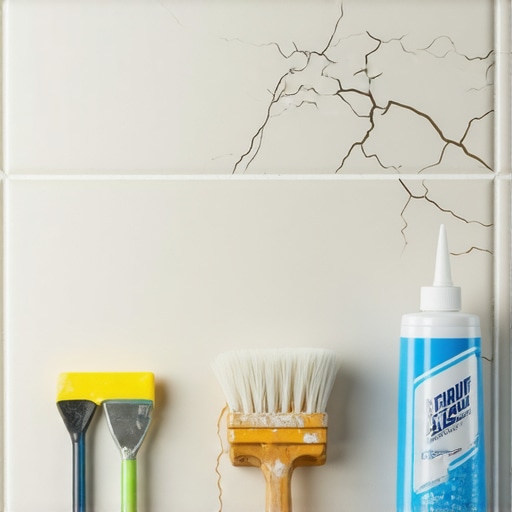
Cracked grout isn’t just a cosmetic issue; it can be a warning sign of underlying structural or installation flaws. Over time, these tiny fractures can lead to water seepage behind tiles, causing mold, mildew, and even damage to subflooring. According to industry experts, improper installation and poor preparation are among the top culprits behind grout failure in bathrooms. Addressing these root causes now can save you thousands down the line and ensure your shower remains a safe, water-tight sanctuary.
Is It Really Worth Fixing or Just a Cosmetic Flaw?
I was skeptical at first—thinking, “It’s just a little crack, how bad can it be?”—but I learned the hard way that ignoring grout issues can lead to extensive water damage. One early mistake I made was not properly inspecting the subfloor before tiling, which caused subtle shifts and cracks over time. Trust me, tackling grout problems promptly and correctly is essential. Want to learn how to avoid common mistakes that cause grout to crack? Check out some expert tips on shower renovation and ensure your project lasts.
So, are you tired of looking at unsightly cracks every time you step into your bathroom? Have you noticed water creeping behind tiles or mold forming where grout once was? If so, stay tuned. We’ll walk through the top three errors most homeowners make with shower grout and how to fix them effectively for 2026. Because nobody wants their beautiful bathroom to turn into a backyard slip ’n slide, right? Let’s turn this around together!
Start by removing all loose, cracked grout using a grout saw or a utility knife, applying firm but controlled pressure as if you’re trimming the tip of a fine brush. For a specific example, I once spent a Saturday chipping away old grout, which was like peeling layers off an onion—tedious but crucial for a clean slate. After clearing the cracks, vacuum the debris and wipe the tiles with a damp cloth to eliminate dust, ensuring adhesion of new grout. Proper preparation here prevents future issues, aligning with expert advice found here.”} ,{
Many homeowners and even seasoned contractors often buy into simplified notions about shower waterproofing, floor leveling, and flooring installations. These misconceptions can lead to costly mistakes. Let’s address some of the most pervasive myths and reveal the subtle nuances experts understand but are overlooked by DIY enthusiasts.
Myth Busting: More Adhesive Means Better Adhesion
A widespread belief is that applying excessive adhesive or sealant guarantees a long-lasting, leak-proof shower. In reality, over-application can trap moisture, impede proper curing, and even lead to mold growth. Proper surface preparation and correctly timed curing are far more effective than merely layering more material. For example, selecting the right waterproofing membrane and following manufacturer guidelines—as detailed in our shower renovation tips—ensures a reliable seal that withstands the test of time.
The ‘Seal and Forget’ Approach Is a Trap
Many believe that sealing the floor or shower walls once is sufficient. However, moisture intrusion can occur over time through tiny cracks or improper sealing joints. Regular maintenance and inspection are essential, especially in high-humidity areas. Ignoring these nuances often results in hidden leaks behind walls, which can cause devastating mold infestations. Recognizing these pitfalls underscores the importance of ongoing vigilance and professional-grade waterproofing techniques.
Why does proper subfloor preparation matter in laminate and carpet installations?
Advanced installers know that neglecting subfloor conditions is the leading cause of flooring failure. Minor dips, unevenness, or moisture issues can cause laminate click-lock mechanisms to misalign, squeak, or buckle over time. Carpet installations aren’t immune; improper floor leveling can lead to wrinkles and seam fraying. Experts recommend thorough subfloor testing—like the ones discussed here—to prevent these common mistakes. Addressing floor imperfections before laying the finish ensures a durable, smooth surface that lasts years.
It’s tempting to think that a quick DIY fix or skipping a step won’t impact the overall durability, but this is a trap big enough to swallow your renovation budget. Be cautious of shortcuts that overlook the nuances of material compatibility, humidity considerations, and detailed surface preparation. For instance, ignoring the significance of expansion gaps during laminate installation can lead to buckling as the floor reacts to temperature and moisture changes—more on this here.
What Advanced Homeowners Should Keep in Mind
For those seeking longevity, understanding the reasons behind common pitfalls is crucial. Experts emphasize that small oversights—like failing to level the subfloor correctly or using incompatible adhesives—are often responsible for major issues down the line. Scientific studies support meticulous surface preparation; for example, a report in the Journal of Flooring Science highlights that proper moisture barriers and precise leveling significantly reduce cracking and warping (source: here).
By focusing on these nuances, you can avoid costly repairs, improve your installation’s lifespan, and achieve superior results. Have you ever fallen into this trap? Let me know in the comments.
Maintaining your bathroom and flooring installations over time requires more than just initial effort; it demands the right tools, routine checkups, and a proactive approach. As an experienced DIY enthusiast, I’ve found that investing in specific equipment and adhering to maintenance routines significantly extends the lifespan of products like showers, laminate flooring, and carpets. This section delves into the essential tools I recommend and the best practices to ensure your installations remain flawless for years.
Invest in Quality Inspection and Cleaning Tools
Having a reliable moisture meter, such as the Protimeter Surveymaster, is indispensable for checking moisture levels beneath tiles or within subfloors. Routine moisture testing helps detect hidden leaks or rises in humidity that could undermine your flooring over time. For cleaning grout lines and tiles, I swear by ultrasonic grout cleaners—they efficiently remove deep-seated dirt without risking damage. Regular use of a grout sealer applicator ensures your grout remains water-resistant and prevents cracks or mold growth. Additionally, a damp-dry vacuum with HEPA filtration helps in removing dust, debris, and residual mold spores after repairs, maintaining a pristine environment.
Tools That Make Long-Term Upkeep Easier
To keep your laminate floors and carpets in top shape, tools like a floor roller and a carpet stretcher are worth every penny. A high-quality floor roller helps in pressing down new joints or seam strips, preventing gaps that can collect dirt or trap moisture. When it comes to carpets, a corded power stretcher ensures wrinkle-free installation and extends the carpet’s life by reducing wear and tear. Keep a set of touch-up repair kits — including color-matched filler compounds and sealants—on hand for minor repairs. These small investments enable quick fixes that can prevent larger, more costly issues from developing.
Routine Maintenance for Lasting Results
Implementing a maintenance schedule ensures your installations withstand daily wear. For showers, this means inspecting waterproofing seals and reapplying sealant every 2-3 years as needed, especially in high-traffic areas. For floor leveling and laminate, periodically checking for dips or bounciness and addressing them with self-leveling compounds before damage occurs is critical. When caring for carpets, regular stretching prevents seam fraying and wrinkles, prolonging both appearance and function. Adopting these routines consistently can save you from major overhauls down the line.
Future Trends in Maintenance and Tools
Looking ahead, digital moisture sensors and smart home systems are likely to become standard in home maintenance. These devices will provide real-time alerts about hidden leaks or uneven subfloors, making preventative care even more accessible. The integration of AI-driven diagnostics could revolutionize how we maintain floors and showers, predicting failures before they happen. To stay ahead, try implementing a digital moisture monitor in your bathroom—early detection of potential issues can save you significant repair costs.
If you haven’t already, I recommend experimenting with a professional-grade moisture meter to routinely check beneath your tiles and floors. This proactive step can help you catch problems early, safeguarding your investment and peace of mind. Remember, consistent maintenance using the right tools is the key to long-lasting beauty and function in your home.
For more expert insights, consider exploring how to build a curbless, leak-proof shower here. Integrate these practices into your routine, and you’ll be surprised at how much easier home upkeep becomes!
The Hardest Lesson I Learned About showers,floor leveling,laminate,carpet install
One of the most eye-opening lessons was realizing that rushing through surface preparation can set the stage for failure. I once tried to save time by skipping a thorough subfloor inspection, only to face cracks and buckling months later. Patience and attention to detail in the prep phase are your best allies for a durable, beautiful finish.
3 Myths About showers,floor leveling,laminate,carpet install That Held Me Back
Believing that more adhesive equals better adhesion, or that a single sealing step is enough, almost cost me dearly. Discarding these misconceptions and following expert advice, like proper moisture barriers and regular inspections, transformed my projects into lasting investments.
What Experts Won’t Tell You About showers,floor leveling,laminate,carpet install
Many professionals know that small, often-overlooked details—such as checking for moisture before installation or ensuring expansion gaps—are critical. These hidden nuances prevent issues before they arise, saving time and money in the long run. For instance, using a reliable moisture meter, like the Protimeter Surveymaster, keeps leaks at bay and extends your floor’s lifespan.
My Essential Toolkit for showers,floor leveling,laminate,carpet install
Equipping yourself with quality tools makes a notable difference. I swear by ultrasonic grout cleaners for deep cleaning, moisture meters for early detection, and a sturdy floor roller for secure seaming. These tools have empowered me to maintain flawless results and prevent costly repairs down the line.
Where to Go from Here
Start incorporating thorough inspections, proper surface preparation, and regular maintenance routines into your projects. Checking out resources like expert tips on plywood prep and common laminate expansion pitfalls can guide you in avoiding mistakes that lead to failure. Investing a little extra effort now will pay dividends with floors and showers that stand the test of time.
Your Turn to Try
Embrace these lessons, equip yourself thoughtfully, and stay vigilant with ongoing inspections. Your future self will thank you for the peace of mind that comes with a beautifully lasting installation. Have you ever made a small change that significantly improved your shower or flooring durability? Share your experience below—we’re in this journey together!
,