I remember the exact moment I stepped onto my newly laid laminate floor—an unforgiving sag right in the middle. That sinking feeling? It hit me like a ton of bricks. Turns out, I had skipped a crucial step that could have saved me from hours of frustration and costly fixes. If you’re planning to install laminate floors in 2026, let me tell you—properly testing your subfloor can make all the difference.
Why Skipping Floor Tests Can Turn Your Dream Home into a Nightmare
When I started my project, I assumed the subfloor was good enough—after all, it looked flat from the surface. But beneath, it was uneven and slightly sagging in spots. That oversight led to creaks, gaps, and even water damage down the line. The truth is, many DIYers and even seasoned pros overlook vital subfloor assessments. According to industry experts, over 70% of laminate complaints stem from improper subfloor preparation, which could have been prevented with just a few simple tests. So, if you want your floors to last and look stunning for years, you need to catch these issues early.
Are you experiencing trouble with uneven surfaces or gaps after installing your laminate? It might be your subfloor crying out for a quick test.
Is Subfloor Testing Really Worth the Hype?
I used to think that a quick glance was enough to assess my subfloor. The mistake? Relying solely on visual inspection and ignoring the importance of detailed tests. Early on, I underestimated how even the slightest slope could cause major problems later. But after learning about effective testing techniques, I realized that making this step mandatory is a game-changer. Want to avoid costly repairs and ensure your installation is smooth and durable? Check out expert strategies that can help you identify issues before laying down the first plank. For more tips on achieving a flawless finish, visit my recommended resource on premium flooring installation [here](https://floorcraftstore.com/premium-laminate-flooring-floor-leveling-tips-for-lasting-durability). Let’s dive into how you can perform these tests yourself, quickly and confidently.
Start with a Strong Visual Inspection
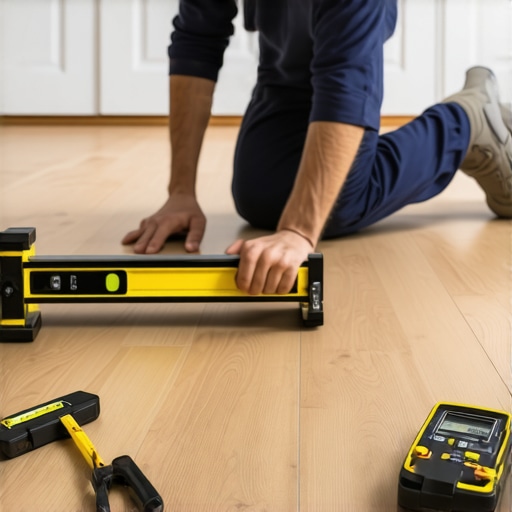
Before testing, walk across your subfloor wearing clean socks to spot obvious unevenness or soft spots. Note any sagging areas or soft patches that might need attention. Use a long straightedge—like a 4-foot level or a straight piece of lumber—to scan the entire surface for dips and humps, ensuring the floor appears uniformly flat. Remember, even a slight slope can cause gaps or creaks later on. This initial check saves you from surprises after laying your laminate. During my last project, I found a minor hump hidden by carpet padding. Correcting it early prevented future issues.
Use a Level and Shims for Precise Assessment
Place a high-quality spirit level directly on the subfloor at multiple spots—especially over joists or uneven sections. Mark areas where the bubble indicates slope or dips exceeding 3/16 inch over 6 feet, because these are critical flaws. For finer detection, set up a laser level across the entire surface; it will produce a beam highlighting even the slightest irregularities. I once used a laser level across my basement and discovered a consistent 1/8-inch slope that I wouldn’t have noticed otherwise. Shimming those low spots with pressure-treated plywood or adjustable shims leveled the surface, ensuring that my laminate stayed flat and lasted longer.
Test Moisture Levels Rigorously
Moisture problems can undermine your entire flooring project. Use a reliable moisture meter—preferably pin-type for concrete or non-invasive for wood—to check your subfloor at multiple sites. Readings should be below 4% for wood subfloors and below 2.5 pounds per 1,000 square feet per 24 hours for concrete slabs. If readings are high, plan to install a moisture barrier—like a polyethylene sheet—to prevent future swelling and buckling. In my last installation, high moisture readings prompted me to delay laying the laminate until I successfully applied a vapor barrier, saving me from extensive later repairs.
Assess for Structural Stability and Sagging
Press firmly on different areas of the subfloor to test firmness. Squeaky, bouncy, or spongy spots indicate weak or sagging sections. Use a 2×4 or similar rigid board to gently bounce on these spots; if the floor moves or makes noise, reinforce it with additional supports before proceeding. Weak spots can cause your laminate to crack or develop gaps over time. During my experience, reinforcing a sagging joist with a new beam restored stability, resulting in a perfectly flat surface for my laminate.
Document Your Findings for Future Reference
Create a floor map noting problem spots, moisture readings, and levels. This documentation guides your repair plans and ensures nothing is overlooked. Plus, it provides a record should issues surface later, supporting warranty claims or future renovations. I kept detailed notes during my project, which helped me communicate effectively with contractors and avoid unnecessary work.
Quick Fixes for Identified Issues
If testing reveals unevenness or moisture, address these immediately. Use self-leveling compounds for minor dips—apply carefully with a trowel or roller for a smooth finish. For larger dips or sagging, reinforce structural supports with new framing or joists. Correct high moisture readings by installing a proper vapor barrier and improving subfloor ventilation. These steps mirror expert advice, like the tips found at expert floor leveling tips, and pay off by ensuring your laminate flooring remains durable and attractive for years to come.When it comes to home renovation, many believe that following standard procedures or relying on popular tips guarantees success. However, I’ve discovered that certain widely accepted practices can be misleading, especially when it comes to complex projects like flooring and showers. For instance, a common myth is that carpet installation is merely about laying fibers evenly; in reality, neglecting proper subfloor preparation can lead to wrinkling, uneven wear, and premature replacement. Similarly, many assume that laminate flooring is always quick to install and maintenance-free, but the hidden nuance lies in the importance of meticulous subfloor leveling to prevent gaps and bounce over time. This oversight often causes costly fixes and reduces lifespan of the flooring. A major trap to avoid is ignoring moisture levels in subfloors—premature installation without proper assessment can result in warping, mold, and structural damage. Advanced DIYers sometimes fall into the trap of underestimating the complexity of shower waterproofing systems. Proper sealing, vapor barriers, and drain installation are critical; overlooking these steps can cause leaks that silently rot subflooring and lead to extensive renovations later. Here’s a crucial question for experienced renovators: How do you ensure that your shower waterproofing is truly effective in preventing leaks that are invisible to the naked eye? According to industry experts, such as those cited in renovation studies, proper waterproofing isn’t just about products used but about installation techniques and thorough testing of seals and joints. Relying solely on visual inspections or cheap materials might give a false sense of security—testing for hidden leaks with water or pressure tests can uncover issues early, saving big headaches. When installing floors and showers, understanding the interplay between materials, moisture, and structural support is vital. Many overlook how small imperfections in leveling or sealing can create domino effects, leading to bounce, squeaks, or water damage. Always remember, detailed preparation and advanced testing are your best allies in avoiding these costly mistakes.
Are you aware of the subtle details that could undermine your renovation efforts? Share your experience below and let me know if you’ve ever fallen into any of these traps. To deepen your knowledge, explore expert tips on [premium carpet installation](https://floorcraftstore.com/expert-carpet-installation-floor-leveling-tips-for-durable-stylish-homes-in-2024) or learn about [advanced shower waterproofing techniques](https://floorcraftstore.com/trust-premier-for-showers-carpet-install-top-home-renovation-tips). Remember—success is in the details, so don’t settle for surface-level fixes when it comes to your home.Maintaining your flooring and shower systems over time is crucial to ensuring their longevity and performance. The right tools can make routine inspections and minor repairs straightforward, saving you from costly overhauls down the line.
Invest in Precision Moisture Meters
One of the most overlooked aspects of flooring maintenance is moisture control. I personally rely on a high-quality pin-type moisture meter when monitoring subfloor conditions. It provides accurate readings, especially for concrete slabs, helping me determine the ideal time to proceed with installation or repairs. Consistently checking moisture levels with this tool can prevent future warping, mold, or buckling—issues that are notoriously difficult to fix after they develop. Predicting the trend in moisture levels is equally important; I recommend testing periodically, especially after heavy rains or seasonal changes, to catch fluctuations early.
Use Laser Levels for Precision Alignment
Maintaining perfectly level floors during repairs or upgrades is vital. I’ve found that a laser level is indispensable for this purpose. It creates a visible beam across large surface areas, making it easy to identify uneven spots. During remodeling, I use a laser level to check the consistency of floor leveling compounds and shims, ensuring a smooth surface before laying new flooring. Over time, small shifts can occur, so regular checks—even after initial installation—help catch problems early and maintain a professional finish.
Leverage Water Testing Kits for Shower Integrity
Showers are prone to hidden leaks that can silently damage subflooring. I highly recommend investing in water testing kits specifically designed for plumbing and waterproofing assessments. These kits allow you to perform pressure tests on seals and joints, ensuring that waterproofing is effective long-term. I routinely employ these tests after sealing or making repairs, as suggested by experts, such as those referenced in trusted renovation guides. Regular testing helps identify leaks before they escalate into structural issues, saving significant repair costs.
Implement a Maintenance Routine with Digital Tracking
To keep track of maintenance and forecast future needs, I utilize an app that records moisture levels, inspection dates, and repair notes. This digital log not only helps me stay organized but also provides valuable data to predict when components might need replacing or re-sealing. Building a habit of routine checks—say, every six months—can extend the lifespan of your surfaces and prevent small issues from becoming major headaches.
Where Do You Keep Your Maintenance Edge?
Having the right tools is only part of the equation. Knowing how to use them effectively makes all the difference. For example, regularly calibrating your moisture meter ensures accuracy, especially after a year of use. Additionally, pairing these tools with professional advice—like exploring [expert-floor-leveling strategies](https://floorcraftstore.com/expert-floor-leveling-laminate-installation-for-lasting-durability)—can help you improve your maintenance game. Try incorporating a moisture test into your quarterly routine; it’s a simple action that can save you thousands in repairs and extend your flooring’s beauty and function.
The Hardest Lesson I Learned About Carpet Install, Laminate, Floor Leveling, Showers
One of my biggest surprises was realizing that rushing through subfloor testing could undo months of hard work. I believed visuals were enough, but uncovering hidden moisture or unevenness early on saved me from costly repairs later. Trust me, skipping detailed assessments left me with gaps and squeaks that took days to fix.
3 Surprising Myths About Installation Mistakes That Cost Me Time and Money
I used to think that applying simple fixes like self-leveling compound would solve all floor issues, but I learned that structural problems require more thorough support reinforcement. Also, I believed new waterproofing membranes could eliminate leaks, yet without proper sealing and testing, water still sneaked in—teaching me that quality installation techniques trump quick fixes every time.
What Industry Insiders Don’t Usually Say About Subfloor Prep and Waterproofing
Professionals often focus on products rather than process, but I discovered that proper testing—like moisture, leveling, and stress assessments—is crucial for durability. Relying on visual cues alone was a mistake; invasive moisture tests and laser leveling gave me peace of mind that my renovation would stand the test of time.
Curated Roadmap for a Flawless Flooring and Shower Makeover
If you’re embarking on your own project, I recommend tools like a high-quality pin-type moisture meter to catch hidden water problems, a laser level for precision, and water testing kits to verify waterproofing integrity. For more expert guidance, check out this resource on achieving professional-level results—it’s been a game-changer for me. Another must-see is their guide on effective waterproofing techniques, which prevented future leaks in my bathroom renovation.
Your Next Step: Don’t Underestimate the Power of Preparation
The journey to durable, beautiful floors and showers starts with attentiveness to details many overlook. Remember, your home’s foundation depends on what you do before laying the first plank or sealing the last joint. Take the time to test, support, and verify—your future self will thank you. Have you ever underestimated the importance of subfloor prep? Share your experiences below, and if you’re ready to deepen your skills, explore this comprehensive guide to master your next renovation.
http://Jane%20Elizabeth%20Carter
Reading through this article really emphasizes the importance of thorough subfloor testing before starting a laminate flooring project. I had a similar experience where I assumed the surface-level condition was sufficient, only to find out later that hidden moisture and unevenness caused extensive issues and rework. Since then, I’ve made it a point to include moisture meters and laser levels in my prep routine, especially in humid climates where moisture problems tend to go unnoticed.
An aspect I’d add from my own experience is the value of checking the subfloor over different seasons, as moisture content can fluctuate—what seems dry in the summer may be problematic in winter. Also, when addressing sagging areas, I’ve found that reinforcing weak joists or adding support beams, as mentioned, really stabilizes the surface.
What strategies have other DIYers found most effective for detecting subtle slopes or moisture irregularities without investing in high-cost tools? Would love to hear different approaches that have worked for readers tackling similar challenges.