It was a mess. The kind of mess that makes you question your entire home renovation plan. I remember standing in my living room, staring at the uneven, lumpy carpet that I had just installed myself. It looked good in the store, but after a few weeks of wear, the seams started to curl, and the uneven floor underneath became painfully obvious. I felt like I had wasted my time, money, and most importantly, my patience.
That lightbulb moment taught me a vital lesson about house upgrades—especially when it comes to premium carpet installation and floor leveling. Without proper preparation, even the most luxurious materials can’t save you from frequent repairs and frustration. This realization pushed me to dig deeper, learn from my mistakes, and share what I’ve found about achieving lasting durability.
So, today, I promise to guide you through the critical steps that can make your home upgrades stand the test of time. From understanding the importance of perfect floor leveling to choosing the right materials, we’ll cover everything to ensure your renovation isn’t just beautiful, but also durable.
Getting the Foundation Right Is Half the Job
Before selecting that plush carpet or sleek laminate, there’s a fundamental step many overlook: ensuring a perfectly leveled surface. Think about it—if the floor isn’t smooth and even, all your efforts in choosing premium materials might be for nothing. Uneven floors can cause seams to stretch, laminate planks to buckle, and carpets to develop wrinkles that ruin the look and lifespan of your upgrades.
In my early days, I underestimated how crucial this step was. I simply laid down new flooring over the existing uneven surface, thinking it would be fine. Spoiler alert: it wasn’t. The floor developed creaks, and my carpet started to show bumps after just a couple of months.
Years of experience and countless projects later, I learned that proper floor leveling isn’t just a minor detail—it’s the foundation of a lasting installation. If you’re considering upgrading your flooring or carpets, I highly recommend checking out expert carpet floor leveling tips for durable home upgrades [here](https://floorcraftstore.com/expert-carpet-floor-leveling-tips-for-durable-home-upgrades). This resource is packed with practical advice that can save you from costly fixes later on.
And if you’re worried about the cost or effort, remember this—skimping on foundation work might save you a little upfront, but it often leads to more expenses down the road. Lasting durability begins with a solid, level base. Now, let’s look at how to identify and prepare your space effectively, avoiding common pitfalls and ensuring your investment truly pays off.
Start with Precise Floor Preparation
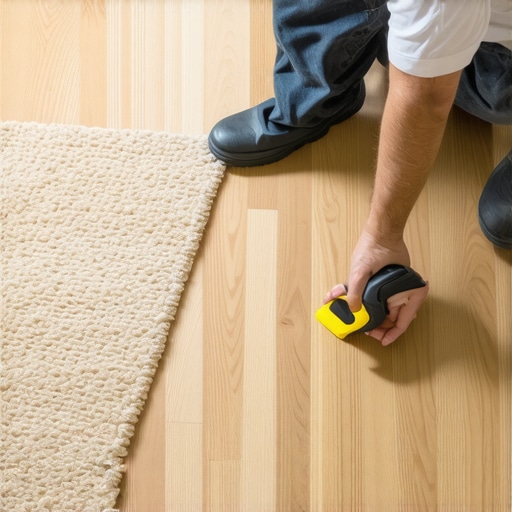
Before laying your new carpet or installing laminate, you must ensure the subfloor is perfectly flat. Think of it as preparing a canvas for a masterpiece—you want it smooth and even. Begin by removing existing flooring, debris, and imperfections. Rent a self-leveling compound mixer and spread the product over uneven areas, guided by expert carpet floor leveling tips for durable home upgrades. Use a long level or straightedge to check for dips or bumps, filling or sanding as necessary.
Choose the Correct Leveling Technique
Applying Self-Leveling Cement
This method is ideal for large dips and uneven surfaces. Pour the cement mix evenly across the floor, using a trowel to spread it out. Once dried, it provides a seamless, flat surface that prevents seams from stretching or buckling.
Sanding and Grinding
If minor imperfections exist, use a belt sander or grinder along the high spots. Be cautious not to create new dips; aim for a uniform surface. Remember, the goal is a smooth, sturdy base that resists shifting.
Address Moisture and Humidity
Test your subfloor for moisture with a proper meter. Excess moisture can cause adhesive failure or mold growth. If high moisture levels are detected, install a vapor barrier or opt for moisture-resistant underlayments to safeguard your investment.
Install a Quality Underlayment
An underlayment acts as a shock absorber and provides an additional leveling layer. Choose a product compatible with your flooring type—whether foam for laminate or felt for carpets. Properly roll out and secure the underlayment, avoiding overlaps or gaps that could cause unevenness or noise.
Lay the Flooring Material Carefully
Follow the manufacturer’s instructions meticulously. For laminate, click-lock planks should be installed with a slight expansion gap around the edges. Use spacers and a tapping block to ensure tight connections without damage. When installing carpets, stretch and secure the material properly using a power stretcher and tack strips, ensuring no wrinkles or looseness emerge over time.
Finish with Precise Seaming and Trimming
Align seams accurately for a seamless appearance. Use a quality seam roller and, if necessary, seam sealing glue to prevent separation. Trim excess carpet or laminate neatly against walls, vent openings, and other fixtures to create a clean, professional look.
During my own recent project, I faced a stubborn bump along one edge. Instead of rushing, I carefully ground down the high spot, checked level again, and re-laid that section. The result was a perfect transition—no bumps, no gaps—and a floor that maintained its durability for years. For more detailed advice on maintaining long-lasting floors, browse through expert carpet installation floor leveling advice for durable home upgrades.
Many homeowners and even DIY enthusiasts believe that a straightforward approach suffices when it comes to carpet installation, floor leveling, laminate, or shower upgrades. However, beneath the surface lies a web of misconceptions and subtle pitfalls that can compromise your project’s durability and appearance. Let’s dig deeper into the most overlooked details and myths that often lead to costly mistakes.
A prevalent myth is that laying new flooring over existing surfaces guarantees a flawless outcome. In truth, this shortcut often ignores subfloor irregularities that cause seams to stretch or buckle over time. Advanced installers know that meticulous assessment and preliminary leveling are crucial, as improperly prepared subfloors can undermine even premium materials. For an in-depth look, check out expert carpet floor leveling tips for durable home upgrades.
Another mistake involves underestimating moisture’s role, especially in bathrooms or basements. Many believe that sealing or ignoring humidity levels won’t affect long-term durability. However, moisture migration can lead to adhesive failure, mold growth, and warping, particularly in laminate or shower installations. Testing your subfloor with a proper moisture meter and considering vapor barriers can save you from future headaches.
When it comes to laminate flooring, a common misconception is that clicking planks are foolproof for DIYers. While these systems are designed for ease of installation, improper leveling or absence of expansion gaps can cause buckling and gaps. Remember, applying expert floor leveling techniques, like using self-leveling cement or precision sanding, is vital for lasting results.
In the realm of showers, many believe that tiling or waterproofing is secondary to aesthetic choices. Yet, neglecting proper waterproofing—such as sealant application at joints and using quality membranes—can lead to leaks, water damage, and mold. Expert shower waterproofing tips can make the difference between a durable upgrade and a future disaster.
### How can I ensure I don’t fall into these traps?
A key insight is that every detail matters—especially in scenarios where moisture, uneven surfaces, or layered materials are involved. For example, understanding the nuanced differences between leveling compounds and grinding techniques can radically improve longevity. Recognizing that sealing at the right moments and choosing compatible materials are often the subtle secrets of successful renovations.
This aligns with studies highlighting the importance of proper subfloor preparation in flooring longevity. Experts emphasize that neglecting these steps significantly reduces the lifespan of new installations. Incorporating advanced knowledge, like moisture testing and thorough surface assessment, transforms a good project into a lasting one.
So, have you ever fallen into one of these traps? Let me know in the comments. Remember, mastering these subtle nuances ensures your renovation not only looks great but also endures the test of time.Maintaining your newly installed flooring, carpets, or showers is as important as the initial upgrade itself. Having the right tools and understanding effective methods can dramatically extend the lifespan of your renovations. I personally rely on specialized equipment like laser levels and moisture meters to achieve precision in floor leveling and ensure long-term durability. For example, a **laser level** provides unparalleled accuracy when aligning laminate planks or tiles, eliminating unevenness that could cause problems down the line. Similarly, a **digital moisture meter** helps me detect hidden water issues that might compromise adhesives or cause mold—especially in bathrooms or basements—saving time and money later. Using these tools regularly during inspections or touch-ups keeps everything functioning smoothly and prevents small problems from escalating. Prediction-wise, the trend is moving toward smart, integrated tools that can connect to your smartphone and offer real-time diagnostics, making home maintenance more intuitive and proactive. If you’re serious about maintaining your upgrades, I recommend investing in a quality laser level and moisture meter, and integrating routine inspections into your annual home care schedule. How do I keep my flooring and showers in top shape over the years? The secret is consistent, informed maintenance—by monitoring moisture levels and realigning surfaces with precision tools. For instance, learn expert carpet floor leveling tips for durable home upgrades, which emphasize regular checking and minor adjustments before issues develop. Try implementing a quarterly moisture scan or laser-guided realignment, and you’ll notice your investments last much longer, saving you from costly repairs. Remember, the right tools are the backbone of effective maintenance—trusted solutions like those available at Floor Craft can make all the difference.
Unspoken Lessons That Changed My Approach
The toughest lesson I learned was that skipping precise floor leveling can turn a beautiful renovation into a maintenance nightmare. I once thought a quick fix over uneven surfaces would suffice, but soon experienced seams stretching and carpets wrinkling, forcing costly repairs. Realizing that meticulous preparation is the backbone of longevity transformed my projects. Now I always prioritize thorough surface assessment, like using expert carpet floor leveling tips for durable home upgrades, before laying any new material.
Another surprise was how much moisture affects the integrity of flooring and showers. I used to ignore moisture testing, assuming sealing was enough. But hidden water issues caused adhesives to fail and mold to develop, especially in bathrooms. Now, I carry a moisture meter to ensure a dry, stable base. Investing in high-quality vapor barriers and understanding proper waterproofing techniques—such as those outlined in trusted shower waterproofing resources—has saved me from future chaos.
A third insight was the myth that DIY-friendly click-lock laminate planks could replace professional leveling. I learned that even the smartest systems need a perfectly flat foundation. Applying expert floor leveling techniques, like self-leveling cement, ensures the planks stay secure and look seamless. For lasting results, I consult trusted guides on laminate flooring floor leveling tips, which have proven invaluable in my renovation toolbox.
Tools and Resources That Steady My Hand
Over time, I’ve come to rely on professional-grade tools to guarantee quality work. A laser level is my go-to for precise alignment, preventing uneven seams that might compromise durability. Moisture meters are essential for early detection of water issues in showers and basements, avoiding costly repairs later. Additionally, I recommend checking out the comprehensive resources offered by expert carpet floor leveling tips for durable home upgrades—they’ve been transformative for my projects.
For those aiming to elevate their DIY skills, professional tutorials and recommended tools can bridge the gap between good and great. The right equipment makes a tangible difference in achieving a finish that lasts, aligning with the best practices shared by seasoned renovators.
Stepping Into Your Renovation Journey with Confidence
The future of home upgrades lies in embracing the nuances—every surface, every material, every detail matters. From mastering floor leveling techniques to understanding waterproofing essentials, your efforts can create a space that endures and delights. Remember, the most significant change starts with the decision to act today. Whether you’re laying a new carpet or installing a shower, approach each step with patience and care, and your home will reward you.
So, are you ready to tackle your next project armed with newfound knowledge? Share your experience or ask questions below—every step you take brings you closer to a home that’s both beautiful and built to last.
http://Jessica%20Turner
Your story really resonates with me. I’ve had similar experiences where rushing into a flooring project without proper leveling led to sagging seams and constant troubleshooting. It’s incredible how much a flat, well-prepared surface can make a difference in the overall durability and appearance of your floors. I especially appreciate the emphasis on moisture testing—something I used to overlook. In humid areas like basements, that step truly is vital to prevent mold and adhesive failure down the road.
What methods or tools have you found most effective for quick and accurate moisture testing at home? I’m curious whether a digital meter is worth the investment or if traditional methods like the plastic bag test still hold value for DIYers. Sharing these insights could help others avoid costly mistakes early on. Overall, I believe the extra effort in proper leveling and moisture control pays off long-term, saving both time and money. Thanks for such an insightful post—definitely a good reminder that the foundation of a beautiful upgrade is in the prep work.
http://Michael%20Johnson
Your story really hits home for me. I’ve experienced similar frustrations with uneven floors leading to wrinkled carpets and unstable steps. It’s amazing how much difference proper floor preparation can make—something I learned the hard way early in my DIY projects. I also used to underestimate the importance of moisture testing, especially in older homes or in humid climates, which can cause a lot of long-term issues like mold or adhesive failure. Since investing in a quality moisture meter, I’ve seen a significant improvement in the durability of my floors and a reduction in future repairs.
Regarding moisture testing, I found that digital meters provide quick, accurate readings and are worth the investment if you plan to do several renovations. Have you tried any specific brands or models that offer reliable results? Also, I’m curious about your experience with different leveling techniques—do you prefer self-leveling cement over grinding and sanding? I’d love to hear what has worked best for you in ensuring a perfectly flat foundation. Thanks for sharing this detailed guide; it’s a great reminder that solid foundation work is truly the backbone of a lasting renovation.
http://David%20Carter
Reading your insights really hits home for me, especially about the importance of thorough floor prep before installing new flooring or carpeting. I once tried to save time by skipping some leveling when renovating my basement, thinking the new carpet would hide minor imperfections. Unfortunately, that led to bumps and wrinkles that I had to address later, not to mention the uneven seams in my new laminate flooring. Since then, I’ve learned that investing time in proper leveling and moisture testing is crucial.
In my experience, a good digital moisture meter has been invaluable—being able to detect hidden moisture early on really helps prevent long-term problems like mold or adhesive failure. I’ve also found that self-leveling cement does a fantastic job for large dips, providing a seamless surface that holds up over time. I’m curious, do you think that combining both self-leveling compounds and meticulous sanding provides the best results, or is one approach sufficient? Also, what’s your take on the best brands for reliable moisture meters? Your post has reminded me just how much detail matters in ensuring a durable upgrade. Thanks for sharing such practical advice!