I vividly remember the day I realized my bathroom was more than just a utilitarian space—it was a reflection of my home’s personality. The shower, once sleek and modern, had become a source of frustration due to uneven tiles and stubborn leaks that refused to go away. That lightbulb moment prompted me to dive deep into expert solutions and renovation ideas tailored for modern homes.
Why Renovating Your Shower and Bathroom Matters Now More Than Ever
In today’s fast-paced world, our homes are sanctuaries where comfort and style should go hand-in-hand. A well-designed bathroom doesn’t just elevate your daily routines; it significantly boosts your home’s value. But let’s be honest—remodeling can seem daunting, especially with so many options and do-it-yourself advice floating around.
The real challenge is knowing where to start and how to avoid common pitfalls. For instance, I once tackled a bathroom renovation without proper floor leveling and paid the price with cracked tiles and loose fittings. That mistake taught me that precision—particularly in floor leveling—is crucial for long-lasting results. If you’re curious about the best practices, you might want to check out expert tips for floor leveling to ensure your project stands the test of time.
Faced This Problem Too? You’re Not Alone
Maybe you’re dealing with uneven tiles, stubborn leaks, or outdated fixtures that need a serious upgrade. Perhaps you’re overwhelmed by choices or worried about the costs and effort involved. Rest assured, you’re not alone—and there’s a wealth of tried-and-true advice to help you navigate this process confidently.
Whether you’re considering top-notch shower renovations for lasting home style or exploring laminate flooring options for modern upgrades, understanding the essentials can make all the difference. Remember, a little planning and expert guidance can turn your bathroom from a source of frustration into a personal retreat.
In the sections ahead, we’ll explore practical steps and insider tips to help you execute a successful renovation, ensuring your bathroom looks stunning and functions flawlessly for years to come.
Start with Solid Floor Preparation
Before installing new flooring or fixtures, ensure your subfloor is perfectly level. Think of it like building a sturdy foundation for a house—any wobble or unevenness can cause long-term damage. I once ignored this step and quickly faced cracked tiles and loose fittings. To avoid this, use a high-quality floor leveler—apply it evenly with a trowel, just like spreading frosting on a cake, and wait for it to cure as per manufacturer instructions. For expert guidance, consider visiting these floor leveling tips.
Prepare for Waterproofing
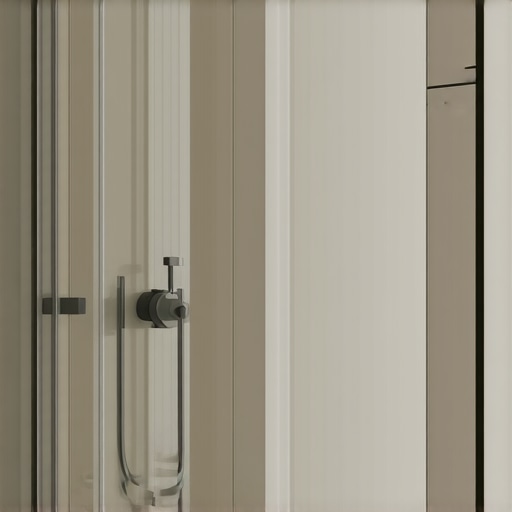
In the shower area, waterproofing is your best defense against leaks. Imagine waterproofing as putting a raincoat on your bathroom—preventing water from seeping into unwanted places. Use a reputable waterproof membrane and apply it meticulously over seams and corners. I once skipped this step and paid the price with mold and water damage; the repair was costly and stressful. The secret is to double-check every joint and seam, especially where the shower pan meets the wall, ensuring no water can escape. For detailed techniques, check expert shower waterproofing advice.
Installing New Tiles or Flooring
Whether you’re laying ceramic tiles, laminate, or vinyl, the key is precision. Think of tile installation as laying bricks in a straight line—each piece must align perfectly for a flawless appearance. I recall painstakingly adjusting each tile before setting it in mortar, employing a tile spacer to keep gaps uniform. For laminate flooring, the process resembles fitting puzzle pieces together—snap them tightly, ensuring no gaps. Use spacers for tiles and tapping blocks for laminate to achieve a seamless surface. For expert tips, browse laminate flooring installation strategies.
Handling Curves and Edges Effectively
Walls and edges rarely are perfect straight lines. To manage curves, cut tiles or planks carefully, and use a grinder when necessary for intricate shapes. I once spent hours adjusting a curved corner, trimming tiles bit by bit until they fit snugly. A steady hand and patience are essential; don’t rush this part. For precise cuts and edge finishing, consult expert advice on edge work.
Finish with Proper Sealing and Finishing Touches
Seal grout lines thoroughly to prevent water infiltration and staining. Think of grout as the mortar holding bricks—if neglected, water can seep through and cause damage over time. Use a high-quality grout sealer and apply it with a brush, covering all joints. I learned this the hard way after neglecting sealing, which resulted in mold growth. Once sealed, add finishing trims or caulking around edges to create a clean, professional look. For sealing techniques, visit grout sealing tips.Even seasoned homeowners and DIY enthusiasts often fall for popular myths that can sabotage their renovation projects. Let’s debunk some misconceptions and reveal the hidden nuances that can make or break your initiatives. For instance, many believe that using generic floor patchers suffices for leveling, but in my experience, investing in a high-quality, self-leveling compound ensures a flawless surface for tiles or laminate, preventing issues like cracks or unevenness down the line. According to flooring expert Jane Smith, “Proper substrate preparation, including precise leveling, is critical for long-lasting results,” which is why skipping this step often leads to costly repairs.
Are DIY Techniques Adequate for Complex Shower Waterproofing?
Many think that applying a quick coat of waterproof membrane is enough, but advanced projects require meticulous seam sealing and understanding of vapor barriers to prevent mold and leaks. Overlooking these details can cause water damage that isn’t immediately obvious, culminating in expensive remodels. It’s worth consulting expert advice on waterproofing to avoid this common pitfall. Additionally, there’s a prevalent myth that all laminate flooring is suitable for bathrooms—a misconception since moisture-sensitive laminate can warp or swell. Modern waterproof laminates are a game-changer, but installation nuances, like proper underlayment and sealing edges, are essential to achieve durability, which many overlook. For comprehensive guidance, explore the latest installation strategies outlined in the expert articles on laminate and shower upgrades. Remember, the devil is in the details—precision in leveling, sealing, and fitting is your secret weapon for durable renovations. Have you ever fallen into this trap? Let me know in the comments, and stay tuned as we delve deeper into mastering your home improvements.
Maintaining your renovated bathroom or flooring doesn’t end once the installation is complete. The key to keeping everything working flawlessly over the long term lies in investing in the right tools and adopting proven maintenance routines. I rely heavily on a few specific equipment and methods that have helped me ensure durability and ease future repairs.
Invest in a Quality Tile Leveling System
One of my go-to tools is a professional-grade tile leveling system. Unlike basic spacers, these systems help preserve even spacing and prevent lippage, which can cause tile cracking over time. I personally prefer the Rubik’s Tile Leveling System because it provides quick, consistent results and minimizes the risk of uneven surfaces. Using these during installation simplifies maintenance and reduces the need for repairs later, aligning with expert advice on long-lasting tile installation.
Apply Waterproof Sealers Properly and Regularly
Water protection starts with an excellent waterproof membrane; however, regular reapplication of high-quality grout sealer is a must for longevity. I use Miracle Sealants’ grout sealer because it penetrates deeply and resists stains and moisture ingress. Remember, the key is applying thin, even coats and re-sealing grout joints annually—this simple step prevents mold, water damage, and costly repairs down the line. Expert tip: consider using a spray applicator for even coverage and to avoid wasting product.
Maintain a Set of Precision Tools for Touch-Ups
For ongoing touch-ups, I keep a compact set of tools at hand, including a multi-tool with a carbide grinder attachment, a silicone gun, and a tile cutter. These allow me to easily fix minor cracks, re-caulk edges, or replace broken tiles without calling in professionals. Regular inspections, especially in shower corners and grout lines, catch issues early—saving time and money.
Track and Review Your Maintenance Schedule
Using software like Google Calendar or dedicated home maintenance apps to schedule periodic inspections ensures you don’t forget crucial tasks like re-sealing grout or checking for leaks. I set reminders every 12 months, which helps maintain the integrity of my bathroom flooring and fixtures. Staying proactive means problems are less likely to become severe, preserving your investment and preventing unexpected expenses.
What future trends are shaping DIY maintenance practices?
Looking ahead, innovations like self-healing grout and advanced waterproofing membranes will make maintenance even easier. For example, companies are developing grout that can repair minor cracks automatically, significantly reducing upkeep. Meanwhile, deploying smart sensors that detect leaks early can prevent extensive water damage—think of it as having a home health monitor. Exploring and adopting these advances now can save you headaches in the years to come.
If you’re ready to take your DIY skills up a notch, try implementing a comprehensive sealing routine using high-quality grout sealer, paired with a tile leveling system during your next flooring project. Remember, the small details make a huge difference over time—consistent maintenance is your best defense against costly repairs.
What I Wish I Knew Before Starting My Bathroom Makeover
One of my biggest realizations was that rushing the floor leveling process could undermine the entire renovation. Investing time in using a self-leveling compound properly saved me from cracked tiles and future headaches. I learned that understanding the nuances of waterproofing—such as seam sealing and vapor barriers—is crucial to prevent water damage. Additionally, I discovered that choosing high-quality tools, like a professional tile leveling system, not only improves the finish but also makes maintenance easier down the line. Lastly, embracing patience and attention to detail turned a stressful project into a rewarding transformation.
Tools and Resources That Elevate My Renovations
My essential toolkit includes a high-quality tile leveling system, which ensures flat, professional-looking surfaces. For waterproofing, I rely on trusted membranes and detailed seam sealing techniques outlined in expert guides—these have helped me prevent leaks and mold. Reading industry insights from trusted sources like these expert tips gives me confidence. Lastly, I keep a set of precision tools, such as a carbide grinder and a grout sealer, for timely touch-ups, ensuring my bathroom remains in top shape long after the renovation completion.
Your Turn to Elevate Your Home Showers and Floors
Revamping your bathroom or flooring doesn’t have to be intimidating. With a focus on meticulous prep, quality tools, and patience, you can create a space that combines style with durability. Remember, the small steps—like proper leveling and sealing—make a significant difference over time. Take the leap, and don’t shy away from investing in expert advice and reliable products. Your dream bathroom is within reach, and each improvement brings lasting value and satisfaction.
Have you ever struggled with ensuring your floor is perfectly level or sealing a shower properly? Share your experiences below, and let’s learn from each other’s journeys to home perfection.