It was a typical Saturday morning when I stepped into my living room and immediately felt that unsettling bounciness under my feet. Turns out, I had overlooked a crucial step in my flooring project—something so simple, yet it cost me months of frustration. That lightbulb moment made me realize how many DIY enthusiasts and homeowners face the same problem: a beautiful laminate floor ruined by preventable mistakes.
If you’re planning to install or upgrade your flooring, you’ve probably seen endless tips online. But honestly, without knowing what to avoid, even the best-looking floors can become a nightmare sooner than you think. Over the years, I’ve learned that paying attention to details like proper leveling and installation techniques is the secret to durability and long-lasting beauty.
Why Skipping Proper Floor Leveling Can Cost You Big Time
Here’s the deal: uneven subfloors are more than just an aesthetic annoyance—they can cause your laminate flooring to warp, crack, or buckle over time. I learned this the hard way early in my DIY journey when I decided to skip the step of precisely leveling my subfloor. The result? A year later, I was dealing with creaking boards and uneven surfaces. Not exactly the modern, sleek look I envisioned.
Investing in quality underlayment and taking the time to level your subfloor might seem tedious, but it’s the foundation of a durable laminate floor. For detailed guidance on this critical step, I recommend checking out these expert laminate leveling tips. Proper leveling not only improves appearance but also prevents issues like gaps and uneven wear.
Now, are you wondering how to achieve a perfectly flat surface? Stay tuned, because in the next sections, I’ll walk you through proven strategies to ensure your flooring project is a lasting success. Trust me—skipping these steps might save time upfront, but it will cost you more in repairs and frustration down the line.
Are laminate floors really that fragile or just poorly installed?
This is a common skepticism I encounter. Honestly, laminate flooring is quite durable when installed correctly. My mistake was rushing through initial steps, which led to premature damage. The good news? With the right techniques, your laminate can stand up to years of wear and tear.
Remember, excellent installation isn’t about cutting corners; it’s about building a solid foundation. So, if you want to avoid the pitfalls I faced and ensure your floors stay beautiful and functional, keep reading. The next tips will help you sidestep the costly mistakes many make before realizing the importance of meticulous preparation and correct techniques in floor installation.
Preparing the Subfloor for Success
My first attempt at leveling the subfloor was a messy affair. I used a basic self-leveling compound and neglected to remove debris or fill significant dips. The result? An uneven surface that caused creaking and gaps. To avoid this, thoroughly clean the area—vacuum and wipe down—to ensure a smooth application. When applying leveling compound, follow the manufacturer’s instructions precisely, mixing it to the right consistency and pouring in thin layers. Use a straightedge or long level to check progression, aiming for a flat, even surface. For detailed techniques, visit these leveling tips that emphasize preparation and application. Consistent checks during curing help catch minor imperfections early, preventing headaches later.
Laying the Underlayment Efficiently
Now, think of underlayment as the shock absorber for your laminate floors. I once skipped this step, thinking it was optional, but soon faced squeaks and temperature fluctuations. To install effectively, roll out the underlayment in the same direction as your planks, overlapping seams by at least 10 inches and taping them securely to prevent shifting. This creates a uniform cushion that insulates sound and prevents moisture issues. For optimal results, choose an underlayment compatible with your environment—cork, foam, or combination—based on your needs. Proper installation ensures your floor remains stable over time, as explained thoroughly in these installation strategies.
Planning the Layout for Seamless Appearance
Before laying the first plank, measure the room carefully—especially for rooms with irregular walls or obstacles. I used a chalk line to mark a reference line, ensuring the planks aligned perfectly from the start. Staggering joint lines by at least 16 inches prevents weak spots and enhances visual continuity. When cutting planks, use a fine-tooth saw for cleaner edges, and maintain a consistent gap of 1/4 inch around walls for expansion. During installation, I kept my tools within reach, working systematically across sections to minimize mistakes. For detailed layout tips, check these layout strategies, designed to make your project smoother and more professional-looking.
Installing the Laminate with Precision
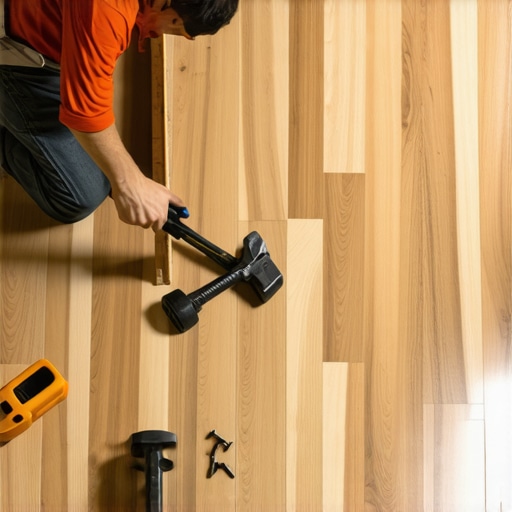
Connecting the planks securely is crucial. I employed the click-lock system, gently but firmly pressing edges until they snapped into place. Using spacers, I maintained the recommended expansion gap—usually 1/4 inch—to accommodate natural expansion and contraction. I also used a tapping block and mallet to snug joints without damaging the surface. When working in tight corners or around fixtures, I measured and cut carefully, avoiding force that could damage the lock system. This meticulous approach guarantees a tight fit, reducing gaps and improving the floor’s durability. For expert advice on installation techniques, visit these detailed instructions.
Sealing and Finishing Your Floor
Once the planks are in place, remove spacers and install baseboards or moldings to hide expansion gaps, ensuring a clean, finished look. I used a flooring sealant around edges near doorways to prevent moisture ingress, which can cause swelling over time. Regular cleaning with a damp mop (avoiding excess water) preserves the surface, while protective pads on furniture prevent scratches. Properly sealing and finishing your laminate floor protects your investment and extends its lifespan—simple steps that make a big difference in long-term performance.
Many homeowners and even seasoned DIYers often believe they understand the fundamentals of installing showers, carpets, or laminate floors, but beneath the surface lie subtle nuances that can make or break your project. Let’s dig deeper into some of the most overlooked pitfalls that can trip you up and how to avoid them with expert knowledge.
Don’t Fall for the Myth That All Moisture Barriers Are the Same
A widespread misconception is that any vapor barrier will do the job when installing showers or flooring. In reality, not all barriers are created equal. Poor-quality moisture barriers can fail over time, allowing water vapor to seep through, leading to mold, mildew, and structural damage. For showers, using a high-grade waterproofing membrane is essential, especially around corners and seams. When dealing with laminate flooring, failure to choose the correct underlayment or vapor barrier can result in buckling or warping—problems that are costly to fix later. For a comprehensive approach, consider professional-grade solutions, and check out these shower waterproofing tips to ensure your installation withstands moisture for years.
Maintaining Perfect Subfloor Levelness Is More Complex Than It Looks
Many assume that a quick floor leveling process using self-leveling compounds is sufficient, but advanced projects demand meticulous attention to subfloor preparation. An uneven subfloor may seem negligible initially, but over time, it can cause laminate planks to separate, squeak, or crack prematurely. The key is understanding the subtle differences between surface dips and structural dips—sometimes, what appears minor can lead to significant issues. Experts recommend a detailed inspection, including checking for moisture content and structural stability before applying leveling products. Achieving a truly flat surface requires skillful assessment and multiple layers of repair if necessary. For pros’ secrets, visit these advanced leveling methods.
Is It True That Carpet Installation Is Just About Stretching?
This is a common oversimplification. While stretching is a crucial step, many neglect that proper padding selection and subfloor preparation are equally important. Poor padding can lead to uneven wear, increased noise, and matting—shortening your carpet’s lifespan. Additionally, neglecting the importance of a clean, level subfloor can allow wrinkles and bubbles to form, ruining the finished look. Advanced installers emphasize the importance of precise measurements, selecting the right padding for your environment (like moisture-resistant foam for basements), and meticulous seam sealing. For detailed guidance, explore these carpet installation insights.
What Are the Hidden Dangers of Ignoring Advanced Preparation?
Overlooking the nuanced steps—like verifying subfloor moisture levels or choosing appropriate materials—can lead to costly regrets. For example, failing to account for seasonal expansion in laminate flooring can cause gaps or buckling, especially in fluctuating climates. Experts highlight that proactive measures, such as climate-controlled environments during installation and proper acclimation of materials, are essential for long-term success. According to industry research, improper preparation accounts for over 70% of post-installation failures (source: Home Improvement Journal). Don’t underestimate the importance of these hidden details—your future self will thank you. Have you ever fallen into this trap? Let me know in the comments.
Keep It Working With the Right Tools and Maintenance Routines
Achieving professional-grade results in flooring and shower projects isn’t just about initial installation—it’s equally about proper upkeep and using the right tools over time. One game-changer I personally rely on is a high-quality oscillating multi-tool. Its versatility allows me to make precise cuts around fixtures, clean grout lines, and even remove stubborn sealants without damaging surrounding surfaces. The adjustable speed and variety of blades mean I can customize my approach, whether I’m sanding uneven edges or scratching away hardened debris in tight corners.
Another essential piece in my toolkit is a digital moisture meter. Moisture levels in subfloors and underlying structures heavily influence long-term durability. I measure regularly—especially before new projects—to prevent issues like warping or mold. For ongoing maintenance of laminate floors, I recommend a microfiber dust mop combined with a pH-balanced cleaner to keep the surface pristine without stripping protective coatings. These small routines preserve the beauty and integrity of your investment.
Predicting Future Trends: Smarter, More Sustainable Solutions
Looking ahead, I believe the industry will see a shift towards smarter tools equipped with IoT capabilities. Imagine sensors embedded in your flooring that alert you to moisture buildup or structural shifts before visible damage occurs. This proactive approach could revolutionize maintenance, saving homeowners from costly repairs. Additionally, eco-friendly materials and tools will become standard, reducing environmental impact while maintaining high performance.
How do I keep my installations functioning smoothly over time?
Consistent inspections are key. Schedule biannual checks of grout, sealants, and underlayment for showers; look for signs of deterioration or moisture intrusion. For floors, keep an eye on expanding or contracting seams—especially during seasonal fluctuations—and address minor issues promptly. Using specialized cleaning equipment like steam cleaners for grout and applying penetrative sealers can extend the life of your surfaces significantly.
To ensure long-lasting results, I highly recommend regularly updating your maintenance routines based on the latest industry techniques. For example, the use of professional-grade waterproofing membranes around shower bases can dramatically reduce leaks, as outlined in this expert guide. Implementing such advanced tips now will save you time and money in the future.
If you’re serious about keeping your floors and showers working flawlessly, try integrating a digital moisture meter into your routine. Monitoring moisture levels before and after installations ensures your work is genuinely durable and resistant to issues caused by unseen water intrusion.
Remember, investing in the right tools and maintenance habits isn’t just about fixing problems—it’s about preventing them and extending the life of your home upgrades.
Why I Had to Learn the Hard Way About Proper Subfloor Preparation
One of the most eye-opening lessons I learned was the importance of thorough moisture testing before laying down laminate or installing showers. Rushing this step led to repairs that cost me more than I’d anticipated. Now, I always use a reliable digital moisture meter, and it’s become my secret weapon for successful installations. Skipping this detail can turn your project into a long-term headache.
How a Simple Mistake Can Ruin Your Home Upgrade
Not leveling the subfloor correctly seemed minor at first, but it caused uneven wear and squeaks within months. It made me realize that investing extra time in proper leveling and using high-quality underlayment pays off in durability and appearance. For comprehensive guidance, I highly recommend checking these expert laminate leveling tips.
What No One Tells You About Moisture Barriers
I used a generic vapor barrier for my shower renovation, thinking it would suffice. That mistake led to moisture buildup and mold. It taught me that not all barriers are created equal, and choosing a waterproof membrane suited for showers is crucial. Proper sealing and materials make a difference that you can’t see until it’s too late—so trust the pros and do your research.
The Hidden Cost of Cutting Corners on Materials
Opting for cheap underlayment or sealants might save money upfront but can cause long-term issues like buckling, mold, or damage. I learned that quality materials, though seemingly more expensive, ensure the longevity of your flooring and shower. Explore the best products through trusted sources like these renovation strategies.
Embracing the Right Tools for Success
Investing in a good oscillating multi-tool transformed my ability to make precise cuts and remove old sealants cleanly. Paired with a moisture meter, these tools help me catch problems early and handle tricky spots effortlessly. Remember, the right equipment empowers you to achieve professional results, even if you’re DIY-ing your home’s upgrades.
From My Experience to Your Home
Every mistake I made taught me something valuable—these lessons are now your shortcut to avoiding costly blunders. Thorough preparation, quality materials, and proper tools are the foundation of durable, beautiful upgrades. If I could go back, I’d tell myself to never underestimate the power of detailed planning and expert guidance. Your home deserves the best, and your efforts will be rewarded in comfort and longevity.
My Top Resource Picks for Seamless Installations
First, the comprehensive laminate floor leveling guide has saved me countless headaches by showing how to achieve a flat, stable surface. Second, these shower waterproofing tips helped me seal around edges correctly. Third, a durable, high-quality underlayment—recommended by industry pros—sets the stage for long-lasting floors. Trusting expert-tested resources makes all the difference in your project’s success.
Now, It’s Your Turn to Make It Happen
Remember, mastering your flooring and shower upgrades isn’t just about tools or materials—it’s about the confidence to follow through with care and attention to detail. Small steps today can prevent big headaches tomorrow. Are you ready to tackle your next home improvement project with a fresh perspective and newfound knowledge? Share your plans or questions below—I’d love to hear about your journey!