Ever spend hours installing a new carpet only to find it wrinkling, bubbling, or uneven within just a few months? I’ve been there. That lightbulb moment hit me hard when I realized my rushed, half-hearted approach to floor leveling was the real culprit behind those frustrating issues. It’s a classic mistake many homeowners and even some pros make early on—skipping proper preparation and underestimating the importance of expert techniques.
Why Proper Carpet Installation and Floor Leveling Are Game Changers
When I first started tackling home upgrades, I thought, “How hard can it be?” Turns out, quite a lot. Without a solid foundation, your beautiful new carpet or laminate won’t last. I learned that the secret lies in meticulous preparation—especially in leveling the floor. A level surface not only looks better but also prevents future problems like buckling, tearing, or uneven wear. If you’re aiming for a space that stays pristine and durable, investing in expert carpet installation & floor leveling is non-negotiable. For those ready to elevate their home quality, I recommend checking out this guide on professional leveling tips.
Is Skipping Floor Leveling Really That Big of a Deal?
Trust me, I used to think minor unevenness was just an aesthetic issue. But I learned the hard way that even small dips can cause big headaches down the line. My early mistake? Overlooking the importance of proper floor prep—something I now know is crucial. According to industry experts, floor leveling can extend the life of your flooring by years and save you money in repairs or replacements. If you’ve ever wondered whether investing in professional leveling is worth it, the answer is a resounding yes. My experience taught me that a little extra effort upfront results in a much more durable, beautiful finish. Want to dive deeper? Check out these tips for lasting home upgrades.
Now, let’s get into the practical steps that will help you achieve a flawless, durable flooring installation—because your home deserves nothing less.
Prepare the Floor Surface Meticulously
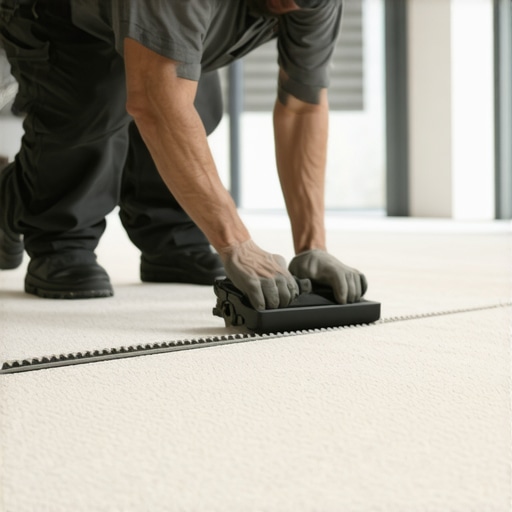
Start by clearing the entire area, removing old flooring, nails, and debris to create a clean workspace. Use a pry bar to lift stubborn sections carefully, avoiding damage to the subfloor. Next, inspect for uneven patches, cracks, or squeaks. For instance, I once tackled a project where a section of my living room floor had a noticeable dip. I used a straightedge and a level to identify the low spot, which was about half an inch lower than surrounding areas. Recognizing this early saved me headaches later.
Assess and Mark High and Low Spots
Use a long spirit level or laser level for accuracy. Mark the problem areas with chalk or painter’s tape. This visual guide helps you focus your leveling efforts effectively. Remember, a truly level floor is the foundation for durable carpet and laminate installation. I find that taking my time here prevents rushing into uneven results.
Apply Floor Leveling Compound Correctly
Mix the self-leveling compound as per manufacturer instructions. It’s crucial to work quickly; the mixture starts to set within 10-15 minutes. Pour the compound into low spots, starting from the furthest corner, and use a trowel or smoothing tool to spread it evenly. During my first attempt, I poured too much at once, causing it to pool in corners. Learning to work in sections and using a gauge rake helped me spread the compound thin and smooth, resulting in a perfectly flat surface.
Allow Adequate Drying
Let the compound cure fully—usually 24 hours—before proceeding. Rushing this step risks cracking or shifting. I once skipped the full drying time and ended up with an uneven floor that caused my new carpet to ripple. Patience here ensures longevity and a uniform surface for installation.
Install the Carpet or Laminate Carefully
Lay down a moisture barrier if needed, then position your carpet padding or underlayment. For laminate, click-lock planks work best if the subfloor is flat. When installing, ensure seams are tight and edges are straight. I once laid laminate without checking for levelness, and the planks started to click apart after a few months—an avoidable mistake. Use spacers around the room’s perimeter to allow for expansion, especially for laminate flooring.
Secure and Finish the Edges
Use trims and baseboards to cover expansion gaps and give a clean finish. For carpets, stretch and tack the edges properly to prevent wrinkling. During my last project, I carefully stretched the carpet with a power stretcher, which made a huge difference in the final look and durability. Proper edge finishing is key to avoiding wrinkles and tearing over time.
Final Checks and Maintenance
Walk over the new floor, checking for soft spots or uneven areas. Correct any issues promptly. Regular cleaning and avoiding excessive moisture extend the life of your flooring. Remember, the foundation you lay now determines how long your investment lasts—attention to detail pays off in durability and aesthetics.
Many homeowners believe that a quick, DIY approach can replace professional expertise when it comes to carpet installation, floor leveling, or even bathroom upgrades like showers. However, this oversimplification often leads to costly mistakes. One of the most pervasive myths is that floor leveling isn’t critical, especially for small imperfections. In reality, even minor dips or uneven patches can compromise the durability and aesthetic of your flooring over time. Skimping on proper leveling can cause buckling, tearing, or uneven wear, which ultimately defeats the purpose of your renovation. For a more detailed understanding, check out these expert floor leveling tips.
Are All Floor Leveling Compounds Equal
Many assume that any self-leveling compound will do the trick, but this couldn’t be further from the truth. The quality, setting time, and compatibility with your subfloor matter immensely. Using a low-quality or inappropriate compound can lead to cracking, shifting, or even failure within a few years. I’ve seen cases where homeowners chose cheaper products, only to face costly repairs later. Always opt for premium solutions designed for your specific flooring type and subfloor condition. For an in-depth guide, consider consulting these premium leveling tips.
Why Overlooking Moisture Can Ruin Your Shower Renovation
Many DIY enthusiasts focus solely on the tile and grout, neglecting moisture management. Improper waterproofing or ignoring humidity levels can lead to mold, mildew, and structural damage over time. This is especially true if the substrate isn’t properly sealed or if the waterproof membrane isn’t installed correctly. It’s a common mistake that can turn a beautiful shower into a nightmare. For advanced insights, see these bathroom renovation tips for lasting durability.
Understanding these nuances can save you hundreds, if not thousands, of dollars and ensure your home upgrades last for years. Have you ever fallen into this trap? Let me know in the comments.
Keeping your flooring and shower installations in top shape requires the right tools and ongoing maintenance. Over the years, I’ve tested various equipment and techniques that help ensure durability and ease future repairs. Investing in quality tools now can save you time and money down the line, especially when it comes to floor leveling, carpet stretching, or shower waterproofing.
Why Proper Tools Make a Difference
Using specialized equipment is crucial for professional results. For example, a high-quality laser level like the Bosch GLL 3-80 ensures precise leveling across large areas, reducing the risk of uneven surfaces that compromise your flooring’s longevity. When applying self-leveling compounds, I prefer a gauge rake, which allows me to spread the compound uniformly and achieve a perfectly flat surface. This simple tool makes a significant difference compared to manual spreading with a trowel alone.
My Go-To Equipment for Floor and Shower Work
Power Mixers such as the QEP 700XT help me mix compounds thoroughly without lumps, ensuring a consistent, smooth application. For shower waterproofing, I rely on a high-quality caulking gun like the Milwaukee M12 for precise application of sealants and membranes. These tools provide control and reduce waste, which is essential for professional-looking results.
To track progress and ensure that my work is perfectly level, I often use a digital laser level that projects laser lines across the floor or wall. This technology allows me to spot even minor dips or elevations, making corrections easier and more accurate. As technology advances, I believe smart leveling tools with integrated sensors will become more affordable and widespread, further improving DIY and professional projects alike.
How do I maintain my tools over time?
Proper maintenance is key for longevity. I always clean my tools thoroughly after each project—removing residual compounds and debris. For power tools, I check brushes and lubricate moving parts as recommended by the manufacturer. Regular calibration of laser levels ensures ongoing accuracy, which is vital for projects like laminate floor leveling or shower installation. Remember, well-maintained tools perform better and last longer, saving you money and frustration.
If you’re ready to elevate your home upgrades, try a high-precision laser level or a gauge rake to improve your results. These tools help you achieve a professional finish and extend the lifespan of your flooring or shower renovation.
Looking ahead, I predict that automation and smart technology will continue to enhance home renovation tools. Imagine laser levels that automatically calibrate themselves or compounds that change color once properly mixed—these innovations will make DIY projects even more accessible and reliable.
For more detailed advice on maintaining your flooring and shower systems, check out this comprehensive guide.
The Hardest Lesson I Learned About Carpet Install, Floor Leveling, Showers, Laminate
One of my biggest realizations came after rushing into a carpet installation without proper floor leveling. I learned that even minor dips can cause significant issues down the line, from buckling to uneven wear. Taking the time to assess and fix low spots early on saved me headaches and costly repairs later, proving that patience and precision are key.
3 Myths About Carpet Install, Floor Leveling, Showers, Laminate That Held Me Back
- Myth: Floor leveling is optional for small imperfections. The truth is, even tiny dips can compromise your flooring’s durability. Skipping this step often leads to ripples or tears over time.
- Myth: Cheap leveling compounds work just as well as premium ones. High-quality compounds provide better adhesion and flexibility, ensuring your floor stays flat for years.
- Myth: Waterproofing isn’t crucial for shower renovations. Proper waterproofing prevents mold, mildew, and structural damage, saving you money and stress.
What Experts Won’t Tell You About Carpet Install, Floor Leveling, Showers, Laminate
Many professionals keep quiet about how vital it is to use the right tools, like laser levels and gauge rakes, to achieve a perfectly level surface. These tools make a significant difference in end results, yet they’re often overlooked by DIYers. Investing in quality equipment and taking your time can elevate your project from average to professional-grade.
Curated Resources to Elevate Your Home Upgrades
- Professional Carpet and Shower Installation Guide: This comprehensive resource helped me understand the nuances of proper preparation and execution.
- Bathroom Renovation Tips for Lasting Style: A must-read for waterproofing and moisture control in shower upgrades.
- Floor Leveling Tips for Laminate Flooring: My trusted source for achieving flat, durable laminate surfaces.
- Top Home Renovation Tips: An all-in-one guide for quality results across multiple projects.
Your Turn to Try
Now that I’ve shared my insights, I encourage you to approach your flooring and shower upgrades with patience and the right tools. A well-leveled floor sets the stage for beautiful, lasting results, whether you’re installing new carpet or renovating a bathroom. Remember, taking the time for proper preparation pays off in durability and aesthetic appeal. What’s the first step you plan to tackle in your home upgrade? Share your goals below—let’s learn together and build better spaces!
http://Rebecca%20Miller
Reading this post really resonated with me, especially the part about the importance of floor leveling. I once skipped this crucial step during a DIY laminate flooring project in my basement, thinking a little dip wouldn’t matter much. Unfortunately, a few months later, I noticed the planks starting to click and shift, leading to costly repairs and frustration. Since then, I’ve learned that investing time and effort into proper subfloor preparation truly pays off in the long run. I’ve also become a big fan of using a laser level for precise measurements; it makes such a difference in achieving that perfect flatness. It makes me wonder, how do others handle tricky spots or stubborn dips in their floors? Do you have any go-to tools or tips for ensuring an even surface in challenging spaces? Sharing experiences could help many of us refine our techniques for lasting results! This article definitely encourages me to prioritize quality prep work for all future home upgrades.