I’ll never forget the time I finished a carpet installation only to see it ripple and bubble within a few weeks. That was my lightbulb moment—realizing that even the best-looking carpet can fail if the flooring beneath isn’t prepared properly. It’s frustrating, disheartening, and honestly, it can feel like throwing your money down the drain. But I’ve learned that with a few expert strategies, you can avoid those costly mistakes and ensure your floors last for years to come.
Why Proper Floor Leveling and Expert Installation Matter More Than You Think
Most homeowners focus on choosing the right carpet or laminate, but the foundation—your subfloor—is often overlooked. I used to think that a quick, DIY approach was enough. Trust me, I was wrong. Early on, I made the mistake of skipping detailed floor leveling, thinking it was just an extra step. That oversight led to uneven surfaces, creaky floors, and a shorter lifespan for my investment. Since then, I’ve discovered that meticulous preparation makes all the difference, especially when it comes to durability and long-term beauty. If you want to avoid these pitfalls, I recommend checking out expert tips on floor leveling strategies that truly work.
Is Floor Leveling Really Worth the Extra Effort and Cost?
Initially, I wondered if all the fuss was necessary. Wouldn’t a quick fix suffice? Well, I learned the hard way that rushing through floor prep can result in a wobbly, uneven surface that wears out fast. Skipping proper leveling can cause issues like premature wear, loose tiles, and even structural damage over time. According to industry experts, ignoring proper subfloor preparation can reduce your flooring’s lifespan by up to 50%. That’s a staggering figure that convinced me to invest the time and effort into expert techniques. If you’re skeptical, just ask yourself: Have I ever replaced a floor sooner than expected because of avoidable problems? If so, then you know how costly and frustrating it can be. To get the real scoop, check out our comprehensive guide on floor leveling strategies.
Now that I’ve shared my own story and why proper installation and leveling are crucial, let’s dive into the practical steps that will help you create a durable, beautiful floor that lasts for years. Are you ready to transform your space and save yourself future headaches? Let’s go!
Ensure the Subfloor is Flat and Stable
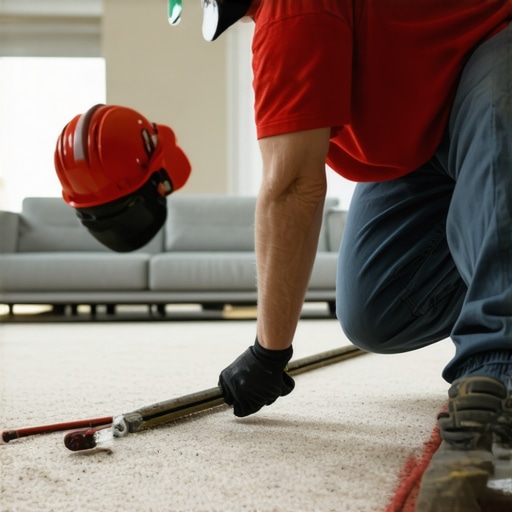
Start by removing all old flooring and debris to expose the bare subfloor. Use a long straightedge or a laser level to identify high spots and dips. For instance, I once used a long 8-foot level to spot uneven areas in my living room floor, which revealed several low spots that needed leveling. Apply a self-leveling compound to fill in dips, following the manufacturer’s instructions carefully. This process is like pouring pancake batter; it must spread evenly to create a smooth, level surface. For detailed guidance, check out expert floor leveling tips.
Prepare the Surface for Optimal Adhesion
After leveling, clean the surface thoroughly to remove dust and loose particles. Use a vacuum and damp cloth to ensure no debris remains. A clean, dry surface is crucial for the adhesive and flooring to bond properly, much like preparing a canvas for painting. Skipping this step can lead to future bubbling or detachment of your new floor.
Apply Proper Floor Leveling Techniques
Mix and pour the leveling compound in manageable sections, spreading it with a trowel or a gauge rake. If you encounter stubborn low spots, use a patching compound and a trowel to fill and smooth them out. I remember a time when I had to reapply leveling compound twice before getting a perfectly flat surface, which saved me from uneven flooring issues down the line. For laminate flooring, a smooth subfloor equals fewer seams and a cleaner look. For additional tips, visit laminate leveling tips.
Choose the Right Installation Method
Depending on your flooring type, select the appropriate method. For carpets, a tack strip around the perimeter and a smooth, tight fit are essential. When installing laminate, click-lock systems are popular for their ease of installation and stability. I once installed laminate using the floating method, which allowed for natural expansion and contraction, preventing warping. Be sure to follow manufacturer instructions precisely to avoid gaps or loose areas. For smart ideas on bathroom upgrades, check shower renovation tips.
Secure and Finish the Floor
Fasten the flooring securely according to the manufacturer’s specifications. Use the correct nails, staples, or adhesive to prevent movement. For carpets, stretch and secure with a power stretcher for a wrinkle-free finish. I remember a tricky stairway where I had to use a knee kicker to stretch the carpet perfectly, which made a significant difference in appearance. Finish edges with trim or baseboards to hide gaps and give a clean look. Proper finishing not only enhances aesthetics but also protects the edges from damage.
Inspect and Maintain for Longevity
Once installed, inspect the entire floor for loose areas or gaps. Regular maintenance, like cleaning with recommended products and avoiding excessive moisture, will prolong the life of your floors. I learned this the hard way when I ignored spills on my laminate floor, leading to warping over time. Keep an eye on high-traffic zones and reapply sealants or coatings as needed for added protection. Proper installation combined with diligent maintenance guarantees your investment stands the test of time.
Many homeowners and even some DIY enthusiasts fall prey to misconceptions when tackling projects like carpet installation, floor leveling, or shower upgrades. While the basics are well-understood, there’s a wealth of nuance that often gets overlooked, leading to costly mistakes or subpar results. Let’s dig deeper into these hidden pitfalls and clarify what most people get wrong.
Why the Industry Emphasizes Subfloor Preparation More Than You Think
Contrary to popular belief, a perfectly smooth and level subfloor isn’t just about aesthetics — it’s a critical factor for long-term durability. Many assume that minor imperfections won’t matter, but even small dips or bumps can cause seams to split, tiles to crack, or carpets to wear unevenly. This misconception often leads to skipping detailed leveling, which in turn causes issues down the line. Experts recommend using professional-grade leveling compounds and precise tools like laser levels to achieve the necessary flatness for lasting results. For detailed strategies, check out floor leveling tips.
The Trap of Overlooking Moisture and Subfloor Compatibility
Many installers focus on the surface layer, neglecting the importance of moisture barriers and subfloor material compatibility. This oversight can lead to mold growth, warping, or delamination, especially in areas prone to humidity like bathrooms. For example, laminate flooring is sensitive to moisture; installing it over a poorly sealed subfloor or in a damp environment will inevitably cause buckling. Advanced installers always assess moisture levels and incorporate vapor barriers or waterproof membranes when necessary. This extra step might seem unnecessary but is vital for longevity. A comprehensive guide on laminate installation covers these nuances.
How Shower Waterproofing Is More Than Just a Membrane
Many assume that applying a waterproof membrane is enough to guarantee a leak-proof shower. However, the real trick lies in proper slope, sealing, and drainage design. Small mistakes like uneven tiling or poor sealant application can lead to water seepage behind walls, causing mold or structural damage. Professional-grade waterproofing involves multiple layers, meticulous slope calculations, and high-quality sealants. Skimping on these details can turn your beautiful bathroom into a nightmare. For best practices, see shower waterproofing tips.
Is Laminate Flooring Really Easier Than Other Options
While laminate is often touted for its easy installation, many overlook the nuances involved in achieving a flawless finish. For instance, expansion gaps are critical; failing to leave enough space can cause buckling as the material expands with temperature changes. Also, subfloor unevenness becomes glaringly obvious with laminate, so meticulous leveling is essential. Moreover, the click-lock systems require precise alignment; a small mistake can result in gaps or loose planks. Advanced installers know that proper acclimation of flooring planks and careful handling during installation make a significant difference. For detailed tips, visit laminate installation advice.
Have you ever fallen into this trap? Let me know in the comments. Remember, understanding these finer points can save you from future headaches and ensure your renovation stands the test of time.
Keeping your renovated floors and showers in top condition requires more than just expert installation; it involves using the right tools and understanding ongoing maintenance practices. As someone who has tackled everything from carpet installations to bathroom upgrades, I’ve learned that investing in high-quality equipment and adopting a systematic approach can dramatically extend the lifespan of your improvements.
Why Quality Tools Make All the Difference
When working on projects like floor leveling or installing laminate flooring, the right tools are essential. For example, I always rely on a laser level for precise subfloor assessment—this tool ensures that no matter how large the area, your surface remains perfectly flat. I’ve found that cheap bubble levels often fail over larger spans, leading to uneven results that cause problems down the line. A professional-grade self-leveling laser level, like the Bosch GLL 3-80, provides consistent accuracy and saves time during leveling tasks. For floor prep, a high-quality trowel and gauge rake from brands like Marshalltown help me spread leveling compounds evenly, avoiding gaps or bubbles that could compromise the surface integrity.
Maintaining Floors and Showers Over Time
Once your floors are installed, regular maintenance is crucial. For laminate and carpeted floors, I recommend using a microfiber mop and a gentle cleaning solution specifically designed for your flooring type—this prevents scratches and preserves the finish. Showers, especially those with waterproof membranes, need periodic inspections for sealant integrity. I suggest checking grout lines and sealants every six months, reapplying as needed to prevent water seepage that can cause damage behind walls. Additionally, applying a protective coating like a silicone-based sealant on grout lines can make future cleaning easier and extend the life of your bathroom fixtures.
Tools I Recommend to Keep Everything Working Smoothly
For ongoing maintenance, I always keep a few essential tools handy. A handheld steam cleaner is fantastic for deep cleaning shower tiles without harsh chemicals, preserving the waterproof membrane. For floors, a vacuum with a soft brush attachment helps remove dirt and debris that can wear down surface coatings. When it comes to repairs or touch-ups, I rely on a small putty knife and a sponge to reapply sealants or fix minor chips. Investing in quality tools like a Ryobi Cordless Multi-Tool allows me to perform small repairs efficiently—whether it’s smoothing out grout or trimming loose carpet edges.
Future Trends: Smarter Maintenance and Better Tools
Looking ahead, I predict that smart technology will play a bigger role in maintenance. Devices like moisture sensors integrated with home automation systems could alert you to potential issues before they become serious. Additionally, advancements in eco-friendly sealants and cleaning solutions will make upkeep safer for your family and the environment. Staying updated with these innovations will help you keep your floors and showers pristine for years to come.
How do I maintain my floors and showers over time?
Developing a routine cleaning and inspection schedule is the best way to ensure longevity. Regularly checking grout and sealants, cleaning surfaces with appropriate products, and promptly repairing minor damage can save you from costly replacements later. Remember, the best maintenance begins with quality tools and knowledge—so invest in reliable equipment and stay informed about new techniques and products. For detailed guidance, check out our comprehensive floor leveling strategies and stay ahead of potential issues before they escalate.
The Hardest Lesson I Learned About Carpet, Floor Leveling, Showers, and Laminate
One of my biggest realizations was that rushing the subfloor preparation often leads to costly problems down the line. I once skipped meticulous leveling in a rush to finish a project, only to see the floors bubble and creak within months. Now, I know that investing time in proper floor leveling and moisture barriers is the difference between a durable floor and one that needs frequent repairs.
3 Myths About Flooring and Renovations That Held Me Back
For years, I believed that DIY could handle everything, and that surface appearance was all that mattered. I misunderstood the importance of subfloor stability and waterproofing, which caused me to replace floors prematurely. Learning from seasoned professionals, I discovered that detailed prep and correct installation techniques are essential for lasting beauty and function. Check out expert floor leveling tips to avoid these pitfalls.
What Experts Won’t Tell You About Floor Leveling and Shower Waterproofing
Many overlook the significance of moisture management and precise slope calculations in showers. I used to think sealing was enough, but I learned that proper drainage slopes and high-quality membranes prevent water seepage and mold. Similarly, when leveling a subfloor, using professional-grade compounds and laser levels helps create a perfectly flat surface, saving headaches later. For comprehensive advice, visit floor leveling strategies.
How I Transformed My Approach to Maintenance and Upkeep
Post-installation, I realized that regular inspections and using the right cleaning tools extend the lifespan of floors and showers. Investing in a microfiber mop, moisture sensors, and quality sealants has made maintenance simpler and more effective. Staying proactive prevents issues like warping, mold, or loose tiles. For ongoing care, see maintenance tips for durable floors.
http://Elizabeth%20Carter
Reading this post really highlights how crucial proper subfloor preparation is for any flooring project. I remember rushing through a laminate installation myself and ending up with uneven planks and frequent gaps, which was frustrating and costly to fix later. It’s impressive how much of a difference thorough leveling and cleaning before installation can make in the final finish and durability. I’ve started using laser levels after seeing such issues in my past work, and it’s a real game-changer. Regarding moisture barriers, I live in a humid climate, so I always make sure to include vapor barriers underneath my flooring. Has anyone found a particular sealing method or moisture barrier that works especially well in high-humidity areas? I’d love to hear practical tips from experienced DIYers or professionals to improve ongoing maintenance and prevent future problems.
http://Michael%20Turner
Wow, this post really hits home. I had a similar experience with my first carpet installation—completely overlooked the subfloor condition, which led to ripples and unevenness in just a few months. Since then, I’ve learned that investing in proper floor leveling tools and techniques makes all the difference, especially for high-traffic areas. I also discovered that addressing moisture issues early on, like applying vapor barriers in humid environments, helps prevent long-term damage. One thing I struggled with initially was choosing the right leveling compound—some just didn’t adhere well or dried unevenly. Has anyone tried different brands or methods that worked particularly well for stubborn dips? I’d love to hear how others handle tricky spots, especially in older homes where the subfloor might be more uneven. It seems like a lot of these issues can be avoided with a bit more prep work upfront, saving time and money down the line.