How to Seal the Gap Between Your Floor Leveler and the Wall
I spent three days grinding concrete on a job last month just so the floor wouldn’t click like a castanet. Most guys skip the leveling compound. They think the underlayment will hide the dip. It won’t. I had to get down on my hands and knees with a 10-foot straightedge and a diamond-blade grinder because the previous installer ignored a 1/4 inch dip in the center of the room. When you pour self-leveling underlayment, the liquid wants to run everywhere. If you do not seal the perimeter, that expensive slurry will disappear into your wall cavities, under your baseplates, or down into the crawlspace. It is a mess that ruins your subfloor integrity and wastes a hundred dollars of product in minutes. I smell like WD-40 and oak dust today because I just finished fixing a botched job where the leveler bonded to the drywall and cracked the moment the house settled. This is not about aesthetics. This is about structural engineering at the ground level.
The anatomy of a perimeter expansion joint
Sealing the gap between floor leveler and the wall requires a flexible foam isolation strip or high-quality backer rod to prevent the liquid cement from bonding to the vertical surface. This expansion joint allows for structural movement and prevents the leveler from cracking due to subfloor deflection or seasonal shifts in the home framing. Without this gap, the floor becomes a rigid drum that snaps under pressure.
When you prepare a room for leveler, you are dealing with fluid dynamics. A high-flow cementitious underlayment has a viscosity similar to thick pancake batter or heavy cream. It will find the path of least resistance. If there is a gap between your subfloor and the bottom of the drywall, the leveler will flow right under the wall. This creates a bridge. When the house moves, that bridge breaks. You get a crunching sound every time you walk near the baseboard. I have seen guys try to use duct tape. It fails. I have seen them use spray foam. It is too messy. You need a dedicated foam perimeter strip with an adhesive backing. This creates a soft dam. It keeps the leveler where it belongs while providing a cushion for the floor to breathe. It is the difference between a floor that lasts fifty years and one that fails in five.
“A floor is only as good as the subfloor beneath it; deflection is the enemy of every joint.” – Master Flooring Axiom
Why your subfloor is lying to you
Subfloor flatness is often mistaken for subfloor levelness, but they are different metrics that require mechanical grinding or self-leveling underlayment to correct. Most OSB or plywood subfloors have humps at the seams and dips in the joist spans that exceed the 1/8 inch over 10 feet tolerance required for modern flooring. Sealing the edges ensures your leveling efforts actually fix these deviations rather than just creating a new problem at the wall line.
You look at a subfloor and it looks fine. Then you put a laser level on it. Suddenly, you see the truth. The house has settled. The joists have crowned. If you are installing a carpet install, you might get away with some slop. Carpet is forgiving. But if you are doing laminate or high-end showers, you have zero margin for error. In a shower, a leveler gap that isn’t sealed means your waterproofing membrane won’t sit flat. That leads to pooling water and mold. For laminate, a dip causes the tongue-and-groove locking system to flex. Every time you walk on it, you are fatiguing the plastic or HDF core. Eventually, the joint snaps. You are left with a floating floor that actually floats. I hate seeing homeowners waste money on beautiful materials only to ruin them by being lazy with a bag of LevelQuik.
The chemistry of bond breaking at the edge
Isolation strips serve as a bond breaker between the Portland cement-based leveler and the wood or gypsum vertical surfaces. Chemical adhesion between the leveler and the wall constricts the floor, leading to tensile stress cracks across the surface as the material cures and shrinks. A proper seal uses polyethylene foam to absorb these forces and maintain a disconnected perimeter.
The science here is simple but brutal. Cement shrinks as it hydrates. If it is stuck to your wall studs and your plywood subfloor at the same time, it is being pulled in two directions. The leveler loses that fight every time. It cracks. Then you have loose chunks of concrete under your floor. I always use a closed-cell foam. It doesn’t absorb the water from the leveler. If you use an open-cell foam, it sucks the moisture out of the mix too fast. That weakens the edge. You want that edge to be as strong as the center. You also have to think about hydrostatic pressure. If you are on a concrete slab, moisture is coming up. If your leveler is bonded to the wall, it can wick that moisture into your drywall. That is how you get black mold behind your baseboards. Seal the gap. Protect the wall.
“Expansion gaps at all vertical surfaces are mandatory for floating and glue-down wood flooring systems.” – NWFA Technical Manual
Essential materials for a professional perimeter seal
Silicone sealant and polyethylene foam strips are the industry standard for sealing the leveler perimeter because they provide waterproof protection and elasticity. For floor leveling projects in showers, a liquid-applied waterproofing membrane should be used over the sealed gap to ensure a watertight transition. Using the wrong material, like a rigid caulk, will result in failure during the first seasonal temperature change.
| Material Type | Movement Capacity | Best Use Case | Smell/Texture |
|---|---|---|---|
| Polyethylene Foam | High | General perimeter leveling | Spongy and odorless |
| Silicone Sealant | Moderate | Wet areas and showers | Vinegar scent, rubbery |
| Acoustical Sealant | High | Soundproofing between floors | Sticky, never fully hardens |
| Spray Foam | Low | Not recommended for leveler | Messy, rigid when cured |
The step by step protocol for edge sealing
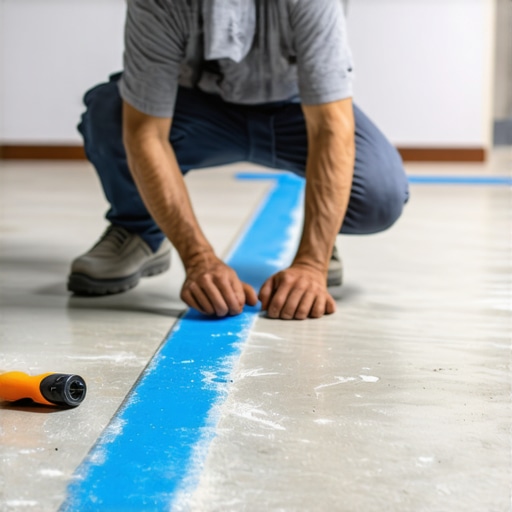
Preparing the wall involves removing the baseboards and cleaning the bottom of the drywall to ensure the foam adhesive bonds correctly. You must apply the perimeter strip at a height at least 1/2 inch above the intended pour depth of the self-leveling underlayment. This creates a bathtub effect that contains the liquid and allows for clean trimming after the material has fully hardened.
- Remove all baseboards and shoe molding to expose the structural gap.
- Vacuum the entire perimeter to remove sawdust and debris that prevent adhesion.
- Apply a high-quality primer to the subfloor and the bottom inch of the wall.
- Install the foam isolation strip tightly against the corner where the wall meets the floor.
- Seal any small punctures or corner overlaps with a dab of 100 percent silicone.
- Check the bottom of door frames and ensure they are dammed off with foam or scrap wood.
- Pour the leveler and let it cure for at least 24 hours before trimming the foam.
Why too much cushion ruins your locking joints
While most people want the thickest underlayment, too much cushion actually causes the locking mechanisms on LVP to snap under pressure. This same logic applies to the gap at the wall. If you leave a massive, unsealed void, the floor has no lateral support. But if you fill it with something too rigid, it buckles. The goal is a firm but flexible stop. I have walked onto jobs where people used rolls of carpet padding as an edge sealer. It is ridiculous. The leveler just soaks into the pad and turns into a jagged rock. You need a material that is engineered for this. You need a closed-cell structure that resists the weight of the wet cement. It is about 1/8 inch of protection. That 1/8 inch is what keeps your floor from sounding like a bag of potato chips when you walk on it in the winter.
The regional reality of moisture and expansion
The dry heat of Phoenix will shrink your baseboards until they show a gap if you do not account for the extreme low humidity during the leveling process. In contrast, if you are in the Pacific Northwest, your subfloor is a sponge. It is constantly expanding. If you seal your leveler too tight against the wall in a damp climate, the expanding wood subfloor will literally heave the leveler off the ground. I have seen 2-inch thick slabs of leveler cracked in half because the installer didn’t leave room for the house to breathe. You have to respect the climate. You have to respect the physics of wood and cement. They are two different animals. They don’t play well together unless you provide a buffer. That buffer is your sealed gap.
Final checks before the floor goes down
Once the leveler is dry, you have to trim the excess foam. Do not pull it out. Cut it flush with the top of the leveler using a sharp utility knife. You want that foam to stay in the gap. It acts as a backer for your transition strips or your baseboards. If you are doing a tile job, this gap is where your movement joint lives. If you are doing a carpet install, the tack strip goes just in front of it. Every flooring type has a relationship with this perimeter. If you did it right, the leveler is flat, the wall is clean, and there is a tiny bit of squish at the edge. That squish is your insurance policy. It means when the wind blows and the house creaks, your floor stays silent and solid. That is what a master installer delivers. Anything less is just a temporary decoration.