How to Repair a Burnt Spot in Your Carpet Without a Pro Kit
Most guys skip the leveling compound. They think the underlayment will hide the dip. It won’t. I spent three days grinding concrete on a job last month just so the floor wouldn’t click like a castanet, but the same logic applies to carpet patches. If your subfloor has a divot under that burn, your patch will eventually sink and reveal the ring of the cut. I have spent twenty five years on my knees with a moisture meter and a level. I have seen every botched DIY job from the suburbs to the city center. When a cigarette or a hot soldering iron hits a synthetic carpet, it does not just leave a mark. It creates a chemical fusion. You are not looking at a stain. You are looking at a polymer meltdown that has reached the glass transition temperature of the fiber, usually around 320 degrees Fahrenheit for polypropylene or closer to 490 degrees for nylon 6,6. You cannot scrub away a change in molecular structure. You have to perform surgery. This is about structural engineering on a microscopic scale. If you do not respect the pile direction and the tuft bind, your repair will look like a literal sore thumb in the middle of your living room.
The molecular reality of scorched polymers
The molecular reality of scorched polymers involves the permanent deformation of thermoplastic fibers like nylon or polyester when they reach their glass transition temperature. This heat destroys the refractive properties of the yarn, creating a hard, darkened mass that cannot be cleaned because the actual chemical structure has fused. When you look at a burn, you are seeing the carbonization of the fiber and the melting of the latex primary backing. If the heat was intense enough, it might have even scorched the secondary polypropylene backing or the rebond foam pad underneath. This is why a simple surface trim rarely works. You have to remove the entire affected area down to the subfloor or at least to the top of the padding. In my years as a flooring architect, I have seen that even a 1/8 inch deviation in fiber height will catch the light and scream failure to anyone walking by. You are dealing with light refraction and the way yarn twists reflect photons. Once that twist is gone, the spot is dead.
“A floor is only as good as the subfloor beneath it; deflection is the enemy of every joint.” – Master Flooring Axiom
The geometry of the surgical cookie cut
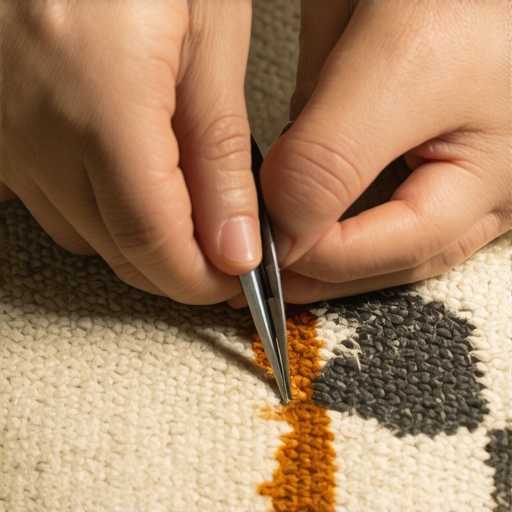
The geometry of the surgical cookie cut requires a perfect circular or rectangular extraction from a donor site to ensure the replacement piece matches the tension of the surrounding fibers. You do not just hack at the carpet with a pair of kitchen scissors. You need a clean, vertical incision that slices between the tufts rather than through them. If you cut through the actual yarn loops, you create a frayed edge that will never blend. Professional installers use a circle cutter, but you can use an empty, clean tin can with the lid removed and the edges filed to a razor sharp state. You press this into the carpet and rotate, which parts the fibers and reaches the backing. This is about mechanical precision. You are essentially creating a plug. This plug must be identical in size to the hole you are about to create in the donor area. Most people think they can just grab a scrap from the garage. They are wrong. That scrap has not been walked on. It hasn’t been vacuumed. It hasn’t been subjected to UV degradation. It will look like a bright new island in a sea of worn carpet. You must take your donor piece from the back of a closet or from under a heavy piece of furniture that has been there since the carpet install day.
The donor site selection strategy
The donor site selection strategy focuses on harvesting a piece of carpet from an inconspicuous area like a closet corner to ensure the wear patterns and soil levels match. Even if you have the same roll of carpet in the attic, the fiber density and pile height will differ because of crushing and abrasion over time. A floor is a living surface that changes with every footfall. When I walk into a house with a burnt spot, I first look at the pile direction. Every carpet has a grain, a direction it leans. If you install your patch ninety degrees out of phase with the grain, it will look a different color because of the way the light hits the side of the fiber versus the tip. In humid regions like Houston, the fibers might be more swollen and open. In dry climates like Phoenix, the fibers are brittle and compact. You must account for this environmental reality. I have seen $5,000 carpet installs ruined because someone ignored the nap of the rug. You need to use a piece that has lived in the same humidity and temperature as the burnt spot. This is why the closet is your best friend. You cut your patch there, then you replace the closet hole with that attic scrap nobody will ever see.
| Fiber Type | Melting Point (F) | Density (g/cm3) | Moisture Regain % |
|---|---|---|---|
| Nylon 6,6 | 490 | 1.14 | 4.0 |
| Polyester | 482 | 1.38 | 0.4 |
| Polypropylene | 320 | 0.90 | 0.05 |
| Wool | Char only | 1.32 | 14.0 |
The chemistry of the adhesive bond
The chemistry of the adhesive bond determines whether your repair stays flush or eventually curls at the edges due to mechanical stress and foot traffic. You cannot use school glue or wood glue. These are too rigid and will crack. You need a high solids latex adhesive or a specialized carpet seam sealer that remains flexible after curing. When you apply the glue to the subfloor or the padding, you are creating a chemical bridge. If you are working over a concrete slab, you must check for moisture. If that slab is exhaling water vapor, your glue will emulsify and fail. I have seen patches floating like lily pads in a pond because the installer ignored the hydrostatic pressure of the basement floor. You want to apply the adhesive to the backing of the patch and the edges of the existing carpet hole. This creates a perimeter bond. You must be careful not to get glue on the fibers themselves. If you do, the fibers will clump, and the light will catch the adhesive, making the repair visible. This is about surface tension and the way the glue molecules cross link during the evaporation of the carrier solvent.
The necessary toolkit for residential surgery
The necessary toolkit for residential surgery includes items that mimic professional gear such as sharp utility blades and specialized combs to blend the yarn. You do not need a $300 pro kit if you have the right mindset and a steady hand. You need to focus on the edge of the blade. A dull blade is the enemy of a clean floor. It pulls the fibers instead of cutting them, leading to delamination of the primary and secondary backing. When the backing delaminates, the tuft bind strength drops to zero, and your carpet starts shedding like a dog in the summer. You also need a transition comb or even a clean pet brush to blend the fibers once the patch is seated. This mechanical agitation helps the new fibers interlock with the old ones. It is about obscuring the seam line by physically weaving the yarns back together at the interface.
- Fresh carbon steel utility blades for every cut
- Industrial strength flexible carpet adhesive
- A clean tin can or a dedicated circle cutter
- A heavy weight such as a stack of books for the curing phase
- A seam roller or a smooth glass bottle to press the edges
- A row separator or a large flathead screwdriver
Why your subfloor is lying to you
Why your subfloor is lying to you is a matter of hidden dips and peaks that cause carpet patches to sit unevenly and wear prematurely. Even under a thick carpet and a 7/16 inch 8-pound pad, a subfloor that is not level will cause problems. If there is a dip where you are placing your patch, the patch will eventually sink. As it sinks, the edges will pull away from the surrounding carpet, creating a visible ring of shadow. This is why I always check the floor leveling before I even think about the carpet. If the subfloor is plywood, check for loose nails. If it is concrete, check for cracks that might be emitting moisture. Moisture is the silent killer of carpet repairs. It breaks down the latex, it breeds mold in the padding, and it ruins the bond of your patch. If you are near a bathroom or a shower, the humidity levels are even higher. I have seen carpet near showers rot from the bottom up because the installer didn’t use a moisture barrier. When you are doing a repair, you are opening a window into the soul of your floor. Take a second to look at what is underneath. If the pad is crumbled or wet, replace that section too. Do not build a house on sand, and do not put a patch on a rotten subfloor.
The ghost in the expansion gap
The ghost in the expansion gap refers to the way flooring materials shift and move with temperature changes, which can stress a small repair patch. While carpet does not expand like laminate or solid hardwood, it still reacts to tension. If you stretch your carpet too tight, the patch will be under constant shear force. If the carpet is too loose, the patch will bunch up. You have to find the sweet spot of neutral tension. While most people want the thickest underlayment, too much cushion actually causes the locking mechanisms on laminate to snap and it causes carpet patches to dip too far when stepped on, stressing the glue lines. A repair is a structural modification. You are introducing a break in the continuous web of the carpet backing. You must reinforce that break with the right amount of adhesive and the right amount of pressure during the drying phase. The dry heat of Phoenix will shrink your carpet fibers until they show gaps, while the swampy humidity of Houston will make them swell. Perform your repair when the house is at its normal operating temperature and humidity. Do not do it while the AC is broken or the furnace is off.
Final steps for a permanent fix
Once the patch is in place and the adhesive is applied, you must set it with weight. I use a stack of heavy architectural manuals or a toolbox. This pressure ensures the backing of the patch is in full contact with the adhesive and that the edges are flush. Leave it for at least twenty four hours. Do not let the kids or the dog run over it. After it is dry, you take your comb and you gently work the fibers across the seam. You are looking for a uniform surface. If you see a stray long fiber, trim it with sharp scissors to match the surrounding pile. This is the finishing touch of a master floor installer. You are erasing the evidence of the trauma. If you did it right, you should be able to stand directly over it and not see the circle. If you can see it from ten feet away, you messed up the pile direction or your cut was not vertical. Flooring is a game of millimeters and chemistry. It is not about how it looks when you are standing up; it is about how it looks when the sun hits it at a low angle through the window. That is when the truth comes out. Respect the physics of the floor, and the floor will respect you.