How to Stop Your Kitchen Tiles from Cracking Near the Oven
The invisible movement that breaks kitchen tiles
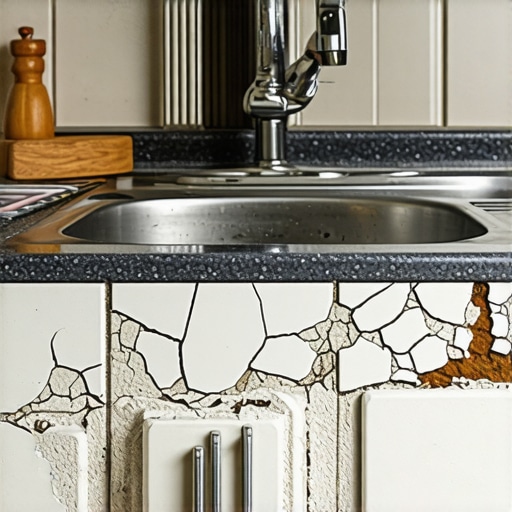
Cracked kitchen tiles near an oven occur due to thermal expansion, subfloor deflection, and a lack of movement joints. When the oven heat transfers to the ceramic tile or porcelain tile, the material expands. Without a silicone sealant or expansion gap, the stress causes grout failure and fractures. Most homeowners and even some fast-track contractors believe that if a floor is solid when it is installed, it will stay that way forever. That is a dangerous lie. I have spent twenty-five years on my knees with a moisture meter and a straightedge, and I can tell you that a kitchen floor is a living, breathing structural assembly. I spent three days grinding concrete on a job last month just so the floor would not click like a castanet. The owner thought I was wasting time. Three weeks later, after he ran his double-convection oven for a holiday dinner, every single tile within four feet of the range stayed perfectly seated while his neighbor, who skipped the prep, saw his grout turn to powder. I smell like floor wax and sawdust most days because I do not take shortcuts. If you want a floor that survives the heat of a high-performance kitchen, you have to respect the physics of the assembly. This is not about picking a pretty color. It is about engineering. Most guys skip the leveling compound. They think the underlayment will hide the dip. It will not. Tile is brittle. Concrete and wood are dynamic. When those two realities collide without a proper buffer, the tile loses every single time. It is a mechanical certainty.
The physics of thermal expansion in a kitchen environment
Thermal expansion is the primary cause of tile cracking near high-heat appliances like ovens and ranges. As porcelain tiles absorb heat, their molecular structure expands, requiring at least a 1/8 inch expansion gap at the perimeter. Without this perimeter isolation, the expanding tile creates lateral pressure that leads to tenting or spiderweb cracks. I have seen guys shove tiles tight against the stove cabinetry and then wonder why the floor looks like a jigsaw puzzle a year later. The coefficient of thermal expansion for ceramic is relatively low, but across a ten-foot span, that movement adds up. When your oven is cranked to five hundred degrees for a roast, the heat radiates through the kickplate and into the thin-set. If you used a cheap, unmodified mortar, it does not have the polymer chains necessary to flex. It just snaps. This is the same reason why a carpet install feels soft while a tile floor feels like rock, tile has zero give. While a laminate floor might just buckle and settle back down, tile is a one-way trip to the dumpster once it cracks. You have to account for the BTU output of your appliances when you are spec-ing your setting materials. Modern professional-grade ranges put out significantly more ambient heat than the old coils we used in the nineties. This requires a shift in how we think about the bond coat. If you are not using an ANSI A118.15 high-performance mortar in these zones, you are basically waiting for a failure to happen. It is not a matter of if, but when. The heat will dehydrate the bond, the tile will expand, and the resulting shear stress will pop the face right off the substrate.
“A floor is only as good as the subfloor beneath it; deflection is the enemy of every joint.” – Master Flooring Axiom
Why your subfloor is lying to you
Subfloor deflection refers to the vertical movement of the joists and plywood subfloor under a live load or dead load. To prevent cracked tiles, the floor must meet the L/360 standard, meaning it should not bend more than the span divided by 360. Excessive floor leveling needs often indicate structural instability. You walk across the floor and it feels solid to your feet. That means nothing to a piece of porcelain. Your body is soft and absorbs vibration. Tile is rigid. If that plywood is dipping even a sixteenth of an inch under the weight of a heavy cast-iron oven, the grout is going to crumble. I always check the joist span before I even bring a bag of thin-set into the house. If I see 2x10s spanning sixteen feet, I know we have a problem. You can spend a fortune on the most expensive Italian marble, but if your subfloor is bouncing, it is going to look like a gravel pit in six months. This is especially true in areas near showers or kitchens where moisture can compromise the integrity of the wood fibers. I have seen carpet install jobs hide a multitude of sins, rotted subfloors, bowed joists, and massive humps. But tile is a snitch. It tells everyone exactly how bad the prep work was. You have to be a stickler for the TCNA details. If the subfloor does not meet the stiffness requirement, you have to add a second layer of exterior-grade plywood or a cementitious backer unit. But do not think for a second that backer board adds structural strength. It does not. It is just a bonding surface. The strength comes from the wood and the joists. If you do not have that, you are building on sand.
The movement joint that saves the installation
An expansion joint or movement joint is a flexible gap filled with 100 percent silicone sealant rather than cementitious grout. These joints are mandatory every 20 to 25 feet in interior installations, but should be placed closer in high-heat zones near ovens. This allows the tile assembly to expand and contract without internal stress. Grout is essentially concrete. It does not compress. When the tile expands from the oven heat, it pushes against the grout. Since the grout cannot move, the pressure goes back into the tile. This is where the term ‘sheer’ comes from. The tile literally tries to slide across the thin-set. If you replace the grout line immediately adjacent to the oven with a color-matched silicone, you provide a shock absorber. It is a simple fix that most people ignore because they think it looks different. I would rather have a slightly different texture in one joint than a crack running through my centerpiece tile. I always tell my clients that a floor needs to breathe. If you lock it in tight from wall to wall, it will find a way to move, usually by exploding upward. This is even more vital if you have radiant heat systems. Those systems are fantastic, but they turn the entire floor into a heating element. The chemistry of the bond is under constant attack. You need that silicone. You need that relief valve. I have gone back to jobs ten years later where the silicone is still doing its job, while the grout in the rest of the kitchen has been replaced twice. It is the professional way to handle a high-stress area.
| Material Type | Heat Resistance | Expansion Rate | Recommended Adhesive |
|---|---|---|---|
| Porcelain Tile | High | Low | Modified Thin-set (ANSI A118.15) |
| Ceramic Tile | Medium | Moderate | Standard Modified Thin-set |
| Natural Stone | Variable | High | Large Heavy Tile Mortar |
| Laminate Flooring | Low | Very High | None (Floating) |
The 1/8 inch that ruins everything
A flat substrate is defined as having no more than 1/8 inch variation over a ten-foot radius for large format tile. Failure to achieve floor leveling results in lippage, where one tile edge sits higher than another, making it susceptible to cracking under the weight of appliances. If you have a hump in the floor right where the oven feet sit, you are creating a see-saw effect. Every time you open that heavy oven door, you are applying leverage to the edge of the tile. It will snap. I use a ten-foot magnesium straightedge to find these dips before I ever mix a bucket. If the floor is out of spec, I am pouring self-leveling underlayment. People complain about the cost of the bags, but it is cheaper than doing the job twice. You have to look at the chemistry of these levelers too. They are not just ‘wet cement.’ They are high-flow, polymer-rich compounds that need to bond perfectly to the subfloor. If you do not prime the wood first, the plywood will suck the moisture out of the leveler, and it will not cure right. It will just turn into a brittle shell that delaminates. I have seen it a hundred times. A guy pours five bags of leveler, skips the primer, and three months later the whole floor is crunching like potato chips. You have to follow the data sheets. Precision is the only thing that separates a master from a handyman. When you are dealing with the precision of a laminate click-lock or the rigidity of a porcelain tile, there is no room for ‘close enough.’ It is either flat, or it is failing.
“Expansion joints are not optional; they are the lungs of a ceramic installation.” – TCNA Handbook Standards
The chemistry of high-performance thin-set
Modified thin-set mortar contains polymers like ethylene-vinyl acetate which increase the bond strength and flexibility of the tile installation. For areas near an oven, using a high-performance mortar ensures that the adhesive bridge can withstand thermal cycling. This is where we zoom into the molecular level. Standard unmodified mortar is just Portland cement and sand. It is great for basic applications, but it is brittle. Polymers act like microscopic springs. They allow for a tiny amount of movement within the cured bed. When the oven heats the tile, and the tile tries to expand, these polymer chains stretch and then return to their original state. If you use a cheap bag of mud, those chains are not there. The bond just shears. I always insist on a premium modified thin-set for kitchens. I also look at the mil-thickness of my trowel notch. You need 95 percent coverage in a kitchen. Most guys just ‘dot and dab’ the corners. That leaves air voids under the tile. Air is an insulator, but it also creates a weak spot. When a heavy oven leg sits over an air void, the tile has no support. Heat builds up in that air pocket, the tile expands, and then ‘pop,’ you have a crack. I back-butter every single tile. It is the only way to ensure that the tile and the substrate are one single unit. It takes longer, and my back feels it at the end of the day, but I do not get callbacks for cracked floors. I sleep better knowing that the chemistry is working for me, not against me.
The Ultimate Kitchen Tile Protection Checklist
- Verify subfloor stiffness exceeds L/360 deflection limits before installation.
- Use a ten-foot straightedge to ensure the floor is flat within 1/8 inch.
- Apply a high-quality primer before using any self-leveling compounds.
- Select a premium ANSI A118.15 polymer-modified thin-set for high-heat zones.
- Ensure 95 percent mortar coverage by back-buttering each tile.
- Leave a 1/4 inch expansion gap at all vertical obstructions and cabinetry.
- Fill the joint between the tile and the oven kickplate with 100 percent silicone.
- Allow the mortar to cure for at least 72 hours before placing heavy appliances.
How to repair a heat-damaged tile section
Tile repair involves removing the cracked porcelain, cleaning the substrate of old thin-set, and reapplying the tile with a flexible mortar. To prevent future cracking, you must integrate a crack isolation membrane during the repair process. If you are already looking at a crack near your oven, do not just smear grout in the hole. You have to perform surgery. Get a oscillating tool with a diamond blade and carefully cut out the grout around the damaged piece. If you are not careful, you will chip the neighboring tiles and then you are in a real mess. Once the tile is out, you will likely see a crack in the concrete or a seam in the plywood right beneath it. That is your culprit. You need to bridge that gap with a membrane. These membranes are thin, rubberized sheets that you glue down first. They allow the subfloor to move independently of the tile. It is like a slip-sheet. Then you set your new tile on top of the membrane. This is the same logic used in high-end showers to prevent leaks and movement. It is an extra step that most people skip because they are in a hurry. But if you do not address the reason why the tile cracked, the new one will break in the exact same spot. I have seen guys replace the same tile three times because they were too lazy to put down a six-inch piece of membrane. Do not be that guy. Fix the structure, and the cosmetic part will take care of itself. Precision and patience are the tools of the trade. If you want a floor that lasts as long as the house, you have to treat it like the engineering challenge it is.