Have you ever stood in your bathroom or kitchen, gazing at the worn-out laminate or cracked shower tiles, and felt that pang of frustration? I’ve been there myself. It’s that moment when you realize that your home’s surfaces might be telling a story of shortcuts or rushed decisions. I remember the first time I tried to upgrade my bathroom without proper planning — the results were disappointing, and I ended up spending more time and money fixing mistakes. That lightbulb moment made me dive deep into the world of home upgrades, especially focusing on laminate flooring and shower renovations that stand the test of time.
Why Investing in Quality Matters More Than Ever
In today’s busy households, durability isn’t just a perk; it’s a necessity. When you choose the right laminate flooring or a reliable shower upgrade, you’re not just beautifying your space — you’re making a long-term investment. Surprising fact: according to industry experts, high-quality laminate flooring can last over 20 years with proper installation and maintenance. That’s peace of mind, especially when you consider the wear and tear from daily life. The key is understanding what makes a flooring or shower upgrade truly last — and that’s exactly what I’ll share with you today.
Is Home Improvement Actually Worth the Hype
Early on, I made the mistake of assuming that all laminate floors and shower solutions are created equal. I bought cheap materials, thinking I’d save a few bucks. But guess what? It led to warping, chipping, and leaks within just a couple of years. It was a costly lesson, but it taught me that quality, proper installation, and attention to detail are non-negotiable. Now, I always recommend consulting trusted sources and experts — like those who emphasize the importance of proper leveling and waterproofing for lasting results. For example, check out this comprehensive guide for laminate and shower upgrades that truly hold up over time.
If you’ve faced similar frustrations or are just starting your home improvement journey, don’t worry. The good news is that with a few expert tips and a clear plan, you can transform your spaces into durable, beautiful areas that last for years. Ready to learn the secrets behind lasting laminate floors and showers? Let’s dive into the practical steps that will make your renovation both successful and long-lasting.
Level Your Surface Before You Start
Imagine trying to build a house on uneven ground; the foundation isn’t solid, and everything else will wobble. The same applies to laminate flooring and shower installations. I once attempted to lay laminate on a slightly uneven subfloor without proper leveling, and within months, gaps and warping appeared. To avoid this, invest in a quality self-leveling compound—like the ones discussed in this guide. Proper leveling ensures a flat surface, preventing future cracks or creases that can ruin your upgrade.
Choose High-Quality Materials for Longevity
Think of your home surfaces like a car: cheaper parts may save money upfront but lead to costly repairs later. I remember picking budget laminate flooring, only to find it chipped and faded within a few years. Instead, I opted for premium laminate options, which offer better wear resistance and water-proofing—crucial for kitchens and bathrooms. Check out this expert advice for selecting durable materials that resist moisture and daily wear, ensuring your renovation lasts decades.
Prepare the Subfloor Carefully
Before laying down any laminate or installing a shower base, ensure the subfloor is clean, dry, and stable. I once skipped this step and ended up with an uneven shower base that caused leaks. Use a moisture meter—like the ones recommended in this resource—to verify your subfloor’s dryness. Secure loose boards and fill gaps with proper patching compounds. This meticulous prep prevents shifting, cracking, and water infiltration, making your upgrade more resilient.
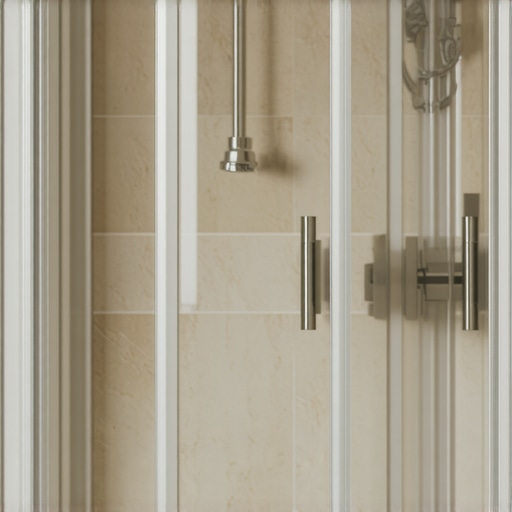
Seal and Waterproof to Keep Moisture Out
Water is the enemy of durability. I learned this the hard way when a small leak caused my laminate to warp and my shower to leak into the ceiling below. To prevent this, apply waterproof membranes under your shower and moisture barriers over the subfloor. Waterproofing not only protects your materials but also extends their lifespan. For tips on waterproofing methods, review this comprehensive guide. Proper sealing around edges and joints is equally important—use high-quality sealants designed for bathrooms and kitchens.
Follow Expert Installation Techniques
Even the best materials can fail if installed improperly. I once watched a professional install my laminate, and I noticed they used spacers to allow for expansion—something I overlooked initially. Proper installation techniques include leaving expansion gaps, using the right adhesive, and aligning planks precisely. Check out this expert guide for step-by-step instructions. For shower upgrades, ensure your waterproof membrane is correctly installed, and your tiles are properly sealed—this prevents leaks that can damage your structure over time.
Regular Maintenance Extends the Life
Once installed, maintenance is key. I make a habit of cleaning my laminate with non-abrasive cleaners and avoiding excessive water. For showers, I wipe down surfaces after use to prevent mold and soap scum buildup. Regular inspections for cracks, leaks, or loose tiles allow me to address issues early before they escalate. Use recommended cleaning products and follow maintenance tips from this resource to keep your surfaces looking new and functioning well for years to come.
Many homeowners believe that choosing the cheapest materials or skipping detailed prep work won’t impact the longevity of a renovation project. However, this is a dangerous misconception that can lead to costly repairs down the line. Let’s dig deeper into some of the most misunderstood aspects of home upgrades, particularly in laminate flooring and shower renovations, and reveal the hidden nuances that can make or break your project.
Why Cutting Corners Usually Backfires in Home Improvements
Everyone says to buy high-quality materials, but the real trap is underestimating the importance of proper installation. For example, even premium laminate flooring can warp or delaminate if not installed on a perfectly level surface. I’ve seen many DIY projects where homeowners skip the crucial step of leveling the subfloor, resulting in gaps and creases that compromise both appearance and durability. According to industry experts, meticulous surface preparation is the foundation of a lasting upgrade. For detailed tips on achieving a perfectly level surface, check out this guide.
Another common myth is that waterproofing isn’t essential unless you have visible leaks. In reality, moisture can seep into even the tiniest cracks, especially in bathrooms and kitchens, causing damage over time. Waterproof membranes under your shower base and moisture barriers over the subfloor are critical investments. Proper sealing around edges and joints with high-quality sealants can prevent leaks that might otherwise go unnoticed until they cause significant damage. Trust me, neglecting waterproofing is a mistake many regret later.
Advanced Mistake: Overlooking the Impact of Expansion Gaps
One often overlooked nuance is the importance of leaving adequate expansion gaps around laminate flooring and shower tiles. It might seem trivial, but failing to account for natural expansion due to temperature and humidity fluctuations can lead to buckling or cracking months after installation. Professional installers always leave a small space—usually around 1/4 inch—around the perimeter. This allows the material to expand without warping. If you’re considering a DIY project, be sure to follow expert advice on this critical step, like those found here.
Similarly, in shower renovations, improper sealing around fixtures and tiles can cause leaks and water damage. Using the right sealants and applying them correctly is essential—it’s not just about aesthetics but about creating a water-tight barrier that endures. Remember, even small gaps can turn into big problems over time, so pay attention to the details.
Have you ever fallen into this trap? Let me know in the comments. Recognizing these hidden nuances and avoiding common myths can save you a lot of frustration and money. Your home improvement projects will not only look great but will also stand the test of time, providing lasting value and comfort.
When it comes to keeping your home upgrades in top shape, having the right tools and a solid maintenance routine can make all the difference. Over the years, I’ve learned that investing in quality equipment not only simplifies the process but also extends the lifespan of your laminate flooring and shower renovations. One of my go-to tools is a digital moisture meter, which I use regularly to monitor moisture levels beneath the surface, ensuring that your subfloor remains dry and stable—key to preventing future issues. For example, I rely on the Moisture Meter from Floorcraft, which provides accurate readings and helps me catch potential problems early before they escalate. Regular maintenance also involves keeping an eye on seals, grout, and caulking around showers; I recommend using high-quality sealants like those discussed in this guide and inspecting them every few months for wear and tear. Additionally, a good vacuum with a HEPA filter is invaluable for routine cleaning, especially in bathrooms and kitchens, where dust and debris can accelerate deterioration. As trends evolve, I predict that smart maintenance tools—such as Wi-Fi-enabled moisture sensors and automated cleaning devices—will become standard, making upkeep even easier. To stay ahead, I suggest integrating these smart gadgets into your routine now, starting with a reliable moisture detector to prevent water damage. How do I maintain laminate and shower surfaces over time? Simple: consistent cleaning with gentle, non-abrasive products, timely resealing of grout and caulk, and periodic inspections for signs of damage. Remember, proactive care not only preserves your investment but also enhances the overall quality of your home. For detailed guidance on maintenance routines, check out this resource and try implementing one advanced tip today—like setting up a moisture monitoring system—to keep your surfaces looking and functioning perfectly for years to come.
The Hardest Lesson I Learned About Durable Home Upgrades
One of the biggest revelations for me was the importance of meticulous surface prep. I once skipped leveling the subfloor, thinking it was a minor step, only to face warping and cracking down the line. That experience taught me that investing time in proper leveling before laying laminate or installing a shower base can save you from costly repairs later. It’s a lightbulb moment that has shaped how I approach all future upgrades, emphasizing precision and patience.
3 Myths About Home Renovation That Can Hold You Back
Many homeowners believe waterproofing is optional unless leaks are visible, but in reality, moisture seeps into small cracks over time, causing damage unseen until it’s too late. My advice? Always invest in quality waterproof membranes and sealants, especially in bathrooms and kitchens. This small extra step significantly extends the life of your renovation and saves you from headaches down the road.
The One Installation Detail That Makes a Difference
Leaving expansion gaps around laminate flooring might seem trivial, but ignoring this can lead to buckling and warping as temperatures fluctuate. Professional installers know to leave about a quarter-inch space to allow for natural expansion. If you’re DIY-ing, don’t skip this! It’s these tiny details that ensure your home upgrade stays beautiful and durable for decades.
Where to Go from Here
To make your home improvements truly last, I recommend checking out this comprehensive guide on level surfaces, and expert tips for laminate and shower upgrades. These resources have helped me refine my approach and achieve results that stand the test of time. Remember, investing in quality materials and proper techniques now pays off in the long run.
Your Turn to Try
Have you ever struggled with a DIY home upgrade that didn’t last? What lesson did it teach you? Share your experiences below—your story might save someone else from making the same mistake!