The Secret to Tiling a Shower Floor That Drains Perfectly
The physics of the perfect shower drain
Most guys skip the leveling compound. They think the underlayment will hide the dip. It won’t. I spent three days grinding concrete on a job last month just so the floor wouldn’t click like a castanet, and that same stubborn refusal to prep is what kills ninety percent of shower installs. I have seen the aftermath of a fifteen thousand dollar bathroom renovation where the tile looked like a million bucks but the water sat like a stagnant pond in the corner. If you want a floor that actually works, you have to stop looking at it as a decorative surface and start seeing it as a structural drainage system. Water is lazy. It wants to go where gravity tells it. If your subfloor is uneven or your slope is a fraction of a degree off, you are building a mold factory. I have spent twenty five years on my knees with a moisture meter and a four foot level. I know the smell of a rotten subfloor. It is a metallic, earthy stench that stays in your nostrils for a week. That smell usually comes from a homeowner who thought a waterproof membrane could compensate for a bad screed job. It cannot. We are going to break down the chemistry and the geometry of a shower that stays dry for decades.
Why your subfloor is lying to you
Floor leveling is the primary requirement for any successful shower installation because gravity does not negotiate with ceramic or stone. A subfloor that is out of level by even an eighth of an inch over ten feet will create high spots and low spots that trap water. You must verify the structural integrity of the joists before the first bag of mortar is opened. Most houses have settled. If you are working on a slab, you need to grind down the humps. If you are on wood, you need to check the deflection. A floor is only as good as the subfloor beneath it, and deflection is the enemy of every joint. I have seen guys try to level a shower floor with just a thicker bed of thin-set. That is a amateur move. Thin-set is an adhesive, not a filler. It has a high water content. As it cures and the water evaporates, the material shrinks. If you have a half inch of thin-set in one spot and a sixteenth in another, that shrinkage is going to be uneven. You will end up with a lippage problem that makes the floor look like a staircase. In my shop, we use a self-leveling underlayment specifically rated for wet areas. We don’t just pour it and pray. We use a spiked roller to release the air bubbles and ensure a dense, monolithic surface. If you treat a shower floor like a simple carpet install where you can hide sins under a pad, you are setting yourself up for a lawsuit. This is engineering, not interior design. You need to understand the L over 360 deflection standard. If your floor bounces more than that, the grout will crack and the moisture will find the wood.
“A floor is only as good as the subfloor beneath it; deflection is the enemy of every joint.” – Master Flooring Axiom
The structural math of the pre slope
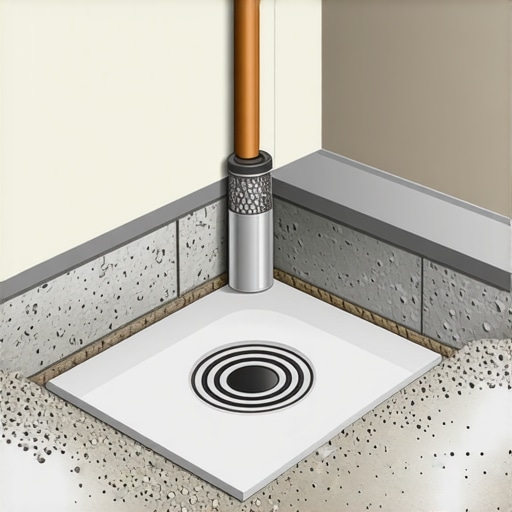
The pre slope is the inclined layer of deck mud situated beneath the waterproofing liner that ensures any moisture reaching the pan is directed toward the weep holes of the drain. Without a proper slope of 1/4 inch per foot, water will sit on the liner and rot the subfloor over time. This is the most common failure point in modern showers. Most people think the tile is the waterproof layer. It isn’t. The tile and grout are the wear layer. They are porous. Water goes through them. If it hits a flat liner, it just sits there. It becomes a science experiment of bacteria and mold. To do this right, you need a dry pack mortar. We are talking about a four to one ratio of sand to portland cement. It should have the consistency of damp beach sand. If you can’t squeeze it into a ball that stays together without dripping, it is too wet. You pack it in tight. You start at the drain and work your way out to the perimeter. I use a straight edge and a level for every single inch. I want to see that bubble exactly half way across the line for every foot of distance. If you are doing a large walk in shower, this math becomes even more vital. You can’t just wing it. You have to account for the distance to the furthest corner. If that corner is four feet away, it needs to be exactly one inch higher than the drain. Not seven eighths. Not an inch and an eighth. One inch. I have had architects try to tell me it doesn’t matter that much. I usually hand them a bucket of water and tell them to pour it on a flat surface and tell me where it goes. It stays put. Surface tension and friction are working against you. You need gravity on your side.
[IMAGE_PLACEHOLDER]
Chemical bonds and polymer chains
Modified thin-set mortars utilize polymers and resins to create a chemical bond that is significantly stronger than traditional cementitious bonds, which is essential for non-porous tiles. These additives allow the mortar to flex slightly without losing its grip, accommodating the natural expansion and contraction of the building. When you are tiling a shower floor, the bond is everything. You aren’t just sticking a rock to a floor. You are creating a barrier. I prefer a high quality ANSI A118.4 mortar. This stuff has the polymer already in the bag. You just add water. But don’t just dump a bucket in there. You need to use a slow speed mixer. If you whip it too fast, you introduce air. Air is a thermal insulator, and it weakens the bond. You want a dense, creamy consistency that holds a ridge when you run your notched trowel through it. Let it slake. This is the part most guys skip. You mix it, let it sit for ten minutes so the chemicals can fully hydrate, then mix it again. If you don’t slake, the mortar will pull the moisture out of the tile and the bond will be brittle. I have seen tiles pop off a shower floor like bottle caps because the installer didn’t wait ten minutes. It is a matter of patience. You also have to think about the tile itself. If you are using a porcelain mosaic, you need a mortar with high suction. If you are using a natural stone like marble, you need to be careful about moisture staining. Marble is a sponge. If you use the wrong thin-set, the minerals in the water will wick up through the stone and turn your white Carrara into a muddy yellow mess within a year. It is about the chemistry of the interface between the substrate and the finish material.
| Waterproofing Method | Drying Time | Skill Level Required | Primary Benefit |
|---|---|---|---|
| Traditional CPVC Liner | None | High | Proven track record in old school builds |
| Liquid Membrane | 24 Hours | Medium | Monolithic barrier with no seams |
| Bonded Sheet Membrane | Instant | High | Allows for direct bond of tile to drain |
| Pre-fabricated Foam Pan | Instant | Low | Consistent factory-calibrated slope |
The myth of the waterproof grout
Grout is a decorative and structural filler that is inherently porous unless it is an epoxy-based formula, meaning it will eventually allow moisture to pass through to the setting bed. Standard cement grout is basically a hard sponge. Even with a sealer, it is only water-resistant, not waterproof. This is why the slope under the tile is so critical. People spend all this money on fancy sealers thinking they can stop the water. They can’t. They can only slow it down. If you want a truly impenetrable surface, you have to go with epoxy grout. It is a nightmare to work with. It is sticky, it smells, and you only have about thirty minutes to get it off the tile before it turns into permanent plastic. But once it is in, it is bulletproof. It won’t stain and it won’t let a drop of water through. In my experience, most residential clients don’t want to pay the labor premium for epoxy. So we use high performance cement grouts with built in sealers. But I always tell them, the grout is not the umbrella. The membrane underneath is the umbrella. The grout is just the shingles. If you have a leak, don’t look at the grout. Look at the flashing and the slope. And for the love of everything, don’t use laminate or carpet anywhere near the splash zone. I have seen people try to run a carpet install right up to a walk in shower edge with no transition. The wick effect will pull water six feet into the bedroom and rot the carpet tack strip in a month. You need a hard break. A marble threshold is the industry standard for a reason. It creates a physical dam that stops the water from migrating. Transition strips are not just for looks. They are the frontline of defense for the rest of your house.
Perimeter expansion and the silent failure
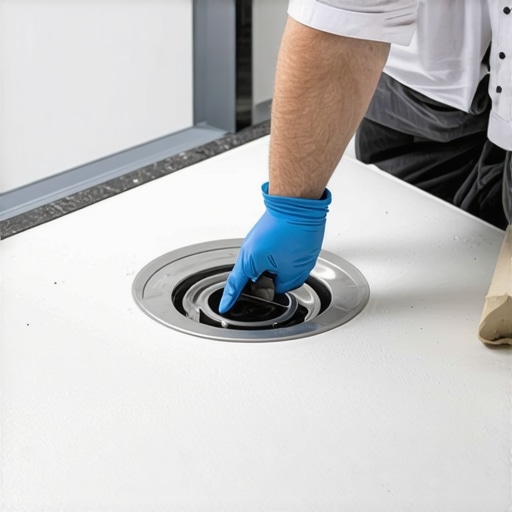
Expansion gaps must be maintained at every vertical transition where the shower floor meets the walls to prevent tile tenting caused by the natural movement of the structure. These joints should never be filled with hard grout; they must be filled with a 100 percent silicone sealant that remains flexible. Houses breathe. They expand in the summer and shrink in the winter. If you pack grout into that ninety degree corner, it is going to crack. And when it cracks, water finds a highway to the wall studs. I have seen entire shower floors lift up like a tent because the installer didn’t leave a sixteenth of an inch gap at the perimeter. The pressure has to go somewhere. If the tile can’t move out, it moves up. This is the same principle as a laminate floor install. You need that expansion space. In a shower, that space is your life insurance. I use color matched silicone that looks exactly like the grout. It takes longer to tool it and make it look clean, but it saves the job. You also have to think about the drain assembly itself. The drain is the only part of the shower that is bolted to the plumbing. The rest of the shower is floating. If you don’t allow for movement between the drain body and the tile, the vibration of the pipes or the settling of the house will snap the bond. I always use a bonding flange drain for modern installs. It allows the waterproof membrane to be glued directly to the drain body. It creates a single, unified piece of plastic that covers the whole floor. No more mechanical clamping rings that fail when the bolts rust out. It is a superior system, but it requires precision. You can’t be off by a hair.
- Verify subfloor flatness within 1/8 inch over 10 feet.
- Install a pre slope of 1/4 inch per foot minimum.
- Apply a waterproof membrane that is rated for continuous immersion.
- Use a modified thin-set with a high polymer count for porcelain.
- Fill all change of plane joints with 100 percent silicone.
- Perform a 24 hour flood test before laying any tile.
The ghost in the expansion gap
There is a phenomenon I call the ghost in the shower. It is that clicking sound you hear when you step on a tile that has lost its bond. Usually, it is because the installer didn’t account for the thermal expansion of the hot water. Think about it. You go from a sixty degree room to a hundred degree shower in three minutes. That is a massive thermal shock. The tile expands faster than the concrete underneath it. If you don’t have those flexible joints at the corners, the tile has nowhere to go. It shears the bond. I spent three weeks last year tearing out a shower in a high rise because the installer used hard grout in every corner. The tiles were literally popping off the wall like popcorn. It was a mess. You have to respect the materials. Ceramic is strong but it is brittle. It has no tensile strength. It relies entirely on the substrate. If you are doing a floor leveling job for a shower, you need to ensure the compound is rated for the heat. Some of those cheap big box store levelers will turn back into mush if they get wet and hot. You need the good stuff. I always tell people, if you are going to skimp, skimp on the faucet. Skimp on the towel rack. But do not skimp on what is under the tile. Once that tile is down, it is a permanent installation. If it fails, you aren’t just replacing a tile. You are replacing the subfloor, the drywall, and potentially the joists. I have seen the rot go all the way to the basement. It is a high stakes game. If you aren’t prepared to do the math and the chemistry, you should stick to carpet install work. Showers are for the architects of the floor.