I remember the moment I stepped into my bathroom after a weekend renovation and immediately noticed a faint, persistent damp smell. Turns out, I had overlooked the importance of waterproofing, and it almost cost me dearly. That experience was my lightbulb moment. It made me realize that choosing the right shower and waterproofing solutions isn’t just about style—it’s about durability and peace of mind.
Why Waterproofing Can Make or Break Your Bathroom Upgrade
Ever heard the saying, “A shower is only as good as its waterproofing”? Well, it’s true. In 2024, more homeowners are realizing that investing in top-quality waterproofing is the secret to avoiding costly repairs down the line. Moisture infiltration can cause everything from mold growth to structural damage, and no one wants to deal with that mess. According to industry experts, poor waterproofing is the leading cause of bathroom renovation failures, costing homeowners thousands in repairs. This is why I always recommend starting with a solid waterproofing plan before choosing your shower fixtures or tiles. If you’re wondering how to make that happen, I’ve got you covered. You’ll find practical tips and product suggestions that will help you confidently upgrade your bathroom while ensuring it stays dry and beautiful for years to come. Want to learn more? Check out this comprehensive guide on [transforming your bathroom with the best waterproofing solutions](https://floorcraftstore.com/transform-your-bathroom-with-the-best-showers-waterproofing-solutions).
Is Waterproofing Actually Worth the Hype
Early in my renovation journey, I made the mistake of skipping proper waterproofing. I thought, “It’s just a little moisture barrier,” but that oversight led to leaks under my tiles, mold, and a lot of stress. The truth is, waterproofing isn’t just a trend; it’s a necessity. It’s the foundation of a durable, long-lasting shower. Whether you’re considering a custom shower enclosure or a simple upgrade, investing in high-quality waterproofing materials and professional installation can save you from future headaches. If you want to avoid my mistake, I suggest reading about expert tips on [waterproofing your shower](https://floorcraftstore.com/top-bathroom-showers-waterproofing-tips-for-2024). It’s a small step that pays off big in the long run. Ready to upgrade your bathroom confidently? Let’s dive into the best solutions for 2024.
Prepare Your Surface Carefully
Before installing your new shower, ensure that the bathroom floor and walls are perfectly level and clean. Use a high-quality floor leveling compound to create a smooth, even surface that will prevent tiles from cracking or loosening over time. I once rushed this step, and within months, my tiles started detaching. After applying a reliable leveling product from this guide, the installation was seamless, and the durability increased significantly.
Choose the Right Waterproofing Materials
Select a Quality Waterproof Membrane
Opt for a liquid-applied membrane or a sheet membrane designed specifically for showers. These materials act like a protective second skin, sealing the substrate against moisture. I learned this the hard way when I used a generic waterproof paint, which peeled and failed after a few months. Using a premium membrane recommended by industry experts made all the difference.
Apply Properly and Overlap
Apply the waterproof membrane with a roller or trowel, ensuring even coverage without gaps or bubbles. Overlap seams by at least 2-3 inches to guarantee continuous protection. Remember, just like laying a delicate carpet, precision here prevents future leaks. I once missed an overlap, which caused water ingress, but reapplying the membrane with care fixed the issue.
Seal Joints and Corners Meticulously
Use high-quality, flexible sealants designed for bathrooms to seal corners, edges, and junctions. These areas are the most vulnerable to leaks. I used a silicone-based sealant and learned that proper tooling—smoothing the bead with a wet finger—ensures a watertight seal that lasts. For extra confidence, consult renovation tips to perfect your sealing technique.
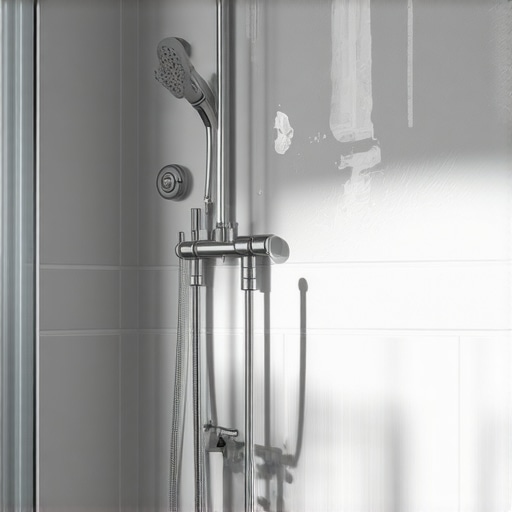
Install Your Shower Properly
When fitting the shower enclosure, ensure that the base is level, and all connections are tight. Use shims if necessary to prevent any wobbling. I once installed a shower base without checking the level, which led to water pooling and eventual leakage. After re-leveling with a spirit level and sealing all joints thoroughly, my shower remained leak-free for years. Consider professional installation or at least detailed tutorials from this resource.
Finishing Touches for Durability and Style
Choose waterproof tiles and grout to complement your shower’s waterproofing system. Use epoxy grout for extra moisture resistance, especially in seams and corners. After grouting, apply a sealant to keep moisture out. I found that sealing my grout lines with a silicone-based product prevented mold growth and kept my bathroom looking fresh. For a modern aesthetic, explore latest design ideas that combine style with functionality.
Many homeowners believe that waterproofing is a straightforward step that can be quickly completed with a generic product or even skipped altogether. However, in my experience as a renovation expert, this misconception can lead to serious issues down the line. For instance, some think that applying a single coat of waterproof membrane is enough, but in reality, proper waterproofing requires meticulous application of multiple layers, thorough sealing of joints, and careful attention to detail. Overlooking these nuances often results in leaks, mold, and structural damage, which can be costly to repair.
One common myth is that waterproofing only needs to be done on the shower floor. Actually, the walls, especially corners and seams, require equally diligent treatment. Neglecting these areas leaves vulnerable points that water can penetrate, ultimately compromising your entire waterproofing system. This mistake is frequently made by DIY enthusiasts who underestimate the complexity of proper waterproofing techniques. To ensure durability, follow expert guidelines, such as overlapping seams by at least 2-3 inches and using high-quality sealants designed for bathroom use. For comprehensive insights, I recommend exploring this comprehensive guide.
Why Do Advanced Waterproofing Strategies Matter for Pros?
Advanced waterproofing involves more than just applying membranes; it includes selecting the right materials, understanding substrate compatibility, and masterfully sealing all joints and penetrations. For example, liquid-applied membranes can create a seamless barrier when applied correctly, reducing the risk of failure at seams and corners. Professional installers also pay attention to surface preparation, ensuring substrates are clean, dry, and free of cracks before application. As highlighted by industry experts, neglecting these details significantly increases the likelihood of moisture ingress, leading to mold and structural issues over time. For those interested in elevating their waterproofing game, I suggest reviewing this expert resource.
Another often overlooked aspect is the importance of proper curing times for waterproof membranes and sealants. Rushing this process can create weak spots that water can exploit. Patience and adherence to manufacturer instructions are crucial, especially in high-moisture environments like bathrooms.
Have you ever fallen into this trap? Let me know in the comments. Remember, investing time and effort into correct waterproofing not only safeguards your bathroom but also saves money and stress in the long run. Prioritize quality materials and meticulous installation to achieve lasting results, and you’ll enjoy a beautiful, leak-free bathroom for years to come.
Keeping your waterproofing system in top shape requires the right tools and a commitment to regular maintenance. Over the years, I’ve tested and refined my toolkit to ensure every aspect of waterproofing, from membrane application to sealing joints, remains durable and effective. In this article, I’ll share the specific tools I recommend and how they help me achieve professional results, along with tips on maintaining your waterproofing over time.
Precision Tools for Seamless Waterproofing
One of the most critical aspects of waterproofing is ensuring even, bubble-free membrane application. For this, I rely on a high-quality roller specifically designed for liquid-applied membranes. This roller helps me spread the material uniformly, preventing gaps or bubbles that could compromise the system. I prefer models with a smooth, dense nap that allows for consistent coverage, which I’ve found crucial for long-lasting results. When working with sheet membranes, I use a rubber roller for sealing overlaps; this ensures proper adhesion and minimizes air pockets that could lead to leaks.
Another essential tool is a digital moisture meter. Moisture can undermine waterproofing if not properly managed, especially when preparing surfaces or checking the integrity of existing layers. I use a reliable digital moisture meter from this trusted source to monitor substrate dryness, ensuring optimal conditions before applying membranes or sealants. This proactive step saves time and prevents future failures.
Sealing and Overlap Accessories
For sealing joints, corners, and penetrations, I always opt for high-grade silicone or polyurethane sealants. To apply these precisely, I use a caulking gun with adjustable pressure control. This allows me to create smooth, even beads, which are essential for a watertight seal. I also recommend a caulking tool or smoothing spatula to shape the sealant after application, ensuring maximum adhesion and flexibility. Proper sealing is often overlooked but is vital for maintaining the waterproof barrier over years of use.
To maintain these seals over time, I periodically inspect for cracks or gaps, especially after heavy use or temperature fluctuations. Reapplying sealant with a fresh bead, using the same tools, keeps the system intact and prevents leaks from developing.
Tools for Surface Preparation and Cleaning
Before applying membranes or sealants, surfaces must be impeccably clean and dry. I use a power scrubber with a mild abrasive pad to remove old adhesive, dirt, and loose particles. A clean surface ensures better adhesion and longer-lasting waterproofing. For drying, I prefer industrial-grade blowers that quickly remove residual moisture, particularly in hard-to-reach areas.
Additionally, I keep a supply of cleaning solvents approved for bathroom surfaces, such as isopropyl alcohol, to wipe down surfaces before application. This extra step ensures optimal bonding and reduces the risk of future failures.
Future Trends in Waterproofing Maintenance
As technology advances, I predict that smart moisture sensors and IoT-enabled monitoring systems will become more common in waterproofing. These devices can alert homeowners to early signs of moisture ingress, allowing for prompt maintenance before significant damage occurs. Investing in such solutions now can save thousands in future repairs and ensure peace of mind.
How do I maintain waterproofing over time?
Regular inspections are key. Check seals, joints, and membrane areas for cracks or deterioration every 6-12 months. Clean surfaces with gentle detergents and reapply sealants as needed. Keep tools like moisture meters and caulking guns ready for quick repairs. By maintaining your waterproofing proactively, you extend its lifespan and protect your investment for decades.
If you want to make sure your waterproofing remains effective, try integrating a moisture meter into your routine inspections. It’s a simple, yet powerful tool that can prevent costly repairs and keep your bathroom dry and beautiful for years to come.
The Hardest Lesson I Learned About Waterproofing
One of my biggest wake-up calls was realizing that DIY waterproofing often overlooks crucial details like seam overlaps and curing times. These seemingly small steps can make or break your entire bathroom upgrade.
Early on, I believed a single waterproof membrane application was enough. It took me experiencing a leak months later to understand the importance of multiple layers and meticulous sealing. That lesson saved me thousands in repairs and stress.
My Essential Toolkit for Waterproofing Success
Over the years, I’ve refined my tools to include high-quality rollers for even membrane application, digital moisture meters to ensure proper surface dryness, and professional-grade sealants for joints and corners. These tools help me achieve professional results every time.
Investing in reliable tools like a caulking gun with adjustable pressure and a smoothing spatula has made sealing easier and more effective, ensuring my waterproofing stays intact over time.
Your Turn to Try
The future of bathroom waterproofing in 2024 is all about precision and smart maintenance. Regular inspections, timely reapplications of sealant, and monitoring moisture levels can extend your waterproofing system’s lifespan significantly.
Remember, a well-waterproofed bathroom isn’t just about avoiding leaks—it’s about peace of mind and lasting beauty. Start with quality materials, pay attention to detail, and you’ll enjoy a durable, stunning bathroom for years to come.
What’s the biggest waterproofing challenge you’ve faced in your renovation journey? Share your experience below and let’s learn together!