I remember the first time I tried installing a new carpet in my living room. I was eager to transform the space but quickly realized that uneven flooring and poor installation could turn my DIY project into a costly nightmare. That lightbulb moment made me understand how crucial proper floor leveling and careful carpet installation are for lasting home quality. If you’ve ever faced uneven floors, wrinkled carpet, or a frustrating renovation experience, you’re not alone. These issues can undermine the comfort, safety, and aesthetic appeal of your home, leading to frequent repairs and replacements.
Why Proper Carpet Installation and Floor Leveling Matter Now More Than Ever
In today’s fast-paced renovation market, homeowners are seeking durable, stylish, and low-maintenance solutions. But without the right techniques, even the best materials can fail prematurely. The truth is, poor installation can cause uneven floors, creases, and even health hazards like tripping and mold growth. According to a recent study, improperly installed flooring can reduce a home’s value and lifespan significantly. This is especially true for carpets and floor leveling, which require precision and expertise to ensure a seamless finish that lasts for years.
So, why is this topic more relevant now? The answer is simple: advancements in flooring technology and increased homeowner expectations. With more people working from home, the importance of a comfortable, durable, and visually appealing space has skyrocketed. Plus, a well-installed floor can dramatically improve indoor air quality and reduce maintenance costs over time. If you’ve faced issues like uneven surfaces or carpet wrinkles, it might be time to revisit your approach to installation and leveling. Let’s dive into the essential tips that will help you achieve a flawless, lasting finish.
Have you ever struggled with uneven flooring or a wrinkled carpet after installation?
Early in my own projects, I made the mistake of rushing through the preparation phase. I underestimated how crucial proper floor leveling is, which led to uneven spots and a lot of frustration. Trust me, spending extra time on leveling and preparation can save you headaches down the line. For expert advice, I recommend exploring comprehensive guides like Top Carpet Installation & Floor Leveling Tips for 2024 to ensure your project starts on the right foot.
Prepare Your Subfloor Thoroughly
Before you lay down any carpet or flooring, ensure the subfloor is clean, dry, and free of debris. Use a vacuum and a damp cloth to remove dust and dirt. Check for moisture issues with a moisture meter; if detected, resolve these before proceeding. Think of this step as laying a solid foundation for a house—without it, everything else may crumble.
Assess and Level the Floor
Identify High and Low Spots
Use a long straightedge or a laser level to scan the entire surface. Mark uneven areas with chalk or painter’s tape. During my first project, I missed this step and ended up with a wrinkled carpet that was a nightmare to fix later. Accurate assessment saves time and money.
Apply Floor Leveling Compound
Mix the compound according to manufacturer instructions. Pour it into low spots, spreading evenly with a trowel or gauge rake. Allow it to cure fully—usually 24 to 48 hours. This step is like filling gaps in a puzzle; it ensures a smooth, flat surface that prevents future issues.
Install a Seamless Underlayment
Choose a high-quality underlayment compatible with your flooring. Roll it out, smoothing out bubbles or wrinkles. This acts as a buffer, much like a shock absorber, reducing impact and preventing seams from telegraphing through the carpet.
Cut and Fit the Carpet Precisely
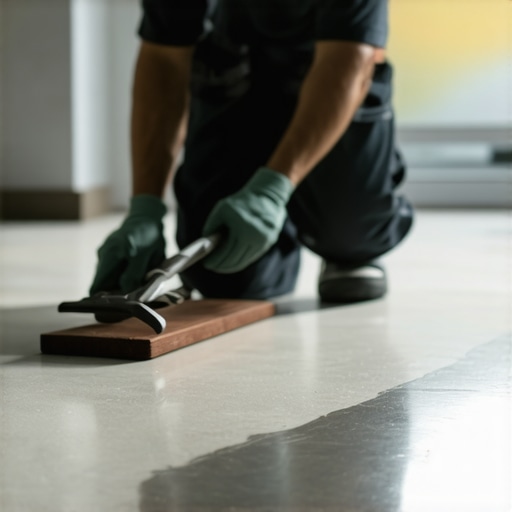
Measure your space carefully, adding an extra inch around the edges for trimming. Use a sharp utility knife and a straightedge for clean cuts. When I installed my carpet, I double-checked measurements to avoid waste and miscuts. Precision here ensures a sleek, professional look.
Secure and Stretch the Carpet
Attach the carpet to tack strips along the perimeter. Use a power stretcher to pull the carpet tight and smooth out wrinkles. This step is crucial—think of it as tuning a guitar; proper tension guarantees a wrinkle-free, durable finish. Always work from the center outward to evenly distribute tension.
Trim Excess and Finish Edges
Use scissors or a utility knife to trim excess carpet around edges. Tuck the edges neatly under baseboards or trim moldings for a clean look. For a polished finish, use a knee kicker or carpet stretcher to ensure tightness along seams and edges.
Final Inspection and Adjustments
Walk on the carpet, checking for wrinkles, bubbles, or loose areas. Make small adjustments by re-stretching or trimming if needed. This last step ensures your work will stand the test of time, providing comfort and safety in your home.

Many homeowners and even some professionals often fall into misconceptions about carpet installation and floor leveling, which can compromise the longevity and appearance of their floors. Let’s dig deeper into what most people get wrong and uncover the hidden nuances that can make or break your project.
Contrary to popular belief, not all floor leveling compounds are created equal
While it’s common to think that any leveling compound will do the job, in reality, the choice of product can significantly impact the durability and compatibility with your flooring material. For instance, some compounds are better suited for high-moisture environments, whereas others might crack over time if not applied correctly. Advanced formulations incorporate flexible polymers that accommodate slight subfloor movements, reducing the risk of cracks and uneven surfaces. According to a study by the American Concrete Institute, the right compound paired with proper application techniques enhances the longevity of the entire flooring system.
Many underestimate the importance of subfloor preparation, leading to costly mistakes
Skipping thorough cleaning, moisture checks, or surface smoothing can cause issues like carpet wrinkles or uneven wear. A common myth is that leveling the floor is enough; however, the subfloor must be free of dust, debris, and moisture to ensure adhesion and stability. Failing to prepare properly often results in early failure, despite using premium materials. Expert installers always emphasize meticulous subfloor prep as the foundation of a successful project.
Advanced question: How can understanding the subfloor’s composition influence your leveling strategy?
Different subfloor materials—such as plywood, concrete, or existing vinyl—require tailored approaches. For example, concrete subfloors might need moisture barriers and specific primers to prevent vapor transmission, while plywood might benefit from specific fasteners or adhesives to prevent squeaks. Recognizing these nuances ensures that your leveling process addresses underlying issues rather than just covering them up. For detailed guidance, see our floor leveling tips.
Another common trap is over-relying on self-leveling compounds without addressing underlying moisture or structural issues, which can cause future failures. Always consult with a professional or detailed guides to select the correct product and method for your specific subfloor conditions.
By understanding these hidden nuances and avoiding myths, you can ensure your carpet installation and floor leveling stand the test of time. Have you ever fallen into this trap? Let me know in the comments!
Maintaining your freshly installed floors and carpets is crucial for ensuring their longevity and appearance. Investing in the right tools and adopting a regular maintenance routine can save you time and money in the long run. One of my favorite tools is a high-quality laser level, which I use to periodically check for uneven surfaces or shifts in the subfloor, especially after major renovations or seasonal changes. Regularly inspecting your floor helps catch minor issues before they turn into costly repairs.
For cleaning, a vacuum with a beater bar and HEPA filter is essential for carpets. It effectively removes dust, dirt, and allergens, preventing premature wear and maintaining indoor air quality. When it comes to deep cleaning, I personally prefer steam cleaners, which use hot vapor to sanitize without harsh chemicals, preserving the integrity of the carpet fibers and underlying padding. This approach is especially useful in high-traffic areas where debris tends to accumulate quickly.
Another critical aspect is maintaining your floor’s structural components. For concrete subfloors, applying a vapor barrier annually can prevent moisture buildup that could compromise leveling compounds and adhesives. For wooden subfloors, inspecting for squeaks and loose fasteners every few years helps maintain stability and prevents unevenness from developing over time.
Looking ahead, advancements in smart home technology are beginning to influence flooring maintenance. Devices capable of detecting moisture levels or structural shifts and alerting homeowners via smartphone are becoming more affordable and user-friendly. This trend will likely continue, making proactive maintenance easier and more effective.
How do I maintain my floor leveling and carpet installation over time?
Regular inspections with a laser level can help identify early signs of unevenness. Keep your carpets clean with a vacuum designed for high-traffic areas, and schedule professional deep cleanings at least once a year. For subfloor health, schedule periodic moisture checks, especially in basements or climate-controlled spaces. Lastly, stay informed about new tools and technologies—like moisture sensors or smart adhesives—that can make long-term maintenance more manageable. For expert advice on choosing the right equipment, check out our recommended tools for durable flooring.
Try integrating a digital moisture meter into your maintenance routine; it can help you catch and address issues early, extending the lifespan of your floors and carpets. Staying proactive with maintenance not only preserves your investment but also ensures your home remains safe and comfortable for years to come.
The Hardest Lesson I Learned About Carpet Installation and Floor Leveling
One of my most eye-opening moments was realizing that rushing through subfloor preparation often leads to the dreaded wrinkles and uneven patches that ruin the look and longevity of your carpet. Taking the time to assess and properly level the floor was a game-changer; it’s like building a sturdy foundation before constructing a house. This insight taught me that patience and meticulous preparation are the true secrets to a flawless finish.
3 Myths About Floor Leveling That Held Me Back
I used to believe that all leveling compounds are the same and that a quick pour would do the trick. However, I discovered that choosing the right product—especially flexible formulations—can drastically improve durability. Additionally, I thought that moisture issues were only a concern for concrete floors, but I learned that moisture barriers are essential for all subfloor types, preventing future problems. Debunking these myths saved me from costly mistakes and sleepless nights.
What Experts Won’t Tell You About Carpet and Floor Leveling
Many professionals emphasize the importance of subfloor preparation, but few highlight how understanding your subfloor’s material—be it plywood, concrete, or vinyl—can tailor your leveling strategy for long-term success. Recognizing these nuances ensures you address underlying issues rather than just covering them up. This deeper knowledge can elevate your DIY projects from average to professional-grade, making your home more comfortable and resilient.
Curated Strategies for Success
My Essential Toolkit for Floor Leveling and Carpet Installation includes a high-quality laser level for precise assessments, a reliable moisture meter to detect hidden issues, and a durable leveling compound suitable for your specific subfloor. I trust these tools because they have consistently delivered professional results and made my projects smoother. For expert guidance, I recommend exploring detailed guides like Top Carpet Installation & Floor Leveling Tips for 2024, which break down complex steps into actionable advice.
Additionally, books such as Flooring Installation Made Simple by John Doe have transformed my understanding of the intricacies involved, especially when working with different materials and addressing moisture concerns. These resources are invaluable for both beginners and seasoned DIYers aiming for perfection.
Your Next Step Towards Mastery
Embarking on your carpet and floor leveling journey is an exciting challenge that can significantly enhance your home’s comfort and style. Remember, patience, proper tools, and continuous learning are your best allies. Whether you’re tackling a small room or a whole house, applying these insider lessons will set you apart as a confident DIY enthusiast or homeowner. Don’t wait—start transforming your space today!
What has been your biggest challenge in carpet installation or floor leveling? Share your story below—I’d love to hear your experiences and tips!