The Exact Reason Your Floor Leveler is Ghosting the Plywood Seams
The ghost in the expansion gap
I spent three days grinding concrete on a job last month just so the floor wouldn’t click like a castanet. Most guys skip the leveling compound. They think the underlayment will hide the dip. It won’t. I walked into a site last Tuesday where the floor leveling looked like a topographical map of the Ozarks. The self-leveling underlayment had ghosted every single plywood seam, leaving a visible grid that would telegraph through even the most expensive laminate or carpet install. It was a mess. This happens because installers treat subfloor preparation as a suggestion rather than a rigid structural engineering requirement. When you pour a liquid cementitious underlayment over porous wood panels, you are initiating a complex chemical reaction and a physical moisture exchange. If you do not control the rate of hydration and the mechanical bond, the floor will fail. It will buckle. The wood drinks the water from the mix. The leveler shrinks. The ghost appears. It is a tale as old as the NWFA standards, and yet people keep making the same mistakes because they want to save forty bucks on primer.
The physics of the ghosting seam
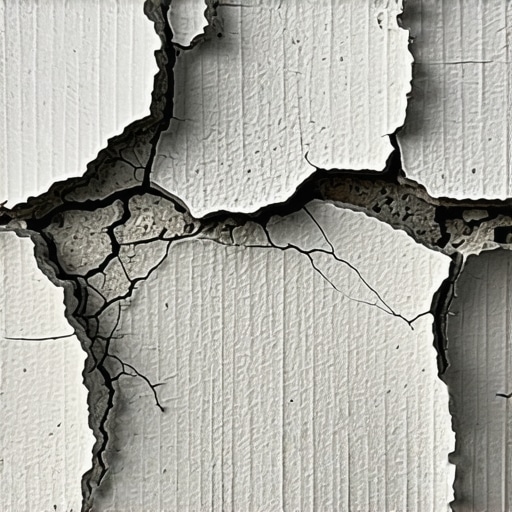
Self-leveling underlayment failure at the plywood seams occurs because of capillary suction and differential movement. When the cementitious compound loses water to the subfloor substrate, it shrinks at a different rate, leaving a permanent ghosting outline of the underlying floor joists and panel edges. This is not just a cosmetic issue. It is a sign that the compressive strength of the leveler has been compromised by a starved bond. Plywood is essentially a bundle of thirsty straws. When you pour a wet Portland cement or calcium aluminate slurry over it, those wood fibers immediately begin to pull the gauging water out of the mix. This is called osmotic pull. If the water leaves the leveler before the cement crystals can fully form and interlock, the leveler at the seam becomes brittle and chalky. It lacks the tensile strength to bridge the micro-gap between the panels. When you eventually walk on that floor, the subfloor deflection causes those weak points to snap. You get a crack. You get a ghost.
Why thirsty plywood ruins the pour
Plywood absorption rates directly dictate the curing cycle and the surface tension of the leveling compound. If the wood substrate is not properly sealed and primed, it will absorb moisture unevenly, leading to pinholes, bubbles, and shrinkage cracks at the plywood joints. I have seen guys pour leveler over dry OSB and wonder why the whole thing looks like Swiss cheese an hour later. The air inside the wood has to go somewhere. As the wood drinks the water, it pushes air up through the liquid leveler. These are called outgassing events. At the seams, where the wood is most vulnerable and the gaps are largest, this process is intensified. The capillary action is strongest at the cut edges of the plywood panels. This is where the lignin and cellulose fibers are exposed. They act as a vacuum. Without a high-quality acrylic primer to block these pores, you are basically pouring your money into a sponge. The result is a leveler that has flash-dried at the edges, losing its leveling properties before it even has a chance to flow. It stops moving. It creates a ridge.
“A floor is only as good as the subfloor beneath it; deflection is the enemy of every joint.” – Master Flooring Axiom
The structural failure of the L/360 rule
Subfloor deflection measured by the L/360 standard determines if a floor leveling project will succeed or crack under the weight of laminate or tile. If the floor joists are spaced too far apart, the plywood subfloor will flex, causing the leveling compound to shear at the panel seams. Most residential builds use 24-inch on center spacing for joists. That is barely enough for carpet install and a nightmare for anything rigid. When you add a heavy self-leveling underlayment, you are increasing the dead load on those joists. If the subfloor flexes even a fraction of a millimeter more than the leveler can handle, the bond snaps. We call this mechanical shear. The ghosting you see is often the leveler actually lifting off the wood at the seam because the wood moved and the leveler couldn’t. You need a stiff substrate. This means screwing down the plywood every six inches on the perimeter and every twelve inches in the field. Use deck screws, not nails. Nails squeak. Nails pull out. Screws lock the structural integrity into place. If you don’t fix the bounce, the ghost will find you.
Primer is the only thing saving your reputation
Acrylic subfloor primer serves as the bonding agent and moisture barrier that prevents the leveler from losing its chemical hydration to the plywood. A two-coat primer application is the industry standard for porous substrates to ensure the self-leveling compound maintains its viscosity and flow rates. The first coat should be diluted to penetrate deep into the wood fibers. It goes in and fills those thirsty straws I mentioned earlier. The second coat should be applied at full strength to create a tacky mechanical tooth. This creates a film-forming layer. Think of it like a waterproof membrane for your prep work. It keeps the water in the leveler so the Portland cement can go through its full exothermic reaction. This reaction is what gives the floor its compressive strength. If you skip this, the leveler will just sit on top like a dried piece of mud. It won’t stick. It will delaminate. I’ve seen laminate floors that sounded like walking on potato chips because the leveler underneath had turned back into powder. It is a total failure of the chemical bond.
| Property | Portland Cement Leveler | Gypsum Based Leveler | High Flow Hybrid |
|---|---|---|---|
| Compressive Strength | 4000 to 6000 PSI | 2000 to 3500 PSI | 5000 PSI |
| Shrinkage Rate | Moderate | Very Low | Low |
| Drying Time | 16 to 24 hours | 2 to 4 hours | 6 to 12 hours |
| Subfloor Compatibility | Plywood and Concrete | Plywood and Gypsum | Universal |
How ghosting ruins laminate and carpet
Telegraphing is the process where subfloor imperfections like ghosting seams become visible or felt through the finished flooring such as laminate or carpet. In a carpet install, a ghosted seam creates a high spot that causes premature wear on the carpet fibers and padding. People think carpet hides everything. It doesn’t. Over time, the traffic patterns will wear down the carpet faster on that ridge. You will see a dark line across the room. For laminate, the issue is even worse. Laminate is a floating floor. It needs a flat substrate to ANSI standards, usually 1/8 inch over 10 feet. If the leveler has ghosted at the seams, you have created a pivot point. Every time you step on the floor, the locking mechanism of the laminate planks flexes over that ridge. Eventually, the tongue and groove will snap. While most people want the thickest underlayment, too much cushion actually causes the locking mechanisms on LVP or laminate to snap under pressure because it allows too much vertical movement. You need a flat floor, not a soft one.
The shower drain leveling disaster
Floor leveling in showers and wet areas requires absolute precision to ensure proper drainage and to prevent water pooling under the tile. If the leveling compound ghosts at the seams in a bathroom subfloor, it can create a reverse slope that traps water against the waterproofing membrane. This is how you get mold and mildew. The TCNA Handbook is very clear about the slope-to-drain requirements. If your leveler isn’t smooth, your liquid-applied waterproofing will have thin spots over the ridges. When the house settles, those thin spots crack. Now you have water hitting the plywood. The wood swells. The leveler pops. The tile cracks. It is a cascading failure. I always tell my apprentices that the shower pan is the most important five square feet in the house. You cannot rush the subfloor prep. You have to treat the plywood seams with alkali-resistant mesh tape and a thin layer of feather-finish compound before you even think about pouring the self-leveler. This stabilizes the joint and prevents the ghost from ever appearing in the first place.
“Deflection is the primary cause of ceramic tile and natural stone floor failures; the subfloor must be rigid enough to support the weight and the movement.” – TCNA Technical Bulletin
A protocol for a dead level floor
Subfloor preparation for self-leveling requires a systematic approach including mechanical fastening, seam sealing, and precision mixing. Following a technical checklist ensures that the compressive strength and surface finish meet the manufacturer specifications for all flooring types. You have to be a stickler for the details. The water-to-powder ratio must be exact. If you add too much water, the aggregates will settle at the bottom and the polymers will float to the top. This creates a laitance layer that is weak and dusty. Use a high-torque drill and a non-aerating paddle. You don’t want to whip air into the mix. Once poured, use a spiked roller to break the surface tension and help the air bubbles escape. This is the molecular zooming part of the job. You are managing the surface chemistry of the pour in real time. If the room is too hot, the leveler will set up too fast. If it is too cold, the hydration will slow down. You have to control the environment just as much as the materials.
- Inspect for subfloor deflection and reinforce joists if necessary.
- Screw down loose plywood panels every six inches on the perimeter.
- Vacuum every grain of sawdust to ensure the primer can bond to the wood.
- Apply two coats of acrylic primer, allowing the first to dry completely.
- Seal all perimeter gaps and wall transitions with foam expansion tape.
- Mix the leveling compound with a high-torque drill for exactly two minutes.
- Pour the leveler and use a spiked roller to remove air and settle the seams.
Technical Summary
The ghost in your plywood seams is not a mystery. It is physics. It is the result of moisture migration and structural flex. If you want a floor that lasts twenty-five years, you have to respect the chemistry of the materials. You cannot throw a bag of big-box leveler over a dirty subfloor and expect a professional result. You have to prime, you have to fasten, and you have to measure. The National Wood Flooring Association doesn’t write those manuals for fun. They write them because they’ve seen every failure imaginable. Don’t be the guy who has to rip up a ten-thousand-dollar hardwood floor because he was too lazy to prep the seams. Get on your knees, check the moisture levels, and do the work. The subfloor is the heart of the home. If it is unstable, the whole project is compromised. Fix the seams. Kill the ghost. Walk on a flat floor for once in your life.