The Secret Way to Level a Floor Without Moving the Baseboards
Most guys skip the leveling compound. They think the underlayment will hide the dip. It won’t. I spent three days grinding concrete on a job last month just so the floor wouldn’t click like a castanet. I once walked into a house where a 15,000 dollar wide-plank walnut floor was cupping so bad it looked like a potato chip because the installer didn’t check the crawlspace humidity. My hands are permanently stained with the grey residue of Portland cement and my knees have the permanent ache of a man who has spent twenty-five years chasing the perfect bubble on a spirit level. You want to talk about aesthetics? Go to a museum. You want to talk about a floor that survives a decade of foot traffic, heavy furniture, and the relentless pull of humidity? You talk to the man with the moisture meter. If your subfloor isn’t flat within 1/8 of an inch over a 10-foot span, you are building a house of cards. The secret isn’t in the wood or the vinyl. The secret is the physics of the substrate.
The ghost in the expansion gap
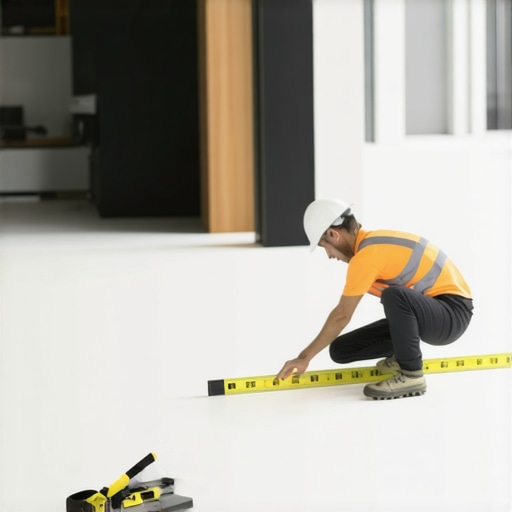
Floor leveling requires a laser level or ten-foot straightedge to identify subfloor depressions. To level without removing baseboards, you must use a foam backer rod or silicone dam at the perimeter to prevent self-leveling underlayment from seeping into wall cavities. This preserves the expansion gap required for hardwood and laminate. Most installers fail because they ignore the capillary action of liquid cement. It will find the hole in your subfloor. It will drain into your basement or your crawlspace before it sets. You have to seal the perimeter like you are prepping a boat for open water. You take a 1/4 inch backer rod and you wedge it into that gap between the bottom of the baseboard and the subfloor. You run a bead of low-tack painter’s tape along the face of the wood. This isn’t about being neat. This is about structural containment. If that liquid SLU touches your baseboards, it will bond to them. When the floor tries to expand in July, it will buckle. It will snap your locking tracks. It will ruin everything.
“A floor is only as good as the subfloor beneath it; deflection is the enemy of every joint.” – Master Flooring Axiom
Why your subfloor is lying to you
Subfloor deflection refers to the vertical movement of the joist system under a live load. You must calculate the L/360 rating for ceramic tile or L/480 for natural stone to prevent grout line cracking and tile delamination. A subfloor looks solid until you walk on it. You see a dip and you think you can just pour some mud and call it a day. You are wrong. You need to check the joist spacing. If you have 2×10 joists spaced at 16 inches on center, you might be fine. If some genius decided to go 24 inches on center, your floor is a trampoline. No amount of leveling compound fixes a structural bounce. You have to sister those joists or add a layer of 1/2 inch Baltic birch plywood, glued and screwed every 6 inches. I use 2-inch deck screws. I don’t use nails. Nails squeak. Nails pull out. Screws are a mechanical bond that respects the physics of wood movement.
| Subfloor Material | Typical Moisture Content | Acclimation Period | Janka Rating Role |
|---|---|---|---|
| Plywood | 8 percent to 12 percent | 48 hours | Structural Base |
| OSB | 7 percent to 10 percent | 72 hours | Moisture Sensitive |
| Concrete Slab | Under 4 percent | 28 days cure | Thermal Mass |
The 1/8 inch that ruins everything
Surface preparation involves removing drywall mud, paint overspray, and adhesive residue to ensure a mechanical bond for the primer. High-solids acrylic primers penetrate the capillary structure of the concrete or wood to prevent the leveling compound from dehydrating too quickly. If the subfloor drinks the water out of the leveler, the leveler won’t flow. It will just sit there like a pile of wet sand. You want a glass-like finish. You want the liquid to find the low spots and stay there. I use a spiked roller to release the air bubbles. If you leave the bubbles, you get pinholes. Pinholes are weak spots. In the world of high-performance flooring, a weak spot is a future crack. You need to understand the chemistry of calcium aluminate. It isn’t like the bag of concrete you buy for fence posts. It is a highly engineered salt-based cement that shrinks less than 0.02 percent. It is the only way to get a floor flat enough for large format tile or laminate planks.
“The integrity of a floating floor is entirely dependent on the compressive strength of the substrate.” – NWFA Technical Manual
The chemical bond of the primer
Acrylic primers create a bridge between the porous subfloor and the cementitious underlayment, preventing delamination and hollow spots. Without a proper moisture vapor barrier, ground-source humidity will push through the slab and rot your laminate from the inside out. You have to look at the molecular reality. Concrete is a sponge. It looks hard, but it is full of tiny tubes. If you don’t seal those tubes, the vapor drive will destroy your adhesive. I’ve seen 4,000 square feet of luxury vinyl plank fail because the installer didn’t use a primer. The floor felt like a sponge. It smelled like a swamp. You spend the money on the primer or you spend the money on the lawsuit. There is no middle ground in this trade. You can’t cheat the chemistry. I apply my primer with a soft-bristle broom. I work it into the grain of the wood or the pores of the concrete. I let it get tacky. If it’s too wet, it’s useless. If it’s too dry and dusty, it’s a bond-breaker.
- Check subfloor for flatness using a 10-foot straightedge
- Seal all holes in the subfloor with rapid-set patch
- Install foam backer rod in the gap under the baseboards
- Apply acrylic primer and allow to dry until tacky
- Mix self-leveling underlayment with a high-speed drill and paddle
- Pour the mixture starting at the furthest corner
- Use a gauge rake to set the depth of the pour
- Maintain a wet edge to ensure the mixture blends seamlessly
The myth of the thick underlayment
Underlayment thickness does not compensate for subfloor irregularities; excessive cushioning leads to joint fatigue and locking mechanism failure. You want the thinnest, densest acoustic barrier possible, typically rated for IIC and STC performance. People buy the thick, squishy underlayment because it feels good under their hand in the store. It is a lie. That squish is the enemy. When you put a heavy dresser on that floor, the planks sink. The tongue and groove joints are made of HDF or plastic. They aren’t designed to bend. They snap. Then you get a gap. Then the gap collects dirt. Then the floor is ruined. You want a high-density rubber or felt. You want something that doesn’t compress more than 5 percent. If your floor isn’t level, the underlayment won’t hide it. It will just highlight it every time you walk across the room and hear the click-clack of a floating floor hitting a hollow spot. That sound is the sound of a bad installation.
Mastering the perimeter dam
Perimeter dams created with weatherstripping or silicone protect the wall base while allowing for structural movement. This technique is vital when installing laminate or carpet in moisture-prone areas like showers or basements. You take your 1/4 inch backer rod. You push it under the baseboard. You leave a small lip. You pour your leveler right up to that rod. The rod acts as a gasket. Once the leveler is hard, you pull the rod out. Or you leave it and cover it with a tiny bead of caulk. You haven’t moved a single piece of trim. You haven’t had to deal with the humiliating task of trying to match old stain or paint on a baseboard that cracked when you pulled it off the wall. You saved the homeowner three days of carpentry work. But you did it by respecting the physics of the pour. If you don’t dam it, the leveler goes under the wall and hits the 2×4 plate. Now your floor is bonded to the frame of the house. That is a recipe for a buckle that will lift your floor three inches off the ground in the summer.