Why Your Laminate Floor Feels Cold and the Underlayment Failed
Why Your Laminate Floor Feels Cold and the Underlayment Failed
I spent three days grinding concrete on a job last month just so the floor wouldn’t click like a castanet. Most guys skip the leveling compound. They think the underlayment will hide the dip. It won’t. I have seen guys throw down a cheap foam roll and expect it to fix a valley in the slab that was deep enough to hide a hammer. You walk across that floor and you feel every imperfection. You hear that hollow, clicking sound that screams ‘amateur hour.’ I have been on my knees for twenty-five years with a moisture meter and a level, and I can tell you that the floor you see is only as good as the concrete you don’t. Most homeowners think they are buying a aesthetic choice, but they are actually installing a structural system. If you ignore the physics of the subfloor, the chemistry of the adhesive, or the thermal properties of the material, your floor will fail. It is not a matter of if, but when. Laminate is essentially high-density fiberboard with a picture of wood on top. If that fiberboard is sitting on a cold, damp, or uneven surface, it will telegraph every single problem right to your feet. You are walking on a thermal bridge that is sucking the heat out of your house and into the earth.
The thermal bridge beneath your feet
Laminate flooring feels cold because of high thermal conductivity and poor insulation values in the core material. When you place a dense material like high-density fiberboard (HDF) directly over a concrete slab without a sufficient thermal break, the concrete acts as a massive heat sink. Concrete has a high thermal mass. It wants to stay at the temperature of the ground below it, which is usually around 55 degrees Fahrenheit. Heat moves from warm to cold. Your body heat and the heat from your HVAC system are literally being drained through the floorboards. This is the law of thermodynamics in action. We are talking about conduction. The molecules in your warm floor are bumping into the cold molecules of the subfloor and transferring their energy. To stop this, you need a material with low thermal conductivity. You need a break in the chain. Most cheap underlayments are too thin to provide any real R-value. They are just a thin layer of plastic bubbles or low-grade polyethylene. They do nothing to stop the heat migration. You need something with density and thickness, like cork or high-density rubber, to actually provide a thermal barrier that keeps your toes warm in the winter.
“A floor is only as good as the subfloor beneath it; deflection is the enemy of every joint.” – Master Flooring Axiom
Why most underlayments fail in three years
Underlayment failure occurs when low-density foam compresses under foot traffic or when moisture vapor breaks down the cellular structure of the material. I see this in every ‘builder-grade’ home. They use that white or blue foam that is maybe two millimeters thick. At first, it feels okay. But after three years of you walking from the kitchen to the couch, that foam has lost its bounce. It has been crushed into a thin, useless film. When the underlayment loses its thickness, it creates a void between the laminate and the subfloor. This void allows the laminate to flex. Laminate is not designed to flex. The locking mechanisms, those tiny tongues and grooves, are made of pressed wood fibers. When they bend, they rub. When they rub, they break. Once those tabs snap, your floor is toast. There is no fixing it. You have to rip the whole thing out. Also, most people do not understand moisture vapor. Concrete is porous. It breathes. If you do not have a 6-mil poly vapor barrier, that moisture is moving up and attacking the underlayment. It can rot organic materials or cause synthetic ones to delaminate. You end up with a floor that feels soft in some spots and crunchy in others.
The subfloor secret that contractors skip
Floor leveling is the most overlooked step in the installation process and is the primary reason for mechanical failure in click-lock systems. A subfloor needs to be flat to within 3/16 of an inch over a 10-foot radius. If it is not, you are asking for trouble. I have walked onto jobs where the ‘professional’ installer just rolled out the padding over a slab that looked like the rolling hills of Kentucky. You cannot do that. You have to get out the grinder and the self-leveling compound. You have to find the high spots and take them down. You have to find the low spots and fill them in. If you have a dip, the floor will bounce. Every time you step on that spot, you are putting hundreds of pounds of pressure on a joint that was never meant to take it. Eventually, the joint will separate. Then dirt and moisture get in there. Now you have a gap that is growing every day. I spent half my career fixing floors that failed because the last guy was too lazy to mix a bag of leveler. It is dusty work. It is loud work. But it is the only way to ensure a floor lasts twenty years instead of twenty months.
A comparison of thermal resistance and density
Selecting the right material requires understanding the relationship between R-value and compression strength. A soft material might be warm, but it will cause the floor to fail under load. A hard material might be durable, but it will feel like ice. You have to find the middle ground. High-density cork is often the gold standard because it offers excellent thermal insulation while being nearly impossible to crush. Rubber is great for sound but lacks the same thermal properties. Foam is cheap and should be avoided for long-term residential use.
| Underlayment Material | R-Value | Density (lb/ft3) | Compression Strength |
|---|---|---|---|
| Standard PE Foam | 0.20 | 1.5 | Low |
| Cross-linked Polyethylene | 0.40 | 3.0 | Medium |
| Natural Cork (6mm) | 1.10 | 12.0 | High |
| High-Density Fiber | 0.60 | 18.0 | Very High |
The 1/8 inch rule that ruins everything
Expansion gaps at the perimeter of a room are mandatory to prevent floor buckling during seasonal humidity shifts. Wood and wood-based products like laminate are hygroscopic. They absorb moisture from the air and they grow. When the heat kicks on in the winter and dries the air out, they shrink. If you run your laminate tight against the baseboard or the drywall, it has nowhere to go. It will hit the wall and start to push back. This creates a peak in the middle of the room. I have seen floors rise four inches off the subfloor because they were pinned against a wall. You need at least a quarter inch, but preferably three-eighths, of space around the entire perimeter. This includes doorways, cabinets, and pipes. People hate the look of the gap, but that is what shoe molding is for. You cover the gap with the trim. You do not nail the trim into the floor. You nail it into the wall. The floor must be allowed to slide underneath the trim like a large, floating raft. If you pin it with a heavy kitchen island or nail the transition strips through the floor into the subfloor, you have killed the floor. It will buckle. It will break.
Why your laminate clicks like a castanet
The hollow clicking sound of laminate is caused by the vertical movement of the planks hitting a hard subfloor due to insufficient underlayment density. This is the ‘drum effect.’ When you walk, you are compressing the air trapped between the floor and the slab. If the underlayment is too thin or too soft, it doesn’t absorb the impact. It reflects it. This is why a cheap floor sounds like plastic. Higher quality laminate has a higher density core, which helps, but the underlayment is doing the heavy lifting for acoustics. You want an underlayment with a high IIC (Impact Insulation Class) rating. This measures how much sound is blocked from traveling through the floor. But you also want to consider the STC (Sound Transmission Class). If you are in a condo, the HOA will have strict rules about these numbers. I have seen people forced to tear out brand new floors because they didn’t meet the STC 50 requirement. They thought they could save fifty cents a square foot on the padding. It ended up costing them thousands in remediation and legal fees.
“Subfloor flatness is not a suggestion; it is the foundation of the entire mechanical assembly.” – TCNA Technical Bulletin
Essential steps for a professional laminate layout
A successful installation requires rigorous preparation and adherence to acclimation protocols before the first plank is laid. You cannot just buy the floor at the big-box store, drive it home, and install it. The wood fibers need to reach an equilibrium with the humidity and temperature of your home. This takes at least 48 hours, but 72 is better. If you skip this, the floor will expand or contract immediately after you install it, and you will have gaps or peaks within a week. Follow this checklist to avoid the most common failures.
- Test the concrete moisture levels using a calcium chloride test or an in-situ probe.
- Grind down all high spots until the floor is flat to within NWFA standards.
- Clean the subfloor until you could eat off it because dust ruins the adhesive bond on tape.
- Install a 6-mil poly vapor barrier with all seams overlapped by six inches and taped.
- Acclimate the laminate planks in the room where they will be installed for 72 hours.
- Check every plank for damage to the tongue or groove before clicking it into place.
- Maintain a consistent expansion gap around the entire perimeter using spacers.
The chemistry of moisture barriers
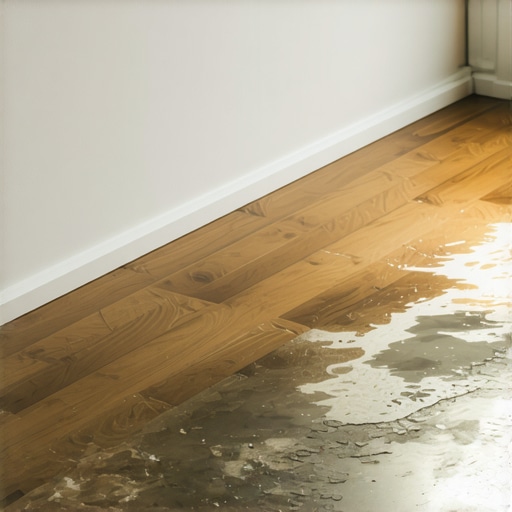
Moisture barriers prevent the migration of alkaline salts and water vapor from the concrete into the sensitive HDF core of the laminate. Concrete is a chemical soup. It contains lime and various salts. When water moves through the slab, it picks up these minerals. This is called efflorescence. If this moisture reaches the bottom of your laminate, it doesn’t just make it wet. It attacks the resins that hold the wood fibers together. This causes the edges of the planks to swell. This is called ‘peaking.’ You will see the edges of the boards pointing up like a tent. Once the core swells, it never goes back down. Even if you dry the room out, the damage is permanent. This is why I insist on a dedicated vapor barrier even if the underlayment claims to be ‘moisture resistant.’ A piece of foam with a thin plastic film is not a vapor barrier. You need 6-mil virgin polyethylene. It is cheap insurance against a total floor failure. Do not trust the ‘2-in-1’ products unless they are high-end, cross-linked materials with certified perm ratings. The chemistry of your floor is just as important as the physics of the installation. If the environment is wrong, the product will fail regardless of the price tag.