The Drip Test for Checking Your Shower Pan Slope
The Drip Test for Checking Your Shower Pan Slope
The 1/4 inch per foot slope is the absolute minimum requirement established by the Tile Council of North America (TCNA) to ensure hydrostatic pressure does not force water through grout joints. This drainage geometry relies on the subfloor stiffness and the pre-pitch layer to prevent standing water and mold growth. If you ignore this fundamental law of physics, your shower floor is a ticking time bomb. Most guys skip the leveling compound. They think the underlayment will hide the dip. It won’t. I spent three days grinding concrete on a job last month just so the floor wouldn’t click like a castanet. That job was supposed to be a simple LVP install over a basement slab, but the client had a previous contractor who thought a bag of cheap patch could fix a two-inch heave. It didn’t. I had to get the diamond grinders out and mask off the whole house. That is the reality of floor prep. It is dirty, it is loud, and it is the only thing that actually matters.
The 1/8 inch that ruins everything
Subfloor deflection and surface tension are the primary enemies of a successful shower pan installation. When a mortar bed or pre-sloped tray is off by even a fraction, the capillary action of the water will keep moisture trapped against the waterproofing membrane. This leads to a persistent swamp under your tile. I have seen guys spend thousands on high-end Carrara marble only to have it turn grey and blotchy within a month because the water sat in a low spot. Gravity is not a suggestion. It is the law. If your slope is 1/8 inch instead of 1/4 inch, the water will linger. It will sit there. It will grow bacteria. You will smell it before you see the mold.
“A floor is only as good as the subfloor beneath it; deflection is the enemy of every joint.” – Master Flooring Axiom
The National Wood Flooring Association and the TCNA agree on one thing. Substrates must be flat to within 1/8 inch over a 10-foot radius. In a shower, that precision is even more vital because we are dealing with liquid dynamics.
The ghost in the expansion gap
Perimeter expansion gaps and silicone movement joints are essential for preventing tile tenting and grout cracking in wet environments. A shower is a high-stress thermal environment. You turn on the hot water and the tile expands. You turn it off and it contracts. If you jammed that tile tight against the wall without a gap, something has to give. Usually, it is the bond between the thin-set and the substrate. This is why I laugh at the amateurs who use hard grout in the corners. You need 100 percent silicone. It allows the floor to breathe. It moves. It survives. Look at this comparison of slope requirements and their impact on drainage velocity. [image_placeholder]
| Slope Ratio | Percentage | Water Velocity | Risk Level |
|---|---|---|---|
| 1/8 inch per foot | 1.04% | Sluggish | High Risk of Pooling |
| 1/4 inch per foot | 2.08% | Optimal | Standard Compliance |
| 1/2 inch per foot | 4.16% | Aggressive | Potential Slip Hazard |
Why your subfloor is lying to you
Plywood delamination and OSB swelling are the hidden killers of modern bathroom flooring and shower foundations. Most builders use the cheapest 23/32 inch OSB they can find. It is garbage. If it gets wet during construction, the edges swell. Now you have a ridge. You try to lay a shower pan over that ridge and you have a pivot point. The pan will flex every time you step on it. That flex eventually snaps the waterproof seal at the drain. I always tell people to switch to an exterior grade plywood or, better yet, a cementitious backer unit over a properly leveled joist system. You have to check the joist spacing. If you are at 24 inches on center, you are asking for trouble. You need to sister those joists or add a second layer of subflooring. The floor must be rock solid. No bounce. No movement. Just a dead, flat plane.
“The installer shall ensure the substrate meets the minimum requirements for the specific tile type, including a deflection limit of L/360 for ceramic and L/720 for natural stone.” – TCNA Handbook Standards
This is not just a recommendation. It is how you prevent a $20,000 bathroom from failing in three years.
Testing the flow with precision
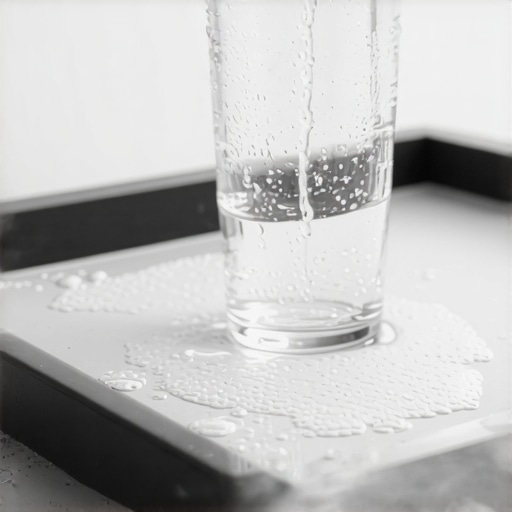
The drip test is the ultimate forensic diagnostic for checking if your shower pan slope is functioning at a molecular level. You do not just dump a bucket of water and call it a day. You use a dropper or a small squeeze bottle. You place single drops of water at the furthest corners of the pan. You watch the surface tension. Does the drop sit there like a bead on a waxed car? Or does it immediately begin to migrate toward the drain flange? If it sits, you have a problem. The friction of the substrate is overcoming the pull of gravity. This is often caused by a ‘birdbath’ in the mortar bed. A tiny dip that you cannot see with the naked eye but that the water knows intimately. You must also check the transition from the floor to the drain. If the drain is set too high, you create a dam. Water will pool around the metal grate. This is where the weep holes in a three-piece drain assembly come into play. If those holes are clogged with mortar because you were too lazy to put gravel or spacers around them, the water has nowhere to go. It stays in the mud bed. It rots the house from the inside out.
The hidden lies of a wet bed
Sand and cement ratios and modified thin-set chemistry dictate the long-term structural stability of your shower floor. Some old-school guys still swear by a 5-to-1 dry pack. It works, but only if you know how to pack it. If it is too loose, it is porous and weak. If it is too wet, it shrinks and cracks. I prefer the modern pre-blended fortified mortars. They have polymers in them. They bond to the substrate better. But even the best mortar cannot fix a bad slope. You have to be a surgeon with the screed bar. While most people want the thickest underlayment, too much cushion actually causes the locking mechanisms on LVP to snap under pressure. The same logic applies to shower pans. You want a dense, non-compressible base. If you use a foam tray, it better be high-density. Cheap foam pans from the big-box stores are trash. They compress. The grout cracks. The leak starts. It is a cycle of failure that keeps the restoration companies in business. I am not in the restoration business. I am in the ‘do it right the first time’ business.
Checklist for a Perfect Shower Pan
- Verify joist spacing and subfloor thickness before any demolition.
- Check the slab for moisture using a calcium chloride test if on a basement level.
- Apply a high-quality liquid waterproofing membrane in at least two coats.
- Ensure the pre-pitch under the liner is exactly 1/4 inch per foot.
- Protect the drain weep holes with crushed stone or specialized plastic spacers.
- Perform the drip test at the corners and the midpoint of each wall.
- Allow the mortar bed to cure for at least 24 hours before applying tile.
Precision is everything. I have been doing this for 25 years. I have seen every shortcut in the book. I have seen the guys who think they can level a floor with a bag of thin-set. They can’t. I have seen the guys who think a level is just a suggestion. It isn’t. You treat the floor like a piece of engineering. You treat the water like an intruder that is trying to destroy your home. Because it is. Water is the universal solvent. It will find the hole. It will find the flat spot. It will sit there and eat your house. Do the test. Grind the floor. Fix the slope. Don’t be the guy I have to come in and fix later. It will cost you triple. It will take a week. Your wife will be mad. Your house will smell like dust. Do it right. Follow the standards. The NWFA and the TCNA wrote the rules for a reason. Read them. Use them. Win.