The Secret to Leveling a Kitchen Floor Around Cabinets
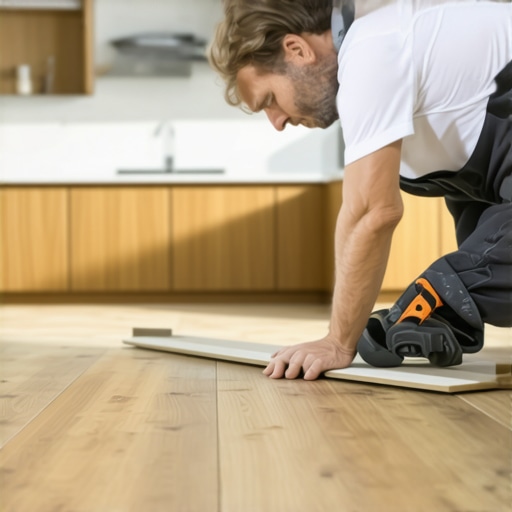
I spent three days grinding concrete on a job last month just so the floor would not click like a castanet. That kitchen was a maze of custom cabinetry and high end appliances. Most guys skip the leveling compound. They think the underlayment will hide the dip. It will not. I smelled like silicate dust and spent six hours with a diamond cup wheel attached to a vacuum that was screaming for its life. The homeowner did not understand why I was there on my knees before the first plank ever touched the house. They understand now that their floor feels like solid marble instead of a bouncy castle. When you are dealing with kitchen flooring, you are fighting the weight of cabinets and the physics of gravity. If the floor is not flat, the laminate locking system will fail. It is that simple. This is not about being a perfectionist. It is about structural engineering at a microscopic level. I have seen thousand dollar floors ruined by a three millimeter dip. Do not be the person who ignores the subfloor. It is the most expensive mistake you can make.
The concrete reality of kitchen subfloors
Kitchen floor leveling requires a tolerance of 3/16 of an inch over a 10 foot radius to ensure the structural integrity of floating laminate joints. Most subfloors are not flat from the builder. They have humps and valleys that the eye cannot see. When you install a stiff material like laminate or a modern stone plastic composite, it cannot contour to these shapes. It bridges them. Every time you walk on a bridge, it flexes. That flex is the sound of your floor dying. You need to identify every deviation before the cabinets become an obstacle. Use a 10 foot aluminum straight edge. Slide it across the room. If you can see light under the bar, you have a problem. If the bar teeters, you have a hump. In a kitchen, these issues are magnified because the floor must run under or against heavy cabinets that do not move. If the floor dips right where the dishwasher sits, you will never get that appliance level. You will be fighting the machine and the floor for years. Leveling is the only way out.
“A floor is only as good as the subfloor beneath it; deflection is the enemy of every joint.” – Master Flooring Axiom
The physics of the bubble and the laser
A level floor and a flat floor are not the same thing but in a kitchen you need both for cabinet integration. You can have a floor that is perfectly flat but slants toward the refrigerator. That is a level issue. You can have a floor that is perfectly level but has a massive crater in the center. That is a flatness issue. For kitchen floor leveling, you need a self leveling compound that handles both. These products are high flow polymers. They use the same physics as water to find their own height. However, they are not magic. They require mechanical preparation. If you do not grind the high spots first, you will use twice as much compound. The chemistry of the bond depends on the concrete pores being open. If the slab is sealed or greasy from years of kitchen cooking, the leveler will peel off like a scab. You must use a diamond grinder to open the surface. I want to see the aggregate. I want the floor to look like a salt and pepper shaker before I pour a drop of primer.
Why cabinets create a leveling nightmare
Installing new floors around existing cabinets is a surgical procedure that requires damming and perimeter isolation. You cannot just pour liquid leveler against the toe kicks of your cabinets. It will seep under them and potentially lock your dishwasher or trash compactor into place forever. You need to create a barrier. I use weatherstripping or spray foam to create a dam. This allows the floor to rise to the necessary height without flooding the cavity beneath the base units. This is especially vital when transitioning from a carpet install in the adjacent room. Carpet hides a multitude of sins because the pad is thick and forgiving. When the carpet comes out, you see the disaster the builders left behind. You might find a half inch height difference between the kitchen tile and the living room slab. You have to bridge that gap with a long, slow feather of compound. If you rush it, you create a trip hazard. If you do it right, the transition is invisible to the foot.
Chemical bonds and the primer protocol
The success of a leveling pour depends entirely on the chemical primer used to bridge the subfloor and the new compound. Most failures happen because people skip the primer or use the wrong one. The primer stops the subfloor from sucking the water out of the leveler. If the water leaves too fast, the compound does not have time to flow. It clumps. It becomes a lumpy mess that is harder to fix than the original dip. You want an acrylic based primer that creates a tacky film. In regions with high humidity like the Gulf Coast, this primer also acts as a minor moisture retarder. In dry climates like Phoenix, it keeps the concrete from dehydrating the mix. You want to see a shiny surface before you pour. I always wait until the primer is clear and sticky. If you pour onto wet primer, you are asking for a delamination event. I have seen guys lose three days of work because they were too impatient to wait one hour for the primer to dry.
| Property | Self Leveling Underlayment | Patching Compound | Plywood Underlayment |
|---|---|---|---|
| Depth Capacity | 1/8 to 5 inches | Feather edge to 1/2 inch | 1/4 to 3/4 inch |
| Prep Time | High with priming | Medium | Low |
| Structural Support | Very High | Medium | High |
The structural failure of the floating island
A kitchen island must never be installed on top of a floating laminate floor because it pins the planks and causes buckling. This is the most common call I get. A homeowner installs beautiful laminate and then bolts a heavy marble topped island through the floor. The floor cannot move. As the seasons change and the wood fibers expand or contract, the floor has nowhere to go. It will lift. It will peak at the seams. It will eventually snap the locking mechanisms. The secret to a professional kitchen install is to level the floor, install the island directly to the subfloor, and then install the floor around it. You leave a 1/4 inch gap around the island and hide it with a base shoe molding. This allows the entire floor to breathe as a single unit. It is the difference between a floor that lasts twenty years and one that fails in twenty months. I once saw a floor in a high rise that had buckled six inches into the air because they locked it under an island and a refrigerator. It looked like a mountain range.
Transitioning from kitchens to showers
The subfloor prep for a kitchen often mirrors the requirements for walk in showers where floor height consistency is mandatory. When we talk about showers, we are talking about waterproofing and slope. In a kitchen, we are talking about flat and level. However, if your home has an open floor plan where the kitchen flows into a mudroom or a bathroom with a shower, the heights must match perfectly. This is where the zoom into the mil thickness of the wear layer matters. A high quality laminate might be 12 millimeters thick with a 2 millimeter pad. Your tile in the shower might be 3/8 of an inch with a 1/2 inch backer board. If you do not account for these heights during the leveling phase, you will end up with a huge transition strip. I hate T moldings. They are a trip hazard and they look cheap. I prefer to use the leveling compound to create a gentle ramp that brings the kitchen floor up to meet the bathroom tile perfectly. This creates a zero threshold look that architects love and my knees appreciate.
- Check the floor with a 10 foot straight edge.
- Grind all high spots until they are flush.
- Vacuum the slab twice to remove all fines.
- Apply the manufacturer specific primer with a nap roller.
- Install dams around all cabinets and floor vents.
- Mix the compound with a high speed mixer for exactly two minutes.
- Pour from the furthest corner and use a spike roller to release bubbles.
The 1/8 inch rule that saves your warranty
Most laminate manufacturers will void your warranty if the floor is installed on a surface with more than 1/8 inch of deviation over 6 feet. They do this because they know the physics of their product. Laminate is made of high density fiberboard. It is strong but brittle. When it is forced to bend over a hump, the tongue and groove joint is under constant tension. Eventually, the tongue will shear off. Then you have a gap. Then water from your kitchen sink gets into that gap. The fiberboard swells like a sponge. Your floor is ruined. People blame the product. They say the laminate was cheap. It was not the laminate. It was the installer who was too lazy to use a level. You must respect the 1/8 inch rule. It is the gold standard of the industry. While most people want the thickest underlayment, too much cushion actually causes the locking mechanisms on laminate to snap under pressure. You want a high density pad that does not compress more than 10 percent under load. This maintains the joint integrity and keeps the floor quiet. A floor should be felt, not heard. If your floor sounds like a drum, you did it wrong. If it clicks, you failed the leveling stage. Take the time to prep. The sawdust under my nails is a badge of honor because it means the job was done right. No shortcuts. No excuses. Just a flat, level surface that will outlast the house.