The ‘3-Second Kick’ Test for Checking Your Carpet Stretch
I spent three days grinding concrete on a job last month just so the floor wouldn’t click like a castanet. Most guys skip the leveling compound. They think the underlayment will hide the dip. It won’t. I was working on a high-end remodel where the owner wanted a thick plush pile over a concrete slab that looked like the surface of the moon. If I had just thrown the pad and carpet down, the tension would have been uneven, and within six months, the floor would have looked like a series of rolling waves. I had to use a diamond cup wheel to take down the high spots and then pour a high-flow cementitious underlayment to get it within the 1/8 inch tolerance. That is the reality of professional work. It is dirty, it is loud, and it is the only way to ensure the carpet stays tight for a decade. Most installers today rely on a knee kicker for the whole room, which is a recipe for failure. A knee kicker is for positioning. A power stretcher is for the install. When you see a ripple in a carpet, you are seeing the ghost of a lazy installer who didn’t understand the physics of lateral tension or the chemistry of the latex backing that holds the whole system together. I smell like oak dust and WD-40 most days because I don’t just lay floors, I build performance surfaces. If your installer doesn’t have a moisture meter and a 10 foot straightedge, you should show them the door before they ruin your investment.
The physics of the three second kick test
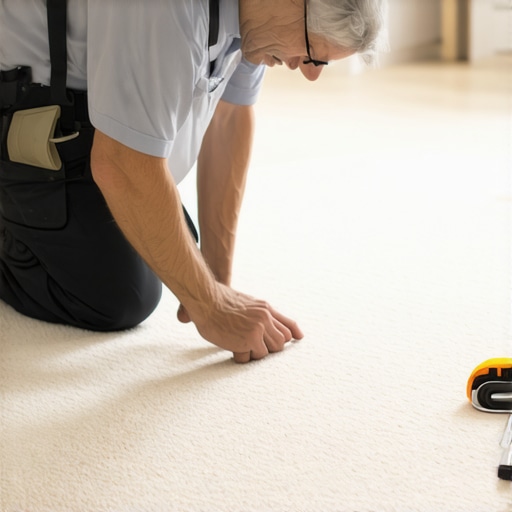
The 3-second kick test involves firmly kicking the carpet surface with a sneaker-clad foot at a sharp angle to observe the recoil speed of the carpet fibers and latex backing. If the carpet ripples or stays displaced for more than three seconds, the lateral tension is insufficient for long-term durability and NWFA standards. This test is a field-expedient method to verify that the power stretcher has achieved the required one to one and a half percent stretch across the length and width of the room. When we talk about stretch, we are talking about the mechanical memory of the secondary backing. Carpet is a composite material. You have the face fibers, the primary backing, and the secondary backing, all held together by a layer of styrene-butadiene rubber (SBR) latex. This latex is a thermoset polymer that provides the dimensional stability of the product. When you apply tension with a power stretcher, you are essentially pre-loading the carpet. You are pulling those polymer chains tight so that when people walk on it, or when heavy furniture is moved, the carpet has the internal force to pull back into its original shape. If you don’t pre-load it, the carpet will relax over time. This relaxation is exacerbated by humidity and temperature fluctuations. In a humid environment, the fibers can absorb moisture, causing the backing to expand. If it wasn’t stretched tight enough to begin with, that expansion manifests as a ripple. The kick test tells you if the carpet has enough ‘snap’ to resist this natural tendency to go limp.
“A floor is only as good as the subfloor beneath it; deflection is the enemy of every joint.” – Master Flooring Axiom
[image_placeholder_1]
Why your subfloor is lying to you
The subfloor surface must be cleansed of debris and structurally sound to ensure that tack strips maintain a mechanical bond with the structural deck. If the subfloor is OSB or plywood, the nail holding power determines if the carpet tension will fail or hold under heavy traffic. Many homeowners assume that because carpet is soft, the floor underneath doesn’t need to be perfect. This is a lie. A dip in the subfloor creates a pocket of air under the carpet. Every time you step on that spot, you are pushing the carpet into the dip, which pulls on the tack strips at the perimeter. This constant tug-of-war eventually pulls the carpet off the pins. For concrete slabs, the challenge is moisture vapor emission. Concrete is a sponge. It breathes moisture. If the moisture vapor emission rate is too high, it will rust the nails in your tack strips and degrade the latex backing of the carpet. I’ve seen jobs where the tack strips were so rotted from slab moisture that they just crumbled when I touched them. This is why we use calcium chloride tests or electronic moisture meters before a single yard of carpet is unrolled. If the slab is wet, you need a moisture barrier or a specialized primer. If the slab is uneven, you need a self-leveling compound with a minimum compressive strength of 3,000 PSI. You cannot hide a bad subfloor with a thick pad. In fact, a pad that is too thick or too soft can actually make ripples worse because it allows for too much vertical movement, which translates into horizontal displacement. This is the same principle we see in laminate flooring where an overly soft underlayment causes the click-lock joints to snap. Physics doesn’t care about your comfort; it only cares about force and resistance.
The mechanical reality of power stretching
Power stretching is the mandatory method for carpet installation as defined by CRI 104 and 105 standards to prevent premature wear and tripping hazards. A power stretcher uses hydraulic or mechanical leverage to pull the carpet taut across the entire room, securing it to tack strips with uniform force. The knee kicker is a tool for the edges and for the stairs. Using a knee kicker to stretch a 20 foot room is like trying to tighten the lug nuts on a semi-truck with a pair of pliers. You might get them snug, but they aren’t going to hold under a load. The power stretcher consists of a head with adjustable teeth, a series of extension poles, and a tail block. The tail block braces against one wall, and the head grabs the carpet near the opposite wall. As you engage the lever, the poles expand, pushing the head and pulling the carpet. You are looking for that sweet spot where the carpet is taut but you aren’t shearing the backing. This is where the technician’s experience comes in. You have to feel the resistance. Different backings have different elasticities. A jute-backed carpet handles differently than an ActionBac or a SoftBac. If you over-stretch, you can actually pull the carpet apart or cause the tack strip to fly off the wall. If you under-stretch, you’ll be back in two years to fix the ripples. A professional installation should have a tension of approximately 1 to 1.5 percent in both directions. This means in a 12 foot room, you are stretching the carpet about 1.5 to 2 inches. That tension is what keeps the floor flat and prevents the fibers from rubbing against each other, which is what causes carpet to ‘ugly out’ before its time.
| Material Type | Elasticity Factor | Tension Requirement | Acclimation Time |
|---|---|---|---|
| Action Bac Synthetic | Medium | 1.5% | 24 Hours |
| Soft Bac High-Flex | High | 2.0% | 48 Hours |
| Natural Jute Fiber | Low | 1.0% | 72 Hours |
| Woven Axminster | Very Low | 0.75% | 72 Hours |
The ghost in the expansion gap
The expansion gap at the perimeter of a room is essential for laminate and hardwood but is often misunderstood when transitioning to carpet or showers. A proper transition requires a sturdy subfloor and a Z-bar or transition strip that allows the floating floor to move while the carpet stays anchored. When I’m installing a laminate floor that meets a carpeted hallway, I see guys jamming the laminate tight against the carpet tack strip. That is a failure waiting to happen. Laminate is a wood-based product. It expands and contracts with the seasons. If you don’t give it that 1/4 inch or 3/8 inch gap at the transition, it will buckle. But you also can’t leave a gaping hole. You use a transition molding, or if you want that ‘zero-threshold’ look, you have to be an artist with the subfloor. You have to ensure the heights match perfectly so the transition is flush. This is even more critical near showers. Moisture is the enemy. If you have carpet meeting a tile shower, the subfloor in that transition zone is under constant attack from humidity. I’ve seen subfloors rot out in a three foot radius around a shower because the installer didn’t use a waterproof membrane under the transition. You need to use a silicone-based caulk at the edge of the tile and ensure the carpet is tucked tight into a G-strip or a Z-bar to prevent water from wicking into the pad. Carpet pad is basically a giant sponge. Once it gets wet, it holds that moisture against the subfloor, leading to mold and structural failure. It is not just about how it looks. It is about how the different materials interact at the molecular level when moisture is introduced.
“The integrity of a stretch-in installation is entirely dependent on the shear strength of the tack strip’s attachment to the floor.” – TCNA Flooring Guide
The 1/8 inch that ruins everything
Precision leveling of the subfloor to within 1/8 inch over 10 feet is the industry standard for preventing floor failure in carpet install and laminate projects. A floor technician must use a straightedge to identify low spots and high spots before applying primer and leveling compound. If you think a heavy carpet will hide a bump, you are wrong. Over time, the traffic on that bump will wear the face fibers of the carpet down faster than the surrounding areas. It creates a ‘bald spot’ that is actually just accelerated mechanical wear from the subfloor’s geometry. In the world of showers and tile, this precision is even more vital. If your subfloor has a dip near a shower entrance, the tile will crack or the grout will fail. This is why I am so obsessed with the prep work. The actual laying of the floor is the easy part. The hard part is the chemistry. You have to understand how the primer interacts with the concrete. You have to know the cure time of the leveling compound. If you pour leveler over a dusty floor, it won’t bond. It will de-laminate, and then you have a ‘hollow’ sound when you walk on it. I use a primer that penetrates the pores of the concrete to create a bridge for the leveler. It is a molecular bond. When that is done right, the floor is a single, monolithic unit. That is the only way to ensure the carpet stretch stays true. If the subfloor is moving or crumbling under the tack strip, your 3-second kick test will fail every time because the anchor points are giving way.
Professional carpet installation checklist
- Subfloor Inspection: Check for moisture using a pin-less meter and verify levelness with a 10 foot straightedge.
- Tack Strip Selection: Use architectural strips with three rows of pins for large rooms or heavy-stretch requirements.
- Pad Density: Ensure the pad is at least 6 pounds in density and no more than 7/16 inch thick for residential cut-pile.
- Acclimation: Allow the carpet to sit in the controlled environment for at least 24 hours to stabilize the latex backing.
- Power Stretching: Use a power stretcher on all four walls, following a clockwise stretching pattern to ensure even tension.
- Seam Integrity: Apply seam sealer to all cut edges to prevent fraying and ensure the primary backing is fused.
- The Kick Test: Perform the 3-second kick test in the center of the room and near all transitions to verify snap-back.
The bottom line is that flooring is a trade of millimeters. Whether it is the mil-thickness of a laminate wear layer or the 1/8 inch variance in a concrete slab, the details are what separate a professional from a handyman. When you walk across a floor that was done right, you don’t notice it. It is silent, it is firm, and it is flat. But when it is done wrong, every step is a reminder of the shortcuts taken. The 3-second kick test is your final check. It is the moment of truth. If that carpet doesn’t snap back instantly, you haven’t finished the job. You need to get the power stretcher back out and do it again. Don’t be the guy who leaves a potato chip floor for the next generation to fix. Do the work. Grind the concrete. Stretch the carpet. Build something that lasts.