How to Mix Floor Leveler Without Getting Lumps or Dry Powder
How to Mix Floor Leveler Without Getting Lumps or Dry Powder
I spent three days grinding concrete on a job last month just so the floor would not click like a castanet. Most guys skip the leveling compound. They think the underlayment will hide the dip. It won’t. I have seen countless five thousand dollar laminate installs ruined because someone thought a sixteenth of an inch did not matter. When you walk across a floor and hear that hollow thud, or worse, the snapping of a plastic locking mechanism, you are hearing the sound of a failed subfloor. Floor leveling is not a suggestion. It is a structural requirement for any modern surface, especially when you are prepping for laminate or a high end carpet install. If your slab is not within an eighth of an inch over a ten foot radius, your finished floor is on a countdown to failure. Mixing the compound is where most beginners fail. They end up with a bucket of gray soup full of dry pockets and lumps that look like oatmeal. That is not how a professional works. You need to treat the chemistry of the leveler with the same respect you give the finish on the wood.
The myth of the flat enough subfloor
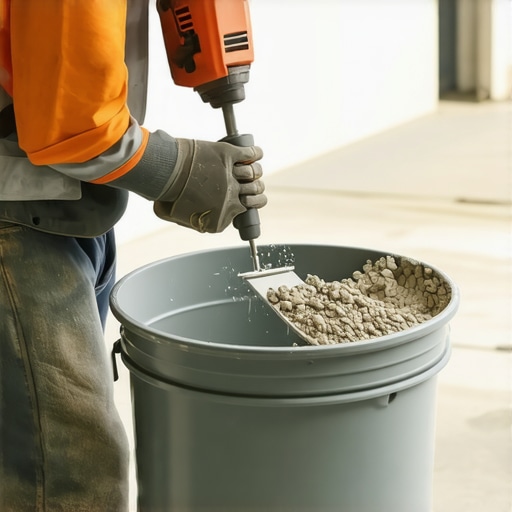
To mix floor leveler without lumps, you must use a high speed drill with a specialized mixing paddle, always add the powder to the water rather than water to the powder, and maintain a consistent RPM to ensure full hydration of the polymers without introducing excessive air into the mixture. This process requires a mechanical bond that only occurs when the powder is fully saturated. If you see dry lumps, the structural integrity of the leveler is compromised. You cannot simply stir it with a stick and expect the product to flow. The physics of self-leveling underlayment rely on a specific gravity that allows the material to seek its own level. When lumps exist, the material loses its fluidity and creates ridges rather than a flat plane. I have seen floors buckle in showers because the leveling was done poorly, leaving voids where moisture could pool under the tile. Whether you are doing a carpet install or laying down rigid core laminate, the flatness of the substrate dictates the lifespan of the wear layer. If the subfloor is not dead flat, the floor will flex. Flex leads to fatigue. Fatigue leads to failure.
The bucket chemistry of perfect hydration
Perfect hydration in floor leveling occurs when the water molecules wrap around the calcium aluminate cement particles, triggered by a high shear mixing action that breaks down surface tension. You are not just mixing mud. You are initiating a chemical reaction. Most self leveling underlayments use a complex blend of Portland cement, aluminate cement, and crystalline silica. These require a precise amount of water to reach their rated compressive strength. If you deviate by even half a quart of water, you risk the floor chalking or cracking. The polymers in the mix are designed to stay in suspension. If you over-water the mix to make it flow better, those polymers will float to the top. This creates a weak, white film on the surface that will peel off as soon as you try to glue down a floor or even walk on it. I always use a dedicated measuring bucket. Do not eyeball the water line. If the bag says five point five quarts, you give it five point five quarts. No more. No less.
| Leveler Type | Water Ratio (Typical) | Mixing Time | Working Time | Walkable Time |
|---|---|---|---|---|
| Standard Self-Leveler | 5.0 – 6.0 Quarts | 3 Minutes | 15 – 20 Minutes | 4 Hours |
| Fast Setting Compound | 4.5 – 5.5 Quarts | 2 Minutes | 10 Minutes | 90 Minutes |
| Fiber Reinforced | 5.5 – 6.5 Quarts | 3 Minutes | 20 Minutes | 6 Hours |
| High Flow / Deep Fill | 4.0 – 5.0 Quarts | 4 Minutes | 30 Minutes | 12 Hours |
Why your cordless drill is killing your floor
Mixing floor leveler requires a high torque corded drill capable of maintaining 650 to 900 RPM because cordless drills often lack the sustained power to break down the dense clumps of powder at the bottom of the bucket. When a drill bogs down, it fails to create the vortex necessary for a smooth mix. You need a paddle that is shaped like an eggbeater or a double box. These paddles are designed to pull the heavy material from the bottom up to the top. If you use a standard paint mixer, you are wasting your time. A paint mixer just moves the water. It does not shear the cement. I have seen guys try to use a half inch cordless drill only to have the battery die halfway through the second bag. Now they are stuck with a bucket of hardening sludge while the first pour is already setting up. That is how you get cold joints. A cold joint is a ridge where two different pours met but did not blend. It will telegraph through your laminate or carpet and look like a speed bump in your living room.
“A floor is only as good as the subfloor beneath it; deflection is the enemy of every joint.” – Master Flooring Axiom
The molecular reality of the five minute window
The working time of a self leveling compound is extremely short, usually between fifteen and twenty minutes, meaning every second spent fighting lumps in the bucket is a second lost for the material to flow properly on the floor. Once the powder hits the water, the clock starts. The chemical hydration begins immediately. If you spend five minutes trying to get the lumps out, the material has already started to thicken. By the time you pour it, it will not level. It will just sit there like thick pancake batter. This is why you need a two man team. One person is the mixer, and one person is the pourer. The mixer should be starting the next bag before the first one is even fully spread. This ensures a wet edge. If you lose the wet edge, you are going to be back the next day with a concrete grinder, and that is a dusty, miserable job that no one wants.
The essential toolkit for a lump free pour
- Two clean five gallon buckets (one for mixing, one for clean water)
- A high torque corded mixing drill (minimum 7 amp)
- An eggbeater style mixing paddle
- A precision water measuring pitcher marked in quarts
- A spiked roller to release air bubbles
- A gauge rake to set the depth of the pour
- A perimeter expansion strip to prevent wall bonding
The ghost in the expansion gap
Expansion gaps are the most overlooked part of floor leveling, yet they are vital because they allow the new subfloor to expand and contract independently of the wall studs, preventing cracks. If you pour your leveler right up to the drywall, you are asking for trouble. Houses move. They breathe. If the leveler is locked against the framing, it will crack as the house shifts. I always install a thin foam strip around the perimeter of the room before I pour. This creates a cushion. It also stops the liquid leveler from leaking into the walls or down into the basement. I have heard stories of guys pouring leveler in a second floor bathroom only to have it start raining gray mud in the kitchen downstairs because they did not seal the perimeter. It is embarrassing and expensive. Take the time to seal the room. It is the hallmark of a professional.
“Subfloor preparation is the foundation of every successful installation; ignore the slab and the finish will fail.” – Master Flooring Axiom
The thermal reality of cold water
Using cold water for mixing leveler is a professional secret that extends the working time of the product by slowing down the chemical exothermic reaction that causes the cement to harden. If you use water that has been sitting in a hot truck, the leveler will flash set. It will turn into a rock inside the bucket before you can even get the paddle out. In the summer heat, I sometimes even use ice water. This gives me an extra five minutes of flow time. Those five minutes are the difference between a floor that looks like glass and a floor that looks like a gravel road. Also, consider the temperature of the bag. If the powder is hot, the water needs to be even colder. You are managing a chemical reaction. You have to be the master of the temperature.
The importance of the primer stage
Applying a high quality acrylic primer to the subfloor is mandatory because it seals the pores of the concrete, preventing air from escaping and creating pinholes in your fresh leveler. Concrete is like a sponge. It is full of tiny air pockets. When you pour wet leveler over dry concrete, the concrete sucks the moisture out of the leveler and pushes air up. This creates tiny bubbles on the surface. Once the leveler dries, those bubbles become brittle holes. A good primer creates a film that blocks this exchange. It also ensures that the leveler bonds to the slab. Without primer, the leveler is just a floating sheet of thin concrete. It will eventually delaminate and crack under the weight of your furniture. I have seen laminate floors that felt bouncy, and when we pulled them up, the leveler underneath was just a bunch of loose plates. The installer skipped the primer. Do not be that guy.