I remember the moment vividly—a new laminate floor in my living room, and I took a single step, only to feel a sudden bounce that made my stomach drop. It was frustration mixed with disappointment. After investing time and money into what I thought would be a sleek, stylish upgrade, I was faced with an uneven, bouncy floor that threatened to ruin the entire project.
Like many homeowners diving into DIY renovations today, I quickly realized that subfloor issues are a common culprit behind uneven or bouncing laminate flooring. The stubborn bounce not only compromises the look but also damages the longevity of your investment. That’s when I discovered that tackling subfloor problems early, with proven tricks, can make all the difference in creating a durable, smooth surface—no matter what year it is.
Why Your Laminate Floors Might Be Bouncing and How to Fix It
Will These Tricks Actually Keep My Floor Stable?
Initially, I made the mistake of assuming that leveling the surface was enough. Turns out, subfloor integrity matters more than I imagined. If your subfloor isn’t solid or properly supported, no amount of surface smoothing will prevent that annoying bounce—so don’t oversimplify things. In fact, according to flooring experts, an uneven subfloor can cause premature wear and even lead to structural issues later on. It’s a sneaky problem that can creep up if you’re not careful, especially in high-traffic areas or older homes with hidden sagging.
If you’ve faced this problem firsthand, you know how frustrating it can be. Luckily, there are specific tricks—like using self-leveling compounds or reinforcing weak spots—that can restore stability, extending your laminate’s life and maintaining a room’s aesthetic appeal. I promise, these techniques are practical and, with a little effort, they’ll save you from future headaches. For more tips on preparing your subfloor properly, check out [these expert suggestions](https://floorcraftstore.com/premier-floor-leveling-laminate-tips-for-durable-home-upgrades).
Now, let’s dive into some of the most effective tricks I’ve personally tested that can stop that bounce once and for all in 2026. If you’re tired of feeling like your floors are a trampoline or worry about damaging your investment, keep reading—because these solutions are about to change your flooring game.
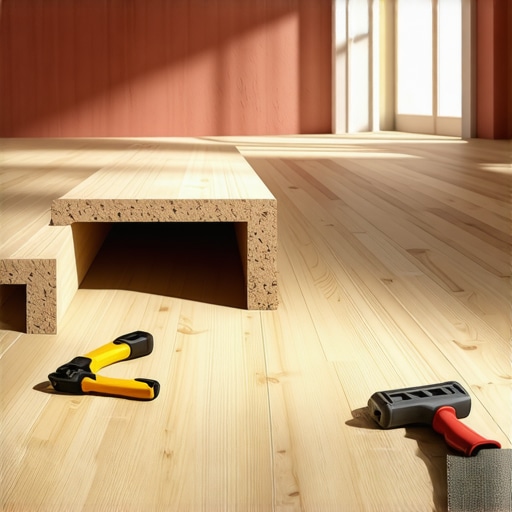
Assess and Prepare the Subfloor
Start by removing your laminate planks and examining the subfloor for any weak spots or damage. Use a pry bar and a flashlight to identify sagging or soft areas. If you spot any inconsistencies, mark them clearly.
In my own experience, I once found a soft patch near a closet that caused noticeable bounce. I marked it for targeted repair. To fix minor issues, apply a layer of self-leveling compound, like a pro, and let it cure fully before proceeding. For larger problems, consider reinforcing with plywood or adding supplementary support beams for extra stability. This preparation ensures your new flooring won’t inherit the previous flaws. For detailed leveling techniques, check out these expert tips.
Reinforce the Subfloor
Strengthening the subfloor is crucial for eliminating bounce. If your subfloor has squeaks or feels spongy, screw down loose sections with flooring screws, ensuring they’re flush with the surface. For larger weak spots, cut and replace damaged sections with new plywood, securing it tightly to the joists below with construction adhesive and nails or screws. This step is akin to tightening a loose foundation before building a house; it creates a solid base for your laminate. Personal experience taught me that skipping this step leads to future problems, despite spending hours on surface finishing.
Implement Underlayment Solutions
Choosing the right underlayment can absorb minor imperfections and prevent bounce from transmitting to the laminate surface. Use a high-density foam or rubber underlayment recommended for laminate flooring. Lay the sheets, overlapping seams, and tape them together to ensure an even, cushioned layer. This acts like shock absorbers in a car—providing stability and reducing movement. When I installed my own laminate, adding a quality underlayment made a quick and noticeable difference in floor firmness.
Double-Check the Joists and Support Structures
If your floor spans multiple joists, verify their condition. Loose or cracked joists can cause bounce. Use a level and check for unevenness or sagging. Reinforce with ledger boards or sister joists if needed. In my case, I found a sagging joist near a corner that I sistered with a new piece of lumber, secured with construction adhesive and nails, stabilizing that section significantly.
Reinstall the Laminate Carefully
Once the subfloor is solid, install the laminate according to the manufacturer’s instructions. Use spacers to maintain expansion gaps, and click or glue planks securely. Pay attention to the layout—stagger seams for strength. I personally found that grabbing a rubber mallet helped snug the planks tightly together without damaging the surface. Proper installation locks everything in place, preventing future waviness or bouncing. For best results, consult these proven installation tips.
Addressing floor bounce involves a combination of proper assessment, reinforcement, and precise installation. Taking these concrete steps turned my own DIY mishap into a durable, stable laminate surface that I could enjoy for years. Don’t rush the process—your floor’s stability depends on it.
Many homeowners believe that bathroom showers, floor leveling, laminate, and carpet installations are straightforward tasks requiring only basic tools and a bit of DIY spirit. However, this oversimplification can lead to costly mistakes and subpar results. One pervasive myth is that low-quality materials can be compensated for with careful installation—this is false. In truth, choosing high-grade materials and understanding their specific nuances dramatically improves durability and appearance. For instance, not all underlayments are created equal; selecting the wrong type can cause uneven surfaces or future water damage, especially in showers where waterproofing is critical. Experts emphasize that the intricate details, like proper slope in shower pans or moisture barriers under flooring, are often overlooked by DIYers, leading to preventable failures.
When it comes to shower renovations, many assume that sealing the edges is enough to prevent leaks. In reality, a comprehensive waterproofing system that includes proper pan installation, curb flashing, and drainage slope is essential for avoiding water damage and mold growth. Studies show that neglecting these nuances significantly increases the risk of rot and structural issues over time.
In floor leveling, there’s a common misconception that surface smoothing alone can fix underlying subfloor problems. This approach temporarily hides imperfections but doesn’t address root causes like sagging joists or moisture-related distortions. Before installation, executing thorough tests—such as the 3-floor leveling tests you can find in detailed guides—is vital. Failing to detect and reinforce these issues can result in cracks, squeaks, or uneven flooring within months.
Similarly, with laminate and carpet installations, homeowners often prioritize speed over precision. They may skip steps like checking for moisture levels or ensuring subfloor stability, which are critical for long-lasting results. For example, installing laminate over a damp subfloor can cause warping and separation, a mistake that experts warn against. Advanced installation techniques, including moisture testing and proper acclimation of materials, are often overlooked but can save you from future headaches.
What many don’t realize is that these seemingly minor details have significant long-term impacts. In my experience, spending extra time on proper waterproofing, subfloor reinforcement, and material acclimation yields results that last much longer. To avoid traps like mismatch between materials and subfloor imperfections, dive deeper into expert tips available [here](https://floorcraftstore.com/premier-floor-leveling-laminate-tips-for-durable-home-upgrades).
In particular, understand that waterproofing isn’t just about sealing edges; it involves comprehensive planning, waterproof membranes, and correct drainage slopes—especially in showers, where neglect can result in hidden rot and mold. For a thorough approach, consult specialized guides on shower waterproofing systems [here](https://floorcraftstore.com/laminate-shower-renovations-lasting-home-upgrades-for-2024).
Are you aware of these hidden details that can make or break your renovation? Have you ever fallen into this trap? Let me know in the comments.
Maintaining your flooring, showers, and underlying support structures is crucial to ensuring their longevity and optimal performance. Over time, even the best installations can develop issues, but with the right tools and routine maintenance, you can catch problems early and perform effective repairs that save money and preserve your home’s beauty.
One of my go-to tools is a high-quality moisture meter. Moisture levels in concrete and subflooring are often silent culprits behind flooring failures, especially in areas prone to humidity or water exposure like bathrooms and kitchens. I personally rely on digital pin-type moisture meters, such as the [Extech MO255](https://floorcraftstore.com/expert-carpet-install-floor-leveling-for-lasting-durability-2), because they provide quick, accurate readings that help me determine whether subfloor conditions are suitable for flooring installation or if they require drying or additional treatment.
For ongoing maintenance and early detection, a good flashlight or inspection camera can be game-changers. I use a flexible borescope camera to peek into tight spaces behind showers or beneath floors, helping identify leaks or rot before significant damage occurs. Regular inspections using these tools can prevent small issues from escalating into costly repairs, especially when paired with an attentive maintenance routine.
Another essential piece is a set of cordless screwdrivers and impact drivers. These tools make reinforcement work, like attaching additional support beams or replacing damaged sections of plywood, much more manageable. Personally, I prefer models with brushless motors for their durability and longer battery life, which is critical during extensive repair projects.
Where do I foresee the future of flooring and shower maintenance?
As technology advances, I predict a shift toward smarter solutions. Think IoT-enabled moisture sensors connected to home automation systems that alert you in real-time about leaks or rising humidity levels, allowing for preemptive action rather than reactive repairs. Additionally, innovations in eco-friendly, self-leveling compounds with faster curing times are promising, reducing project durations and improving results.
Regular upkeep isn’t just about catching problems early; it’s also about maintaining the integrity of your materials over decades. For example, when working with laminate flooring, I always recommend periodic checks of the subfloor using a moisture meter to ensure it stays dry, especially in bathrooms or kitchens. This simple habit extends the life of your flooring significantly. To ensure you’re following best practices, I suggest reviewing these expert-level tips.
If you haven’t tried monitoring moisture levels regularly or using inspection cameras in your maintenance routines, now is a great time to start. Incorporate these tools into your home care arsenal, and you’ll be surprised at how much they can help you avoid costly repairs down the line.
Lessons That Changed My Approach to Home Renovations
- I realized that rushing through subfloor assessments often leads to bouncing floors and future headaches. Proper inspection and reinforcement are non-negotiable steps I now never skip, as they set the foundation for lasting results. Without diligent subfloor prep, even the best materials will fail prematurely.
- I learned that the quality of underlayment can dramatically influence the stability of laminate flooring. Investing in high-density foam or rubber underlayment proved to be a game-changer, absorbing minor imperfections and preventing bounce. It’s a small upgrade with huge long-term benefits.
- One lightbulb moment was understanding the critical importance of waterproofing in showers beyond simply sealing edges. Implementing a comprehensive waterproofing system—including proper sloped pans and moisture barriers—protects your investment from hidden rot and mold, which can be devastating and costly to repair later.
- My biggest takeaway is that even seemingly minor details, like using the right screws or proper moisture testing, can prevent major failures down the line. These small, overlooked steps have saved me time, money, and the frustration of repair in my home projects.
Key Tools and Resources That Keep My Projects on Track
- High-Quality Moisture Meters: Devices like the Extech MO255 have been invaluable. They provide accurate readings that inform whether your subfloor needs more drying before installation, preventing warping and mold issues.
- Inspection Cameras: Small, flexible borescopes help me peek into tight spaces behind showers or beneath floors, catching leaks or rot early. This proactive approach saves thousands in repairs and keeps my home safe.
- Durable Power Tools: Cordless impact drivers and screwdrivers with brushless motors make reinforcement work seamless, allowing me to secure support beams or replace damaged plywood efficiently, especially during large repairs.
- Expert Guides and Articles: Resources like these detailed tips provide the insights I need to avoid common pitfalls and ensure long-lasting results in projects like laminate flooring and shower upgrades.
Your Next Step Towards a Stable Space
Transforming your home with stable, long-lasting showers, laminate floors, or carpets begins with attention to detail and patience. Remember, the foundation of a durable renovation is often invisible—hidden in subfloor prep, moisture control, and choosing the right materials. By implementing the lessons learned and utilizing the tools I trust, you can confidently create spaces that will stand the test of time. Embrace the process, stay diligent, and don’t hesitate to seek out expert advice along the way. Your home deserves it.
Have you encountered unexpected bounce or instability in your home projects? How did you address it? Share your experiences below—I’d love to hear your journey toward more stable, lasting renovations.