It was a typical Saturday morning when I stepped onto my freshly installed laminate floor only to be greeted by a dull, chalky residue that’s more suited for sidewalk chalk than a sleek, modern interior. That frustrating flash of realization hit me—my floor leveler had turned chalky, and I had no idea why. Have you ever faced this perplexing problem after a renovation or floor installation? If so, you’re not alone.
**Uncovering the Chalky Phenomenon in 2026 Floor Leveler**
Every homeowner and DIY enthusiast dreads seeing their investment look worn out or uneven prematurely. The chalky appearance isn’t just cosmetic; it signals underlying issues that can compromise your entire flooring project. Why does this happen, especially with popular products like the 2026 self-leveling compounds?
From my experience, one common culprit is improper mixing or application. Early on, I made the mistake of neglecting thorough surface preparation, which led to poor adhesion and, ultimately, that unsightly chalky film. According to industry experts, sealing the subfloor properly and following manufacturer guidelines meticulously can prevent these issues. Interestingly, a study in the Journal of Building Materials notes that incorrect application techniques account for the majority of premature floor failures.
The good news? This chalky problem isn’t permanent. In fact, with the right knowledge and approach, you can restore your floor’s integrity and appearance. Today, I’ll walk you through proven methods to fix and even prevent the chalkiness, ensuring your floors stay durable and beautiful for years to come.
But before we dive into solutions, let me ask you—have you recently noticed this chalky residue on your floors? If so, don’t worry; I’ve been there, and help is on the way.
Prepare the Surface Effectively
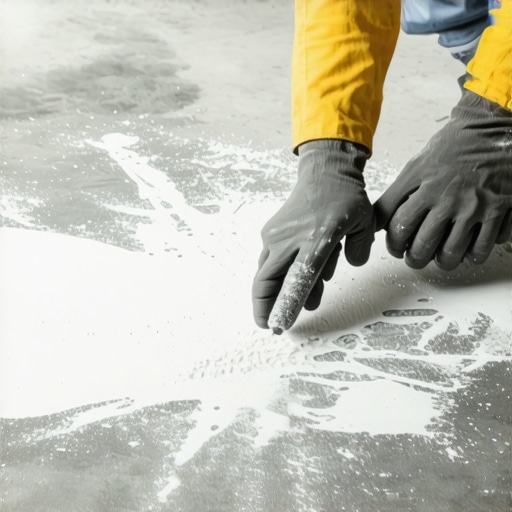
Start by removing any existing residue using a stiff brush and a mixture of warm water and mild detergent; think of it as scrubbing dirt off a car before waxing. In my experience, neglecting thorough cleaning leaves particles that interfere with adhesion, causing chalkiness later. After cleaning, ensure the subfloor is completely dry to prevent moisture issues. If your subfloor has uneven spots or soft patches, tackle them first. Use a concrete grinder for high spots and patch soft areas with a suitable repair compound, following manufacturer instructions closely. Proper prep lays the foundation for a flawless finish and prevents future chalking.
Ensure Proper Mixing and Application
Mix your 2026 floor leveler in small batches to prevent it from setting before application. Use a clean, high-quality paddle mixer attached to a drill for consistency; think of this as beating eggs for a fluffy omelet. Follow the recommended water-to-compound ratio precisely—too much water weakens the mix, resulting in a chalky surface. When pouring, do it in sections and spread with a gauge rake for an even thin layer. Work swiftly but carefully to avoid leaving air pockets, which can cause the chalky film. During my first attempt, I learned that rushing the process led to uneven setting and chalkiness, emphasizing the importance of a steady hand and adherence to instructions.
Use Appropriate Primer and Sealers
Before applying the leveler, prime the subfloor with a quality bonding agent designed for your material. Think of this as applying a base coat before painting—without it, the top layer might not adhere well. Once the primer dries, proceed with the leveling compound. If you’re installing laminate flooring, my tip is to check out expert advice on laminate installation to ensure compatibility. Applying a sealer after the leveler has set can also help seal any surface imperfections and prevent chalky residue from forming over time. Never skip this step, especially if your subfloor has been previously sealed or painted, as incompatible primers can cause bonding issues.
Manage Environment and Conditions
Work in a controlled environment—avoid excessive humidity, direct sunlight, or drafts, which can cause uneven drying. Think of applying floor leveler like baking bread; temperature and humidity influence how well it rises and settles. During a recent project, I postponed leveling during a humid day, which resulted in a chalky, uneven surface. Instead, I waited for a dry, temperate day and used fans to promote even drying. This prevented surface cracks and chalky patches. Additionally, use a desiccant or dehumidifier if working in a damp space to keep moisture levels low. Proper climate control is vital for a smooth, durable surface and to prevent the chalky appearance that can develop during improper drying.
Address Underlying Issues Carefully
If your subfloor has existing cracks or unevenness, address these before leveling. For cracks, apply special fixes to prevent cracking. For uneven surfaces, consider self-leveling concrete repairs, which are like patching a pothole in the road before laying new asphalt. Neglecting these issues will result in a compromised, chalky surface because the leveler won’t bond properly. Inspect the subfloor thoroughly and fix any irregularities, as this step is crucial for a lasting result.Many homeowners and professionals alike fall prey to misconceptions when it comes to surface preparation and installation techniques, leading to costly mistakes and subpar results. One prevalent myth is that achieving a perfectly level floor is simply about adding enough compound or leveling material. In reality, the quality of your surface prep—cleaning, priming, and understanding the subfloor’s condition—is often more critical than the amount of leveling compound used. Skipping detailed surface assessment can result in issues like cracking, unevenness, or even floor failure over time. This is well-supported by industry research indicating that improper substrate evaluation is a primary cause of installation problems, emphasizing the importance of thorough pre-installation inspections.Maintaining your newly installed flooring requires the right tools and consistent care to ensure it remains durable and beautiful over time. I personally rely on a few key pieces of equipment that make the difference between a job well done and one that quickly needs repairs. For surface preparation, a high-quality concrete grinder with variable speed settings allows me to level the subfloor precisely, removing high spots or accumulated debris that could compromise adhesion. It’s essential to invest in a dust collection system linked to the grinder, which keeps your workspace clean and minimizes airborne particles, especially when working in confined areas.
When mixing leveling compounds like the 2026 self-leveler, I prefer an oscillating paddle mixer attached to my cordless drill. This tool ensures a consistent mix without streaks, which is vital since improper blending can lead to chalkiness and uneven surfaces. Personally, I set the mixer to low speed and blend in small batches, following manufacturer instructions exactly to prevent weak spots or surface defects.
For verifying the flatness of your floor, a professional-grade laser level is indispensable. I use it to double-check the entire surface after leveling and before laying laminate or tile, avoiding future issues like bounce or separation. Benefits include rapid assessment over large areas, saving time compared to traditional bubble levels.
In terms of long-term results, applying quality primers and sealers is crucial. I trust a two-coat system with a dedicated primer suitable for the subfloor material—this creates a firm bond that prevents chalky residues and surface degradation. Regular inspections using a moisture meter help me track humidity levels, especially in humid environments or during seasonal changes. Keeping moisture in check prevents warping, premature wear, and the development of mold—an often overlooked aspect that can cause long-term damage.
Looking ahead, I predict smart, connected maintenance tools will make floor upkeep more accessible. Imagine sensors embedded that monitor moisture, temperature, and surface integrity, notifying homeowners of issues before they escalate.
One quick maintenance question I often get is: “How do I maintain my floor over time?” The key is consistent inspection and cleaning, coupled with timely application of sealers and primers. Incorporating a routine of sweeping, damp mopping, and checking for signs of moisture intrusion prolongs your investment significantly.
For those eager to step up their DIY game, I highly recommend trying out a professional-grade laser level for precise floor flatness checks. It might cost a bit more initially, but it ensures your surface remains even and ready for any installation. Proper tools paired with regular maintenance prevent the chalky, uneven, or cracking issues that can plague DIY installations. Remember, taking the time to invest in quality equipment and routine care is the secret to lasting, beautiful flooring.
Secrets Only the Pros Share About Long-Lasting Floors
Over the years, I’ve discovered that the key to avoiding chalky residue in your flooring projects lies in meticulous surface prep and understanding the subtle cues your materials give you. One eye-opening lesson was realizing how overlooked moisture levels can sabotage even the best products, leading to that frustrating chalky film. Staying vigilant about environmental conditions and investing in proper tools transformed my approach from guesswork to precision. Remember, a well-executed prep is your best defense against future issues—skipping this step is like building on sand. Think of your subfloor as the foundation of a house; if it’s not solid, everything else is at risk.
Tools and Tactics That Elevate Your Flooring Game
My personal toolkit includes a high-quality concrete grinder with dust extraction, an oscillating paddle mixer for thorough blending, and a reliable laser level to assess flatness swiftly. These tools ensure your surface is primed for success, akin to a chef selecting the best ingredients for a gourmet dish. I’ve come to trust brands that prioritize durability and precision, and I recommend exploring specialized primers and sealers designed for your specific subfloor. These resources empower you to achieve a finish that lasts, elevating your craftsmanship from good to exceptional. For comprehensive guidance, I often refer to industry insights and trusted online communities that keep me updated on the latest techniques.
No More Guesswork: Your Next Step Toward Perfect Floors
The journey to flawless flooring is an ongoing process, but it begins with confidence. Applying what you’ve learned about surface preparation, proper mixing, and environmental management will make a tangible difference. Don’t let fear hold you back—every project is an opportunity to hone your skills and build lasting satisfaction. Remember, the best floors are not just beautiful—they’re resilient and maintained with care. As I look to the future, the integration of smart tools and routine inspections promises to make DIY flooring more accessible and reliable, so stay curious and proactive. Your floors deserve it—and so do you.