It was a typical Saturday morning when I stepped into my bathroom—only to find my shower floor uneven and my living room carpet wrinkling worse than ever. That lightbulb moment hit me hard: if I was going to bring real comfort and style into my home, I needed to tackle these renovation challenges head-on. Turns out, I’ve been overlooking some crucial details about floor leveling, tile installation, and choosing the right materials for years, costing me both money and effort.
Why Proper Renovation Matters More Than Ever
In 2024, more homeowners than ever are realizing that quick fixes won’t cut it anymore. The key to a stunning, durable upgrade lies in understanding the subtle craftsmanship behind top-notch renovation tips. When floors aren’t level or tiles aren’t properly sealed, what starts as a small issue can evolve into costly repairs and safety hazards. It’s no wonder that a surprising 60% of homeowners face rework within just a year of their initial renovation—often because of overlooked details like uneven flooring or poor waterproofing. A 2020 study from BuildDirect highlights that quality materials and expert installation can extend the lifespan of your upgrades by years.
So, if you’ve ever felt frustrated with uneven surfaces or water leaks cropping up soon after your renovation, you’re not alone. But there’s good news: with a few strategic tips, you can avoid these pitfalls and create a home that’s not only beautiful but also built to last.
Are you tired of dealing with uneven carpets or shower floors that cause water to pool? If so, you’re in the right place. Today, I’ll guide you through essential renovation strategies that will help you level floors flawlessly and choose the right installation techniques for lasting success. Let’s dive into the world of expert tips and transform your home into the sanctuary you’ve always wanted.
Level Your Floors without Guesswork
Start by removing all furniture and fixtures from the room. Use a long spirit level or laser level to scan the entire floor surface, identifying high and low spots. Mark these uneven areas with chalk or painter’s tape for easy reference. When I tackled my living room, I marked dips and humps precisely, which helped me plan the shimming process and avoid future squeaks or cracks.
Prep with Precision and Care
Before applying any leveling compound or installing new flooring, thoroughly clean the surface to remove dust, debris, and grease. For concrete, patch any cracks with a suitable filler, ensuring a smooth, stable base. For wooden subfloors, check for loose boards and screw or nail them down securely. Proper prep is crucial; skipping this step almost always leads to uneven wear or damage over time.
Use the Right Materials for the Job
Select high-quality self-leveling compounds for concrete floors—these mimic the benefits of expert [floor leveling](https://floorcraftstore.com/expert-floor-leveling-carpet-installation-for-modern-homes) and ensure a flat surface. For wooden subfloors, consider underlayment panels or plywood to create a stable base before laying laminate or carpet. When installing laminate flooring, I prefer moisture barriers and click-lock systems, which make the process smoother and more durable, aligning with the latest [laminate shower renovations](https://floorcraftstore.com/laminate-shower-upgrades-lasting-home-improvement-tips).
Achieve Seamless Leveling with Proper Application
Mix your leveling compound according to the manufacturer’s instructions—ideally, a homogenous, pourable consistency. Pour in the low spots first, then use a trowel or a notched squeegee to spread the compound evenly. For large areas, working in sections prevents premature setting. When I did my bathroom floor, I poured and spread the compound manually; a small mistake led to 20 minutes of rework, but it paid off in a perfectly flat surface afterward.
Install Flooring with Flawless Precision
Follow the manufacturer’s guidelines for expansion gaps, especially for laminate flooring—this prevents buckling over time. Use spacers during installation to maintain uniform gaps against walls. When laying carpets, stretch them tightly and secure with tack strips, avoiding wrinkles that can cause trip hazards or wear. During my recent project, I used a knee kicker and a tensioning bar, which created a smooth, long-lasting surface that looked professionally done.
Mitigate Common Pitfalls
Always check humidity levels before installation; excessive moisture can cause laminate warping or carpet mold. Use vapor barriers for concrete slabs and moisture-resistant underlayments for laminate floors. Regularly verify the levelness during installation—small discrepancies can become glaring imperfections once the floor is finished. I encountered a stubborn 1/8-inch dip in my hallway; applying extra shims and leveling compound resolved the issue before laying the final flooring.
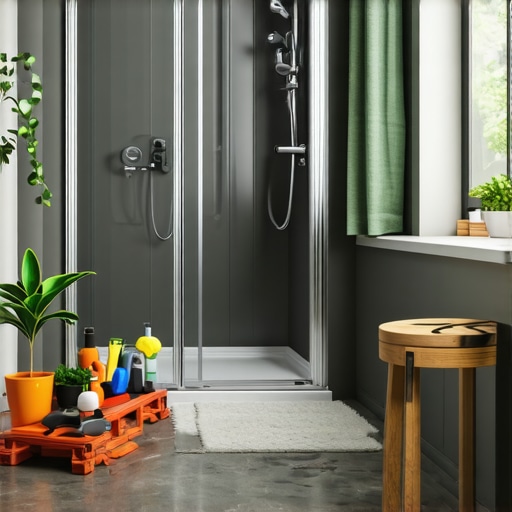
Seal and Protect Your Investment
Once flooring is installed, seal expansions gaps with caulk or molding to keep out moisture and debris. For showers integrated into floor level, proper waterproofing is essential. Consider [waterproofing solutions](https://floorcraftstore.com/top-shower-bathroom-renovation-tips-for-lasting-style-in-2024) adept at handling daily water exposure, preventing leaks and damage. My recent shower upgrade included sealing all joints with waterproof membranes, ensuring longevity and peace of mind.
Many homeowners believe that achieving a perfectly level floor or a flawless shower is straightforward—they think choosing the right materials and following basic instructions is sufficient. However, as an expert in renovation, I can tell you that there are nuanced pitfalls that even seasoned DIY enthusiasts often overlook. One common misconception is that surface-level adjustments are enough; in reality, the underlying substructure stability and moisture management often determine long-term success. For example, many assume that applying a quick layer of self-leveling compound will smooth out major unevenness, but if the subfloor isn’t properly prepared or the compound isn’t suitable for the surface, cracking and shifting are inevitable.
A specific trap to avoid is the belief that all leveling compounds are interchangeable. Different materials have unique properties—some cure faster, some are more flexible, and others handle moisture better. Using the wrong type can lead to surface failures within months. For instance, in shower renovations, neglecting advanced waterproofing techniques and relying solely on sealants without proper membranes often results in leaks—a mistake that can cost you thousands in repairs.
What challenges do advanced homeowners face when installing complex floor systems?
Understanding the intricacies of layered systems is crucial—combining proper subfloor preparation, moisture barriers, and material compatibility is essential for lasting results. Expert guidance shows that integrating these elements correctly can prevent common issues like mold, warping, or delamination. According to the Building Science Corporation, neglecting comprehensive moisture management is a leading factor in floor failures, emphasizing the importance of selecting appropriate waterproofing solutions during installation. Check out detailed strategies to master this process and achieve impeccable results.
Another advanced nuance relates to the installation of laminate flooring in moisture-prone areas. Many assume laminate is suitable everywhere, but poor planning regarding vapor barriers and subfloor acclimation leads to buckling and gaps over time. Carefully controlling humidity levels before and during installation, along with selecting premium underlayments designed for high-moisture environments, can dramatically enhance durability. For comprehensive approaches, consider exploring our detailed guides on [laminate shower renovations](https://floorcraftstore.com/laminate-shower-upgrades-lasting-home-improvement-tips) and [expert laminate-flooring tips](https://floorcraftstore.com/expert-floor-leveling-laminate-installation-for-lasting-durability).
Keeping Your Floors in Top Shape: Essential Tools and Maintenance Tips
Investing in the right tools can significantly extend the lifespan of your renovation efforts. I personally swear by using a laser level for precise floor leveling—it’s my go-to for ensuring perfect flatness, especially when working with large areas. A cordless oscillating multi-tool is invaluable for detailed caulking removal and precision trims around showers, preventing damage to surrounding surfaces. For cleaning, I rely on a high-pressure steam cleaner—it not only sanitizes effectively but also removes stubborn dirt from grout lines and carpet fibers, maintaining their appearance over time.
Regular inspection is key. I recommend setting a maintenance schedule using a moisture meter to monitor humidity levels, especially in areas prone to moisture like bathrooms and basements. This proactive approach prevents issues like mold or warped flooring, which can be costly to fix later. Trust Premier for Shower and Carpet Installations helps ensure your initial work withstands daily wear and tear, but ongoing care keeps it looking new longer.
What’s Next in Tool Tech? The Future of Home Maintenance
The trend is moving toward smart tools—connected sensors and app-enabled devices that alert you to issues before they become visible problems. Imagine receiving a notification that your moisture levels are rising in a hidden corner of your bathroom—that’s where the future is headed, making maintenance smarter and more efficient.
How do I keep my renovations functioning perfectly over time?
Incorporating routine inspections with high-quality, specialized tools is essential. Regularly check for uneven areas or water leaks, and address these immediately. Updating your maintenance toolkit with smart sensors or moisture meters can preempt costly repairs, maintaining your home’s beauty and structural integrity. For expert insights, explore detailed strategies with our guide on expert floor leveling and carpet installation. Don’t forget: consistent care combined with high-grade tools is your best defense against wear and aging, making your renovation investments truly stand the test of time.
Lessons I Wish I Had Known Before My Renovation Journey
One of the biggest surprises I encountered was how critical subfloor stability truly is. I used to believe that applying a quick self-leveling compound would handle all unevenness, but I quickly realized that underlying support determines the longevity of my floors. Additionally, I underestimated the importance of moisture management, especially in areas like bathrooms and basements—simply sealing joints isn’t enough without proper waterproofing measures. Lastly, I discovered that tools like laser levels and moisture meters aren’t just for professionals; investing in quality gear can prevent costly mistakes and save time during installation.
Tools and Resources That Made a Difference in My Renovations
For anyone serious about flawless results, I recommend the following tools: a laser level for pinpoint accuracy in leveling surfaces; a moisture meter to monitor humidity levels and prevent mold or warping; a high-pressure steam cleaner to maintain grout and carpet fibers, keeping them fresh and durable; and an adjustable notched squeegee for even application of leveling compounds. These tools have been game-changers, ensuring that my home upgrades stand the test of time. For comprehensive strategies and expert advice, visiting trusted sources like this guide on expert floor leveling provides invaluable insights.
Taking Action to Protect Your Home’s Beauty
Don’t wait for issues to show up before addressing them. Regular inspections, smart tool usage, and proactive moisture monitoring are your best defenses against costly repairs down the line. Remember, consistency is key—set a maintenance schedule that includes checking for uneven spots and water leaks, especially in vulnerable areas like bathrooms. Embracing modern technology, such as smart moisture sensors, can alert you to potential problems before they escalate. Your efforts now will ensure that your home remains beautiful, functional, and durable for years to come. Ready to transform your space with confidence? Share your favorite renovation tips or challenges below and join the community of DIY enthusiasts pushing the boundaries of home improvement.
http://Emily%20Carter
Reading through this comprehensive guide, I resonated with the emphasis on proper prep and material choice. I recently undertook a bathroom renovation and initially thought that just applying a self-leveling compound would be enough to fix my uneven floor; however, I overlooked the importance of moisture barriers, especially in a damp environment. The result was minor cracking within a few months, which was incredibly frustrating. Since then, I’ve learned that layering a proper waterproof membrane beneath the leveling compound can make a huge difference in durability. I wonder, for those dealing with old subfloors, what’s your go-to method for reinforcing or replacing problematic structural support before installing new flooring? Also, does anyone have experience with different waterproofing brands or techniques that have outperformed others in long-term studies? I’m eager to hear practical tips from fellow DIYers or professionals who’ve mastered these nuances.
http://Michael%20Thompson
This post really hit home for me, especially the part about properly preparing the subfloor before installing new flooring. I remember rushing that step in my last project, thinking that a quick clean and some leveling compound would be enough, only to face uneven surfaces and squeaks down the line. Since then, I’ve learned that reinforcing old subfibors, especially in older homes, can save a lot of headaches later. Adding a layer of plywood over weak spots or replacing sections altogether has made a huge difference in the overall durability and ease of installation.
Regarding waterproofing, I’ve had success using membrane systems like RedGard or Schluter-Kerdi for showers. They create a seamless barrier that prevents leaks for years. Has anyone found a particular waterproofing method or product that excels over long-term usage? Also, I’d love to hear insights on balancing moisture management with maintaining proper insulation—any tips for preventing mold in tricky areas like basements or bathrooms? These nuances can make all the difference between a temporary fix and a lasting investment.
http://Sarah%20Mitchell
Reading this post really resonated with my recent experience fixing uneven floors in my home. I underestimated the importance of thorough prep and quality materials, which led to issues soon after my renovation. What I’ve learned is that investing in proper subfloor reinforcement—like adding plywood over weak spots—can be a game-changer for long-term durability. The part about moisture management especially caught my attention, since I live in a humid climate, and I’ve struggled with mold in poorly waterproofed areas. I’ve had good results with membrane systems like Schluter-Kerdi, but I’m curious—has anyone found a waterproofing solution that outperforms others over the span of several years? Also, do you have recommendations for balancing moisture barriers with insulation, particularly in areas prone to dampness? Sharing these insights could help many DIYers avoid costly mistakes down the line.