The ‘Plunge’ Test for Checking Shower Drain Speed Before Tiling
The Plunge Test ensures your shower drain actually works before you bury it in tile
I spent three days grinding concrete on a job last month just so the floor wouldn’t click like a castanet. Most guys skip the leveling compound because it is expensive and messy. They think the underlayment will hide the dip. It won’t. I see this same laziness in showers. A guy slaps down a membrane, glues a drain, and starts tiling. He never checks if the water actually leaves the room. Then the homeowner calls me six months later because the grout is mushy and the bathroom smells like a swamp. I tell them the truth. Your installer didn’t do the plunge test. We have to rip it all out. That is a five thousand dollar mistake that could have been avoided with a simple rubber plug and a stopwatch. Flooring is not about what looks pretty. It is about how the structural assembly handles the physics of gravity and the chemistry of moisture. If you are moving from a carpet install to a tile or laminate floor, your margin for error just dropped to zero. Carpet hides sins. Tile exposes them. Laminate screams them at you every time you take a step.
The fundamental mechanics of drainage speed
The plunge test involves filling a shower pan to the brim of the curb and then releasing the plug to measure how quickly the water evacuates. This test identifies air-lock issues and poor venting that a simple bucket pour ignores. It is the only way to verify pipe capacity. When we talk about showers, we are talking about hydrostatic pressure. A standard shower head pumps out about 2.5 gallons per minute. If you have a fancy rain head and four body jets, you might be pushing 10 gallons per minute. If your drain is restricted because of a burr in the PVC or a vent stack that is blocked by a bird nest, the water will back up. You do not want to find this out after you have spent three days meticulously laying out 12 by 24 porcelain. You need to see a vortex. If the water just lazily disappears without a swirl, you have a venting problem. A slow drain is a failing drain. It causes soap scum to settle on the tile instead of washing away. This degrades the grout and the topical sealer. Eventually, that standing water finds a pinhole in your waterproofing. It is not a matter of if, it is a matter of when.
“A floor is only as good as the subfloor beneath it; deflection is the enemy of every joint.” – Master Flooring Axiom
Why surface tension matters for thin-set bonding
Surface tension dictates how well your waterproofing membrane adheres to the substrate. If you have oils or dust on the subfloor, the chemical bond will fail. This leads to delamination under the tile. Understanding the molecular interaction between the modified polymers and the substrate is mandatory for any installer. You have to look at the concrete or the backer board under a microscope. It is full of tiny pores. When you spread your thin-set, you are forcing those polymers into those pores. If the subfloor is too dry, it sucks the water out of the thin-set before the cement can hydrate. This is called a flash dry. It leaves you with a brittle bond. I always damp down the subfloor to a saturated surface dry condition before I start. This balances the surface tension. In the world of showers, this bond is the only thing standing between your joists and rot. If you are switching from laminate to tile, you have to be extra careful. Laminate is a floating floor. It does not care about the chemical bond. Tile is a married system. It is fused to the house. If the house moves and the bond is weak, the tile cracks. It is basic engineering. Stop thinking like a decorator and start thinking like a structural specialist.
[image_placeholder_1]
The specific steps for a successful plunge test
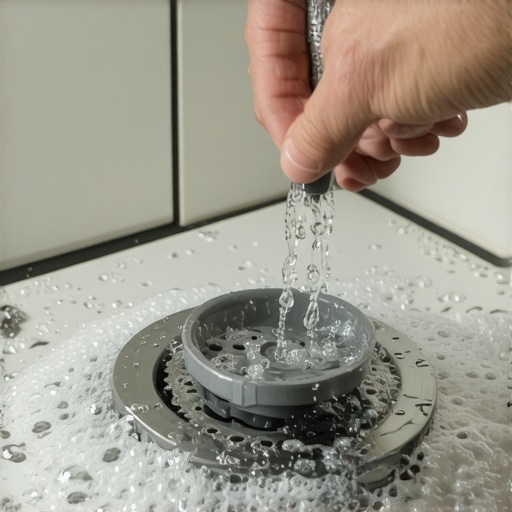
To perform a plunge test, you must first seal the drain with a mechanical test plug. Fill the shower pan with water until it reaches the top of the waterproofing at the curb. Mark the level with a pencil and wait 24 hours. If the level holds, pull the plug. This two-part test confirms both the integrity of your membrane and the speed of your plumbing. If the water level dropped during the 24-hour wait, your membrane is leaking. You probably didn’t get enough coverage in the corners or around the drain flange. If the level held but the water took five minutes to drain after you pulled the plug, your plumbing is the culprit. I have seen guys leave plastic shavings from the pipe cutter inside the P-trap. Those shavings act like a dam for hair and lint. You have to be surgical. I use a borescope to look down the pipe before I even start the pan. I want to see a clear path to the main stack. If I see a sag in the pipe, I fix it then. I do not wait until the tile is down to realize the water is standing in the trap because of poor pitch. Precision is the difference between a master and a hack.
The 1/8 inch variance that ruins everything
Floor leveling is the most neglected phase of any flooring project. Whether you are installing tile in a shower or laminate in a hallway, the substrate must be flat within 1/8 inch over a 10-foot radius. Any more variance will cause structural failure. In a shower, that variance creates a birdbath. That is a low spot where water sits. Water sitting on tile is a recipe for mold. In a laminate install, that variance causes the boards to flex. Every time you walk on a low spot, the tongue and groove joint is stressed. Eventually, the locking mechanism snaps. This is the source of that annoying clicking sound people complain about. I do not care if your laminate was expensive. If your subfloor looks like a mountain range, your floor will fail. I use a 10-foot straight edge on every single job. If I find a dip, I fill it with high-strength self-leveling underlayment. If I find a hump, I grind it down. This is dusty, loud, and miserable work. But it is the only way to ensure the floor lasts 30 years instead of three. Most homeowners do not see this part of the job. They only see the pretty finish. But the subfloor is where the money is made. It is where the quality is hidden. [image_placeholder_2]
Chemical bonds and the waterproofing sandwich
Modern shower construction relies on a sandwich of materials that must be chemically compatible. This typically includes a subfloor, a pre-slope, a waterproof membrane, and a polymer-modified thin-set. Each layer must bond perfectly to the one below it. I prefer liquid-applied membranes like Laticrete Hydro Ban or sheet membranes like Schluter-Kerdi. The chemistry of these products is fascinating. They are designed to be vapor-impermeable while remaining flexible enough to bridge small cracks in the substrate. When you apply the thin-set over the membrane, you are creating a mechanical and chemical lock. The modified polymers in the thin-set are long-chain molecules that wrap around the fibers of the membrane or the microscopic texture of the liquid coating. If you use a cheap, non-modified thin-set, you are asking for trouble. It lacks the tensile strength to hold the tile during the seasonal expansion and contraction of the house. Wood moves. Concrete moves. Your floor has to be able to move with it without breaking the bond. This is why I never use mastic in a shower. Mastic is basically glue. It re-emulsifies when it gets wet. It is the hallmark of a cheap builder-grade install. Real pros use cement-based products that get stronger over time.
“The slope to drain shall be a minimum of one-fourth inch per foot and shall be uniform.” – Tile Council of North America Standard
Technical comparison of drain flange systems
Choosing the right drain flange is about more than just aesthetics. You have to match the flange to your waterproofing method. A traditional three-piece drain is for a thick mortar bed with a buried liner. A bonded flange is for topical waterproofing. Mixing these systems is a recipe for disaster. If you try to use a topical membrane with a traditional drain, you will block the weep holes. Then the water gets trapped in the mud bed with nowhere to go. It sits there and rots. This is why your shower smells like old gym socks. I always advocate for bonded flanges in modern construction. They allow the water to exit the shower immediately rather than soaking into a sand bed first. This keeps the whole system drier and cleaner. See the table below for a breakdown of flow rates and substrate requirements for different drain types.
| Drain Type | Minimum Flow Rate | Best Substrate | Installation Method |
|---|---|---|---|
| Standard Center | 5 GPM | Mortar Bed | Traditional Liner |
| Linear Wall | 8 to 10 GPM | Pre-sloped Foam | Bonded Membrane |
| Point Drain | 6 GPM | Level Concrete | Liquid Applied |
| High-Flow Commercial | 15 GPM | Structural Slab | Epoxy Bonded |
Laminate and carpet transitions to tile
The transition between a tiled shower and the adjacent floor is a critical failure point. Whether it is a carpet install or laminate, the height difference must be managed without creating a trip hazard or a moisture wick. Carpet is the most forgiving. You can tuck it into a transition strip and call it a day. But laminate is tricky. Laminate is a wood-based product. If water splashes out of your shower and sits on the edge of the laminate, it will swell. It acts like a sponge. I always leave a 1/4 inch gap between the tile curb and the laminate, and I fill that gap with 100 percent silicone sealant. Never use grout at a transition. Grout has no flex. It will crack the first time the house breathes. Silicone is your best friend. It stays flexible and creates a watertight seal. If you are doing a carpet install next to a tile floor, make sure the tack strip is set back far enough so the installer doesn’t nick your waterproofing with a nail. I have seen guys ruin a shower pan by driving a carpet tack right through the liner at the doorway. It makes me want to retire every time I see it.
Pre-installation checklist for wet room success
Before you even think about opening a bag of thin-set, you must verify every structural component of the shower. A single oversight in the plumbing or the subfloor will lead to a total system failure within the first year of use. Follow this checklist to ensure your installation meets professional standards. These steps are non-negotiable for anyone who values their reputation.
- Verify subfloor levelness within 1/8 inch over 10 feet.
- Check drain pipe diameter is 2 inches for standard residential showers.
- Confirm vent stack is clear of obstructions to prevent air-locks.
- Install a pre-slope of 1/4 inch per foot towards the drain.
- Perform 24-hour flood test to verify membrane integrity.
- Execute the release/plunge test to check plumbing flow speed.
- Inspect the bonded flange for any gaps or debris in the throat.
- Measure the Janka hardness of any adjacent wood flooring to determine expansion needs.
Final verification protocols for the master installer
The plunge test is the final gatekeeper. If the water screams down the drain and creates a strong vortex, you have done your job. You have verified the plumbing, the venting, and the pitch. Now you can focus on the tile layout. Remember that your tile is only a decorative wear layer. The real work is underneath. It is in the floor leveling, the chemical bonds, and the physics of the drain. If you are a homeowner, do not let your installer skip these steps. If they say it is unnecessary, find a new installer. A pro wants to test their work. A hack wants to get paid and disappear before the leaks start. I have been doing this for 25 years. I have never regretted taking the extra time to do a flood test. I have, however, regretted trusting a plumber who said the vent was fine without checking it myself. Trust but verify. That is the rule of the master flooring architect. Keep your tools clean, keep your subfloor flat, and never trust a drain until you have seen it plunge. Your reputation is built on the 95 percent of the job that nobody ever sees. Make sure it is solid.