How to Stop Your Shower Pan from Flexing Under Weight
I spent three days grinding concrete on a job last month just so the floor wouldn’t click like a castanet. Most guys skip the leveling compound. They think the underlayment will hide the dip. It won’t. I’ve been in this game for twenty-five years and if there is one thing that gets my blood boiling, it is a shower pan that moves under a man’s feet. It feels cheap. It feels like a failure. Last year, I walked into a master bath where the homeowner had spent ten thousand dollars on tile, but the acrylic pan was moving a full quarter inch every time he stepped in to shave. The grout was already turning to powder. The drain was weeping into the joists. All of it had to come out. All because someone was too lazy to mix a forty-pound bag of mortar. I do not care about your marble choice or your designer fixtures if your subfloor is garbage. A shower is a high-stress engineering environment. It handles weight, heat, and constant moisture. If you treat it like a piece of furniture, you have already lost.
The physics of a failing shower base
Shower pan flexing occurs when the gap between the subfloor and the acrylic or fiberglass basin allows for vertical deflection. This movement stresses the drain seal and creates hairline fractures in the gel coat. Stopping this requires a rigid mortar bed or high-density spray foam to distribute weight evenly. When you stand in a shower, you are applying concentrated point-load pressure to a thin layer of plastic or fiberglass. These pans are designed to be light for shipping, not for structural rigidity. Without a solid interface between the bottom of the pan and the subfloor, the material must bend to bridge the air gap. This bending is what we call deflection. Over time, this repeated stress causes the material to fatigue. You will hear it first. A little squeak. A little groan. Then, the seal at the drain fails because the pipe is rigid but the pan is moving. Now you have water sitting on your subfloor. This is how rot starts. It is not a matter of if, but when.
Why mortar bedding is non negotiable
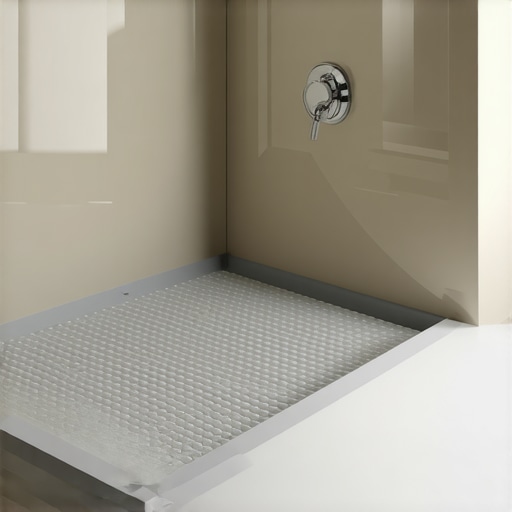
Mortar bedding acts as a customized structural bridge that eliminates the air space between the uneven subfloor and the manufactured shower pan. Using a sand-mix mortar provides a high-compressive strength base that prevents the plastic from bowing under the weight of a person. I see people try to use spray foam or piles of cardboard. That is hack work. You need a mix that will hold its shape and withstand hundreds of pounds of pressure without compressing. Sand-mix is the gold standard here. It has a higher ratio of sand to cement, which makes it less prone to shrinking as it cures. You want a stiff consistency, like peanut butter. If it is too runny, the pan will just sink to the floor and you are back to square one. If it is too dry, it won’t bond. You pile it in mounds, about two inches high, then you set the pan into the wet mud. You step into the pan and wiggle it until it hits your level lines. That mortar fills every void, every nook, and every cranny of that honeycomb structure under the pan. Once it hardens, that floor is as solid as a sidewalk.
“A floor is only as good as the subfloor beneath it; deflection is the enemy of every joint.” – Master Flooring Axiom
The role of joist spacing in shower stability
Proper joist spacing and subfloor thickness are the primary factors in preventing the structural sagging that causes shower pans to flex. For a standard shower installation, joists should be spaced sixteen inches on center with at least three quarters of an inch of plywood decking. If your house was built with joists twenty-four inches on center, you have a problem. The plywood between those joists will bow like a trampoline under a heavy shower unit. I have seen guys try to fix this from above. You cannot fix a structural span issue with more mortar. You have to get underneath. You sister those joists. You add blocking. You make that subfloor immovable. I don’t use OSB under a shower. OSB is just wood chips and glue. It swells the second a drop of water hits it. I want CDX grade plywood or better. It has the internal bond strength to handle the weight of the mortar bed and the water and the person without delaminating. If the subfloor moves, the mortar bed cracks. If the mortar bed cracks, the pan flexes. It is a chain reaction of failure.
Comparing support methods for acrylic versus fiberglass
Different shower materials require specific stabilization techniques to ensure long term durability and prevent structural cracking during use. Acrylic pans are more flexible and require full mortar coverage while heavy cast iron bases require reinforced floor framing to manage the massive static load.
| Material Type | Flexibility Rating | Recommended Base | Typical Lifespan |
|---|---|---|---|
| Acrylic | High | Full Mortar Bed | 15 Years |
| Fiberglass | Medium | Mounded Mortar | 10 Years |
| Cast Iron | Low | Reinforced Joists | 50 Years |
| Stone Resin | Very Low | Thin-set Adhesive | 30 Years |
Acrylic is essentially a giant piece of heated plastic sucked into a mold. It is tough, but it has zero structural integrity on its own. Fiberglass is a bit stiffer because of the glass fibers, but it is brittle. If you let a fiberglass pan flex, it will crack and leak. Stone resin is the new kid on the block. It is heavy as lead and solid all the way through. For stone resin, you don’t need a huge mud bed, just a layer of thin-set to keep it level. But for the cheap stuff you find at the big box stores, you better be ready to mix some mud.
The step by step stabilization protocol
A successful shower pan installation requires a systematic approach to subfloor preparation and material application to ensure a rock solid finish. Following a strict sequence prevents the common mistakes of premature drain attachment or uneven leveling that leads to future leaks.
- Clean the subfloor of all debris and drywall dust to ensure a proper bond.
- Check the floor for level in all directions and identify the highest point.
- Install a moisture barrier or primer if the subfloor is particularly porous.
- Dry fit the pan and the drain assembly to check for alignment issues.
- Mix the sand-mix mortar to a stiff, workable consistency.
- Apply the mortar in mounds across the footprint of the shower base.
- Set the pan and use your body weight to press it into the mortar bed.
- Verify level across the top flanges and the threshold immediately.
- Allow the mortar to cure for at least twenty four hours before standing in it.
Don’t skip the dry fit. I’ve seen guys dump fifty pounds of wet mud only to realize the drain pipe is two inches off center. Now they are shoveling wet concrete into a five-gallon bucket while swearing at the wall. It is messy and avoidable. Measure twice. Mud once.
“Substrate preparation is the most significant factor in the success of any waterproofing system.” – TCNA Handbook Principles
The ghost in the expansion gap
Leaving a small expansion gap at the perimeter of the shower pan allows the structure to breathe without putting pressure on the wall studs. This gap prevents the pan from squeaking or buckling when the house settles or the temperature changes during a hot shower. Most amateurs jam the pan tight against the studs. They think tight is good. Tight is bad. Wood expands. Plastic expands. If there is no room for that movement, the pan will bind against the wood. That is where those mysterious popping sounds come from. I leave an eighth of an inch. That gap gets covered by your backer board and tile anyway. It is a hidden safety valve. In high-humidity areas like New Orleans or Houston, this is even more vital. The moisture in the air makes the wood framing grow and shrink. If you don’t respect the physics of expansion, your shower will scream every time you step in it.
Chemical bonding and the moisture barrier
The chemical interaction between the mortar bed and the subfloor must be managed to prevent the wood from sucking the moisture out of the mix too quickly. Using a primer or a thin layer of felt paper can control the hydration process and ensure the mortar reaches full strength. If you put wet mortar directly on dry plywood, the wood acts like a sponge. It pulls the water out of the cement. Without that water, the cement cannot hydrate. You end up with a pile of dry sand that has no strength. I like to lay down a layer of number fifteen felt paper. It protects the wood from the water and it keeps the mortar from drying out too fast. It also acts as a cleavage membrane. If the house shifts slightly, the floor can move a tiny bit without cracking the mortar bed into pieces. It is a small detail that separates a pro job from a weekend warrior mistake.
The final word on structural integrity
Look, I know it is tempting to just drop the pan on the floor and screw it to the studs. The instructions in the box might even say you can do it. But those instructions are written by lawyers and marketing people, not by the guys who have to fix the rot ten years later. If you want a shower that feels like it is part of the foundation of the house, you have to do the work. You have to mix the mud. You have to check your levels. You have to respect the deflection limits of your joists. It is about the chemistry of the bond and the physics of the load. Do it right the first time or get ready to do it again when the mold starts growing in the crawlspace. There are no shortcuts in flooring. Only long roads back to fix what you messed up. Keep your subfloor flat, your mortar stiff, and your drain aligned. That is how you build a shower that lasts a lifetime. “