How to Fix a Squeaky Plywood Subfloor Before Laying Carpet
I spent three days grinding concrete on a job last month just so the floor would not click like a castanet. Most guys skip the leveling compound. They think the underlayment will hide the dip. It won’t. Most installers believe carpet is a mask. They treat it like a thick rug that hides the sins of a lazy builder. This is the first mistake of the amateur. A squeak in a plywood subfloor is not just an annoyance. It is a structural SOS. It is the sound of friction between two wood members or a fastener that has lost its grip. When you walk across a floor and hear that high-pitched chirp or the deep groan of shifting timber, you are hearing the physics of deflection in real time. If you ignore this before the carpet install, you are locking that ghost into your home for the next decade. This is about more than comfort. It is about the integrity of the walking surface. I have seen fifteen thousand dollar wide-plank walnut floors cup like potato chips because the installer ignored the crawlspace humidity, and I have seen luxury carpet feel like a cheap motel because the subfloor was a vibrating mess. We are going to stop that today. We are going to look at the chemistry of adhesives, the mechanics of fasteners, and the structural reality of your joist system.
The ghost in the expansion gap
Subfloor squeaks are caused by the movement of plywood sheets against floor joists or adjacent panels when weight is applied. This friction occurs because the original fasteners, usually nails, have pulled away from the wood over time. This process is often driven by moisture cycles where wood expands and contracts, eventually loosening the mechanical bond between the nail and the cellulose fibers. To fix this, you must identify the exact point of movement. You cannot just guess. You need to walk the room, marking every chirp with a wax crayon. This is not a cosmetic fix. It is a surgical intervention. You are looking for deflection. If the plywood moves even a sixteenth of an inch when you step on it, that is a failure. You are also looking for the expansion gap. Plywood is a hygroscopic material. It breathes. It absorbs water from the air and grows. If two sheets are butted tight against each other with no gap, they will rub. That rubbing creates a groan that no carpet pad can dampen. You need a 1/8 inch gap between all sheet edges to allow for this natural movement. Without it, the floor will bind and buckle.
The structural physics of a noisy joist
A squeaky floor is the result of mechanical failure where the fastener no longer provides sufficient clamping force between the subfloor and the framing. When the nail slides up and down in its hole, it creates a friction-based sound. This is often exacerbated by poor floor leveling or joists that have crowned or bowed. In my twenty five years, I have seen joists that were so warped they left a half inch air pocket under the plywood. Every time someone stepped there, the plywood acted like a drumhead, snapping down against the wood. You have to address the gap. If you just drive a screw into that void, you might pull the plywood down, but you could also create a dip in your floor. This is where the structural zooming becomes necessary. You aren’t just fixing a noise. You are stabilizing a system. You must check the moisture content of your joists using a pin-style meter. If the joist is over twelve percent moisture, any fix you apply today might change as the wood dries. Wait for the house to stabilize. This is the difference between a master and a handyman. One cares about the chemistry of the wood. The other just wants to get paid.
“A floor is only as good as the subfloor beneath it; deflection is the enemy of every joint.” – Master Flooring Axiom
The chemistry of silence and adhesive bonds
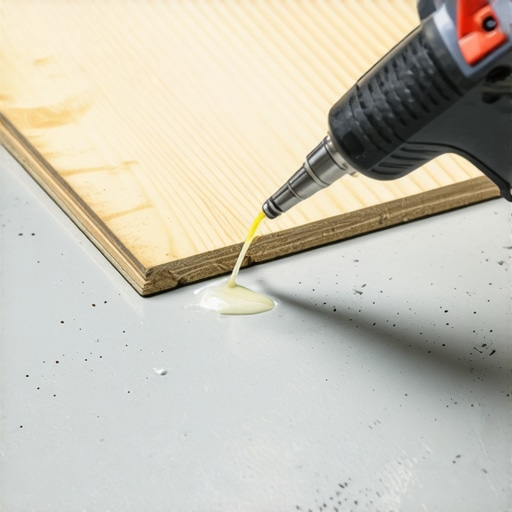
Modern subfloor stabilization relies on high-solids polyurethane adhesives that bridge the gap between wood members to create a monolithic structure. When we talk about fixing squeaks, we aren’t just talking about screws. We are talking about the chemical bond. If you have access from below, in a crawlspace or basement, you should be using a subfloor adhesive like PL Premium. This isn’t your standard school glue. This is a moisture-cured polyurethane that expands slightly as it sets. You run a bead into the junction where the joist meets the plywood. This creates a shim. It fills the void. It stops the movement. On the top side, before the carpet install, you should look for loose seams. If the tongue and groove joint is rubbing, you can sometimes use a thin-viscosity cyanoacrylate or a specialized wood floor lubricant, but the permanent fix is always mechanical. You need to understand the shear strength of your fasteners. A standard drywall screw has almost no shear strength. If the house shifts, the head will snap off. You must use dedicated subfloor screws with a ribbed head that sinks itself into the plywood without mushrooming the wood fibers.
Why your subfloor is lying to you
The flat appearance of a plywood subfloor often masks significant undulations and dips that lead to future noise and wear. Just because it looks flat doesn’t mean it is level. You need a ten foot straightedge. Any dip greater than 3/16 of an inch over a ten foot span is a problem. While carpet is more forgiving than laminate or tile in showers, a significant dip will still cause the backing of the carpet to stretch and eventually wrinkle. This is where floor leveling comes into play. You don’t use a hammer for a dip. You use a cementitious self-leveling underlayment. But wait. You cannot just pour it over the squeak. If you do, the movement of the plywood will crack the leveler, turning it into a bag of gravel under your new carpet. You must secure the floor first. You must make it silent. Only then do you apply the leveler. This sequence is vital. Most people want the thickest underlayment, thinking it will cushion the floor. But too much cushion actually causes the locking mechanisms on laminate or the seams in carpet to stress under pressure. You want a firm, flat, and silent base.
The technical guide to mechanical stabilization
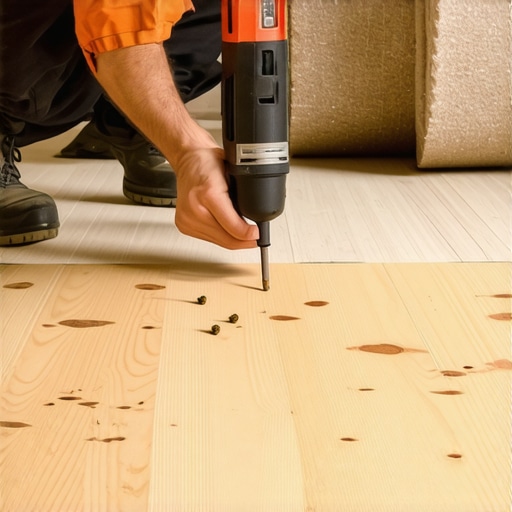
To permanently silence a subfloor, you must use a pattern of screws that creates a consistent clamping force across every joist. Start by locating the joists with a stud finder or by looking for the original nail lines. Use 2-1/2 inch or 3 inch wood screws. Do not use nails. Nails are what got you into this mess. Space your screws every six inches along the edges of the plywood sheets and every eight to ten inches in the field of the board. When you drive the screw, make sure the head is slightly countersunk. If the head sticks up, it will eventually wear a hole through your carpet pad and the carpet itself. You will feel that little metal bump every time you walk barefoot. If you find a spot where the joist is missing entirely or the plywood is overhanging too far, you need to add blocking. Go into the crawlspace and install 2×4 blocks between the joists to support the edge of the plywood. This is the only way to stop the vertical deflection that causes the most violent squeaks.
“Standard subfloor thickness for 16-inch on-center joist spacing must be a minimum of 19/32 inch to prevent excessive deflection.” – NWFA Structural Guidelines
The 1/8 inch that ruins everything
Expansion gaps at the perimeter of the room and between sheets are the most overlooked aspect of a silent floor. If your plywood is tight against the wall studs, the house will push against the floor as it settles. This creates a tension that manifests as a loud pop when you walk nearby. I have seen entire rooms that groaned like a haunted house simply because the installer didn’t leave a gap at the drywall. Take a circular saw and set the depth to the thickness of the plywood. Run it along the perimeter if the gap is missing. This relieves the stress. The same applies to the seams. If the panels are touching, use a multi-tool to create that 1/8 inch space. This is not just for the carpet install. This is for the life of the building. Even in areas like showers or kitchens where you might transition to tile, these expansion rules are the difference between a floor that lasts fifty years and one that fails in five.
Comparing subfloor stabilization methods
| Method | Effectiveness | Required Tools | Chemistry/Material |
|---|---|---|---|
| Top-down Screwing | High | Impact Driver, Subfloor Screws | Mechanical Clamping |
| Adhesive Shimming | Very High | Caulk Gun, Polyurethane Adhesive | Polyurethane Bridge |
| Sistering Joists | Extreme | Circular Saw, 2×10 Lumber, Bolts | Structural Reinforcement |
| Squeak-No-More Kits | Moderate | Specialty Tripod Tool, Scored Screws | Temporary Mechanical Fix |
The definitive checklist for a silent room
- Check moisture content of the subfloor and joists before beginning any work.
- Identify every squeak and groan by walking the floor in a grid pattern.
- Verify the expansion gap at all walls and between all plywood sheets.
- Drive subfloor screws every six inches into the joists, ensuring they are countersunk.
- Apply structural adhesive from below if the floor has significant voids or air pockets.
- Use a ten foot straightedge to check for dips and apply floor leveling compound where needed.
- Vacuum the entire surface to remove sawdust and debris that can grind under the carpet pad.
Preparing for the finish
Once the subfloor is silent, you have won the battle. The carpet install will be straightforward because you have provided a stable, flat surface. But don’t get sloppy at the end. Check your transitions. If you are moving from the carpeted room to a hallway with laminate or a bathroom with tile, ensure the subfloor heights are accounted for. You don’t want a trip hazard. A master installer knows that the work you don’t see is more important than the work you do see. The carpet is just the clothes. The subfloor is the skeleton. If the skeleton is broken, the clothes will never look right. You have used the science of fasteners and the chemistry of adhesives to build a surface that will remain silent through the seasons. No more ghosts in the floorboards. Just a solid, professional result that stands the test of time. You have treated this like the engineering challenge it is. Now, lay the pad, stretch the carpet, and enjoy the silence of a job done right.