How to Fix a Carpet Burn from a Dropped Curling Iron
The physics of burnt nylon and the mechanics of the perfect patch
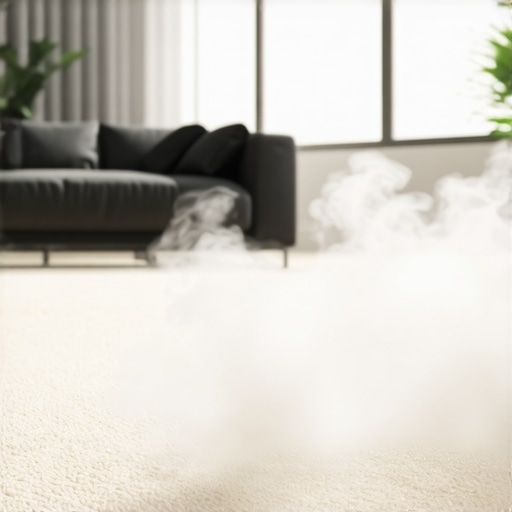
The smell of burnt nylon is something you never forget. It lingers in the air like a bad floor wax on a humid day. When a curling iron hits a carpet, you are not just looking at a stain. You are looking at a thermal event that has reorganized the molecular structure of the synthetic polymers. Most guys skip the leveling compound when they are prepping a room. They think the underlayment will hide the dip. It won’t. I spent three days grinding concrete on a job last month just so the floor wouldn’t click like a castanet. That same level of obsession is required to fix a burn. If you do not treat this like a surgical procedure, you will end up with a visible scar that screams amateur hour. I have spent twenty five years on my knees with a moisture meter and a power stretcher. I have seen every botched carpet install in the tri state area. A dropped curling iron usually operates at four hundred degrees Fahrenheit. Nylon 6 melts at approximately four hundred and twenty degrees. Polypropylene is even less resilient. When those fibers touch, they fuse into a hard, blackened puck. This puck cannot be cleaned. It must be excised with the precision of a jeweler.
The anatomy of a thermal carpet failure
A curling iron creates a localized heat zone that destroys the twist of the yarn. Every carpet fiber has a specific memory. This memory is set during the manufacturing process using steam or dry heat. When the curling iron drops, it overrides that memory and creates a permanent deformation. You cannot simply sand it down. The singed tips turn brittle and lose their ability to reflect light. This is why the spot looks dark. It is not just the charring. It is the change in the light refraction index of the melted plastic. Professional carpet install teams know that the subfloor condition affects how these fibers sit. If the floor leveling was ignored during the initial build, the carpet might have slight ridges that make a burn even more prominent. You need to understand the material before you reach for the scissors. Is it a cut pile, a loop, or a frieze. Each requires a different approach to the donor site selection.
“A floor is only as good as the subfloor beneath it; deflection is the enemy of every joint.” – Master Flooring Axiom
The hidden truth about subfloor preparation and fiber stability
Most homeowners assume a carpet patch is a surface level fix. They are wrong. The stability of the patch depends entirely on the backing and the subfloor contact. If you have a dip in the subfloor because the previous contractor skipped the floor leveling process, the patch will eventually sink. This creates a shadow line. I always tell my clients that flooring is a structural engineering challenge. Whether we are talking about showers or a standard bedroom carpet, the physics remain the same. Moisture is the enemy. If your concrete slab has a high moisture emission rate, the adhesive used for your patch will fail. It will emulsify and lose its tack. I use a calcium chloride test even for small repairs if I suspect the slab is weeping. People think I am crazy for bringing a moisture meter to a carpet burn job. I call it being professional. I do not want a callback in six months because the patch lifted.
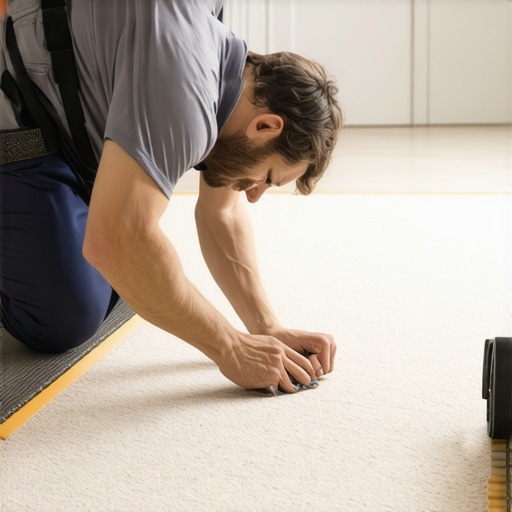
Selecting the donor site without ruining the room
You need a piece of carpet that has seen the same amount of wear and UV exposure as the damaged area. Do not just take a scrap from the attic. That attic scrap is pristine. It has its full factory luster. The carpet in the middle of your floor has been walked on, vacuumed, and exposed to sunlight. If you use a fresh scrap, the patch will glow like a neon sign. I usually harvest donor material from the back of a closet or under a heavy piece of furniture that has never been moved. This is where the surgical skill comes in. You need to use a row separator to find the exact grid of the primary backing. If you cut through the loops, you are asking for the patch to unravel. I treat every carpet install like a puzzle. You have to match the grain direction. Yes, carpet has a grain. It is called the pile sweep. If you rotate the patch ninety degrees, it will look like a different color even if it came from the same roll.
[image_placeholder]
Chemical bonding and the adhesive matrix
Once you have excised the blackened puck, you are left with a void in the secondary backing. You cannot just use super glue. You need a specialized thermoplastic adhesive or a high solids pressure sensitive glue. The chemical bond must be strong enough to withstand the lateral tension of a power stretcher. If you ever have to restretch the room, a weak patch will pop out like a cork. I prefer using a cool iron and seaming tape for larger burns, but for a small curling iron mark, a surgical plug is better. The adhesive needs to stay flexible. If the glue dries too hard, it becomes a localized hard spot. When you walk over it barefoot, you will feel it. It will feel like a pebble in your shoe. This is the difference between a mechanic with sawdust under his nails and a guy who watched a five minute video online. We care about the tactile reality of the floor.
| Repair Method | Durability Rating | Visible Seam Risk | Skill Level Required |
|---|---|---|---|
| Fibers Transplant | Low | Minimal | Extreme |
| Surgical Plug | High | Medium | Professional |
| Section Replacement | Very High | High | Master |
| Heat Re-bonding | Medium | Low | Intermediate |
The tools required for a professional result
You cannot do this with a kitchen knife. You need a dedicated carpet transition tool, a sharp row separator, and a duckbill napping shear. The napping shear is the most underrated tool in the flooring world. It allows you to trim the tops of the fibers without gouging the backing. I keep mine sharpened to a razor edge. I also carry a small bottle of denatured alcohol to clean the subfloor before applying any adhesive. If there is dust or old carpet pad residue, the bond will fail. It is the same logic we use when prepping for laminate or tile in showers. Cleanliness is the foundation of every long lasting floor. If you are working over a wooden subfloor, check for loose nails or squeaks while the carpet is pulled back. It takes two minutes to drive a screw into a joist, but it saves the homeowner years of annoyance.
A checklist for the perfect patch
- Identify the fiber type and check the melting point to understand the damage depth.
- Locate a donor site with identical wear patterns and UV exposure.
- Determine the pile sweep direction to ensure the patch reflects light correctly.
- Use a row separator to isolate the backing grid before cutting.
- Vacuum the subfloor void to remove all dust and loose debris.
- Apply a high solids adhesive that maintains flexibility after curing.
- Comb the fibers together using a fine tooth tool to hide the transition lines.
The ghost in the expansion gap
I have seen people try to fix a burn right near the baseboard. This is a nightmare. The tension near the tack strip is much higher than in the center of the room. If the original carpet install was done correctly, that carpet is under hundreds of pounds of tension. When you cut a hole near the wall, the carpet wants to pull away. You have to be careful not to let the backing shift. If it shifts even a sixteenth of an inch, your patch will not fit. It is like trying to change a tire while the car is moving. I usually have to use a mini stretcher to hold the tension while I set the patch. This is why I tell people that floor leveling and proper installation are not optional. They are the baseline for any future repairs. A cheap floor is the most expensive thing you will ever buy because you cannot fix it when things go wrong.
“Every installation is a battle against the natural tendency of materials to expand and contract; the installer is the mediator.” – Master Flooring Axiom
The final grooming and finish work
Once the patch is in and the glue has set, the job is not done. You have to groom the fibers. I use a specialized carpet comb to blend the donor fibers with the surrounding field. This is where you see if your grain matching was successful. If the light hits it and you cannot see the seam from a standing position, you have succeeded. I take a lot of pride in that. Most people just want to get in and get out. They do not care about the microscopic reality of the yarn. But I do. I smell the oak dust from the next room and the WD-40 on my tools, and I know that I have done the job right. Whether it is fixing a burn or installing a whole house of laminate, the goal is the same. Perfection is not an accident. It is the result of following the standards set by the experts. Do not let a small burn ruin your investment. Treat the floor with the respect a structural element deserves.