The ‘Randing Trick’ for Blending a Hardwood Floor Patch Without Sanding the Whole Room
The ‘Randing Trick’ for Blending a Hardwood Floor Patch Without Sanding the Whole Room
If you have ever stared at a water stain from a leaky radiator or a deep gouge from a moved piano, you know the sinking feeling that follows. You look at that one-square-foot of damage and then you look at the remaining 600 square feet of beautiful, aged oak in your living room. The traditional advice from most hardwood floor refinishing Kansas City companies is often discouraging: “To make that patch disappear, we have to sand the entire room to the bare wood.”
It is the “patchy” nightmare. Homeowners are often caught between living with a glaring eyesore or spending thousands of dollars on a full-room refinish they didn’t want. As a flooring specialist rooted in Kansas City, I have seen this dilemma play out in historic homes from Brookside to the newer builds in Overland Park. The frustration is real, but the solution doesn’t always have to be a total overhaul.
My name is Justin Kelley, and over the years, I’ve developed a specialized technique I call the “Randing Trick.” It is a professional secret designed to save my clients time, mess, and money. This technical “hack” allows us to blend a hardwood floor patch into an existing finish so seamlessly that the human eye can’t pick out the repair. By understanding the mechanics of wood grain and the physics of light reflection, we can avoid the dreaded “sore thumb” effect without dragging a heavy drum sander through your front door. In this guide, I’m going to pull back the curtain on how we achieve an invisible old hardwood floor restoration using randomized blending.
Why Traditional Patches Fail: The “Halo” Effect
The reason most DIY repairs – and even many professional ones – fail is due to what we call the “Halo Effect.” When you sand a small area and apply a fresh coat of stain and polyurethane, you aren’t just dealing with color matching; you are dealing with texture and light. New finish is smooth, high-build, and sits on top of the wood. Old finish has been lived on; it has microscopic scratches, oxidation, and a “patina” that only comes with time.
When these two surfaces meet at a hard, straight line, the light hits them differently. This creates a visible ring or “halo” around the repair. Even if the stain color is a perfect match, the transition is jarring. Furthermore, wood is a biological material. In the Kansas City area, our wild swings in humidity mean your wood floors are constantly “breathing.” New wood introduced in a patch might have a different moisture content than the boards installed forty years ago.
Before you even think about the aesthetics of a patch, you must ensure the structural integrity of the surrounding area. I always recommend performing The ‘Tap Test’ for Spotting Delaminated Wood Before You Sand. If the wood surrounding your repair area is delaminated or pulling away from the subfloor, no amount of clever sanding will save the patch. The “Randing Trick” only works if the foundation is solid. Once you’ve confirmed the surrounding boards are healthy, you can begin the process of defying the “Halo Effect.”
What is the ‘Randing Trick’?
The term “Randing” is a portmanteau I coined for “Randomized Blending.” Most people, when they sand a patch, stay strictly within the lines of the boards they replaced. This creates a geometric shape that the human brain is hard-wired to notice. Our eyes are incredibly efficient at spotting straight lines and perfect rectangles in nature.
The “Randing Trick” involves using a random orbital sander in a specific “feathering” pattern that breaks the human eye’s ability to see a hard transition line. Instead of a square patch, we create a soft-edged, irregular zone of transition. This technique is built upon The ‘Sanding’ Secret for Blending a Hardwood Floor Patch Perfectly, which emphasizes the importance of grit progression and pressure control.
The Technical Mechanics of Randing
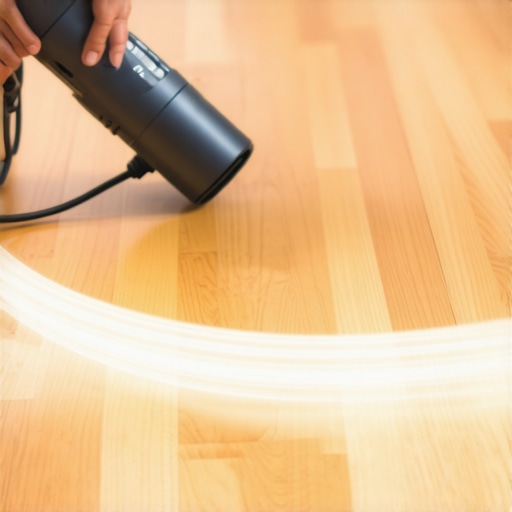
To execute this, we use a 5-inch or 6-inch random orbital sander. Unlike a belt sander, which cuts in straight lines, the orbital sander moves in tiny ellipses. When we “Rand” a patch, we start at the center of the repair with a heavier grit (usually 60 or 80) and move outward toward the old finish. As we reach the “border” between the new wood and the old wood, we lighten our pressure and begin a “scuffing” motion.
The goal is not to remove the old finish entirely in the surrounding area, but to “interlock” the scratch patterns of the new and old surfaces. By varying the distance the sander travels into the old floor – sometimes three inches, sometimes six – we create an amorphous boundary. When the new finish is applied, it fills these randomized microscopic scratches, creating a gradient of sheen rather than a hard stop.
- Grit Progression: 60/80 grit for leveling, 100 grit for smoothing, and 120 grit for final blending.
- Motion: Avoid straight lines. Use a “figure-eight” or “S-pattern.”
- Pressure: Heavy in the center of the patch, feather-light at the edges.
Step-by-Step Guide: Executing the Randing Trick
Performing a hardwood floor repair that looks professional requires a disciplined approach. Follow these steps to ensure your hardwood floor water damage repair or scratch fix disappears into the rest of your flooring.
Step 1: Preparation and Inspection
Clean the area thoroughly. Dust is the enemy of any finish. If your patch is located near a kitchen island, dishwasher, or refrigerator, you need to be certain that the original cause of the damage – usually moisture – is completely resolved. I suggest using The ‘Flashlight Test’ for Spotting Hidden Leaks Behind Your Kitchen Sink to ensure no slow drips are still haunting your subfloor. There is no point in “Randing” a patch if it’s going to cup and warp again in six months.
Step 2: The Cut-In
When replacing boards, try to stagger the ends. Do not cut all your replacement boards to the same length. This “staggering” is the first step in breaking up the visual pattern. Use a circular saw set to the depth of the wood and a chisel to remove the damaged sections. When installing the new boards, ensure they are snug but not forced, as wood needs room to expand in our humid Kansas City summers.
Step 3: The Randing Motion
This is where the magic happens. Start your orbital sander before it touches the floor to avoid swirl marks. Begin in the center of your new wood. As you move toward the old floor, use a “feathering” motion. Think of it like an airplane taking off; as you reach the edge of the patch, you want the sander to gradually lift away from the floor while still moving. This ensures that the depth of the “cut” into the old finish becomes shallower and shallower until it is non-existent.
Step 4: Grain Matching and Transitions
New wood often looks “too clean” compared to old hardwood floor restoration projects. To match the texture, some pros use a stainless steel wire brush to lightly open the grain of the new boards, mimicking the wear of the older surrounding wood. Furthermore, pay close attention to the height of the boards. Even a millimeter of difference can cause a trip hazard or a visual shadow. Utilize The ‘Feather Edge’ Secret for Perfectly Smooth Flooring Transitions to ensure the physical surface is as seamless as the visual one.
The Finishing Touch: Color Blending and Sheen
You can sand perfectly, but if the color is off, the “Randing Trick” won’t save you. Matching stain on hardwood flooring in Kansas City is particularly tricky because of the variety of species found in our older neighborhoods – red oak, white oak, and even walnut are common.
The secret to the “Randing” finish is “dry brushing.” When you apply your stain, do not stop at the edge of the new wood. Take a nearly dry brush and lightly “flick” the stain over the randed, scuffed area of the old floor. This creates a color gradient. Because you scuffed the old finish with 120-grit sandpaper during the Randing phase, the old finish will accept a tiny amount of this new pigment, helping the two colors bleed together.
Once the stain is dry, you must match the sheen. Most older floors have a “satin” or “matte” look due to wear. A “high gloss” patch will stand out like a neon sign. After your first coat of polyurethane is dry, use The ‘Sunlight Test’ for Spotting Scratches in Hardwood Finishes. Open the blinds at the brightest time of day and look at the patch from a low angle. If you see a “halo” or if the patch is shinier than the rest of the floor, you may need to lightly buff the patch with a high-grit abrasive pad to dull the sheen until it matches the surrounding area.
When to Call a Professional
While the “Randing Trick” is a powerful tool for the dedicated DIYer, there are times when hardwood floor refinishing in Kansas City requires the heavy hitters. If you are dealing with a hardwood floor patch in a high-traffic area with direct sunlight, the margin for error is zero.
Certain situations demand professional refinishing hardwood floor contractors:
- Large Scale Water Damage: If the damage covers more than 20% of the room, “Randing” becomes less effective than a full sand.
- Rare Wood Species: Matching the grain and aging of old-growth heart pine or exotic species requires a level of stain-mixing that goes beyond off-the-shelf products.
- Structural Issues: If the subfloor is compromised, the repair requires more than just surface work.
- Alternative Flooring: Sometimes, the wood is too far gone. In those cases, we might discuss options with luxury vinyl plank installers or look into luxury vinyl tile installation for basements and kitchens where moisture is a recurring theme.
In Kansas City, our homes are our pride. Whether you are looking to replace carpet with hardwood or you need a master-level scratch repair hardwood floors, the goal is always the same: a floor that looks like it has always been there. Wood floor refinishing Kansas City is an art form that balances the science of wood chemistry with the craftsmanship of hand-blending.
Conclusion: The Art of the Invisible Repair
Mastering the “Randing Trick” changes the way you look at floor damage. It moves the conversation from “How much will it cost to sand the whole house?” to “How can we artistically blend this repair?” By breaking the lines, feathering the edges, and respecting the natural patina of your wood, you can achieve results that most people think are impossible without a full crew and a week of dust.
However, keep in mind that while the technique is straightforward in theory, the execution takes a steady hand and a keen eye for detail. A seamless, invisible repair is the hallmark of a true flooring craftsman. You don’t have to live with a “patchy” nightmare, and you don’t always have to sand it all to the bare wood.
Don’t risk a patchy floor that devalues your home. If your Kansas City home needs professional hardwood floor repair, a complex old hardwood floor restoration, or a full sanding and refinishing hardwood floors service, we are here to help. Contact Justin Kelley at Floorcraft today for a consultation and let us bring our local expertise to your next flooring project.