The ‘Garden Hose’ Trick for Testing Your New Long Island Egress Window Seal
The ‘Garden Hose’ Trick for Testing Your New Long Island Egress Window Seal
There is a unique sense of relief that comes with completing a major home improvement project, especially one as transformative as a Long Island egress window installation. You’ve taken a dark, underutilized basement and turned it into a safe, sunlit living space that adds significant value to your property. However, as any seasoned homeowner knows, the job isn’t truly finished until it’s been tested against the elements. My name is Nick Scaldino, and with years of experience in basement waterproofing and foundation repair across the NY and NJ area, I’ve seen how even the most aesthetically pleasing installations can fail if the seal isn’t watertight. While hiring professional Long Island egress window installers is the most critical step in ensuring a high-quality build, the “Garden Hose” trick is your best DIY tool for final verification. This simple yet effective method provides the ultimate peace of mind, ensuring your basement remains dry during the next heavy Nor’easter.
Why Egress Window Integrity is Non-Negotiable on Long Island
On Long Island, the climate and local regulations make the structural integrity of your egress window a top priority. Whether you live in Hempstead, Brookhaven, Islip, Shelter Island, or Southampton, the local building departments have strict requirements for basement habitability. In recent years, there has been a significant push toward legalizing basement apartments to address housing shortages, but these conversions are only permitted if they adhere to the NY Residential Code Section R319 (2025 standards). This code dictates specific dimensions for emergency escape and rescue openings, but it also implies a standard of weatherproofing that protects the occupants and the structure itself.
An egress window is a life-saving exit, but if it isn’t sealed correctly, it becomes a liability. Long Island’s geography – characterized by sandy soils in some areas and dense clay in others – creates unique drainage challenges. High water tables in coastal towns like Islip or Southampton mean that hydrostatic pressure can force water through the smallest gaps in a window frame. If your egress window installation was performed by a cut-rate contractor who skipped the proper flashing or used inferior sealants, you might not notice the failure until a major storm causes thousands of dollars in water damage. This is why testing the seal is vital. Furthermore, ensuring the window well itself manages water correctly is essential, which is why your Long Island egress window installation needs a dedicated sump connection to prevent the well from becoming a backyard aquarium during heavy rainfall.
Beyond the legal and safety requirements, there is the financial aspect. A basement that shows signs of water intrusion will fail a home inspection instantly, potentially tanking a sale in a competitive market like Brookhaven. By using the Garden Hose trick, you are performing a proactive quality control check that ensures your egress window company delivered the high-standard result you paid for.
What is the ‘Garden Hose’ Trick?
The “Garden Hose” trick is a simulated rainfall test designed to mimic the conditions of a localized downpour. It is a technical standard used by egress window contractors and waterproofing specialists to identify “pathways of least resistance” where water might bypass a seal. It is a more rigorous version of the testing methods used in other areas of the home, such as the ‘wet sponge’ trick for testing shower waterproofing before tiling. To perform this test correctly, you must follow a specific sequence to isolate potential failure points.
The Step-by-Step Testing Process
- 1. The Setup: You will need a standard garden hose equipped with a multi-setting nozzle. Set the nozzle to a “fan spray” or “shower” setting. Never use a high-pressure jet or power washer, as the concentrated force can actually damage fresh caulk or force water through seals that are designed to withstand gravity-fed rain, not 2,000 PSI of pressure.
- 2. The Sequence (Bottom-Up): This is the most important technical detail. Always start spraying at the very bottom of the window frame where it meets the foundation. If you start at the top, water will run down the entire window, making it impossible to tell if a leak is coming from the top header or the bottom sill. By starting at the bottom and moving up in 12-inch increments, you can isolate the exact height of a failure.
- 3. The Duration: Patience is key. Spray each section for at least 5 minutes. Water often takes time to saturate the exterior seal and find a path through the masonry or the window buck. If you move too quickly, you might miss a slow-seeping leak that would only appear during a prolonged storm.
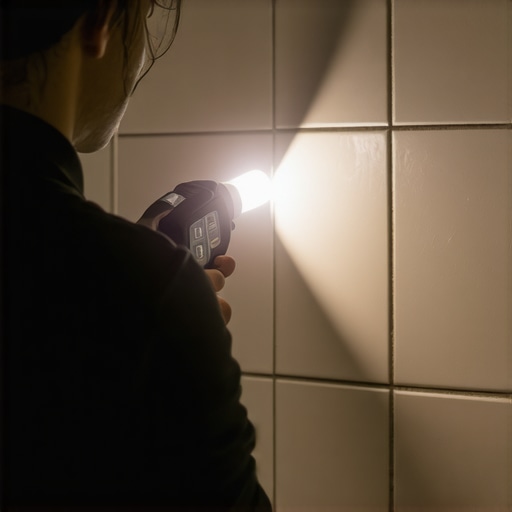
- 4. The Observer: This is a two-person job. While one person handles the hose outside, a second person must be inside the basement with a high-powered LED flashlight. The observer should look for any signs of “glistening” on the frame, dampness on the surrounding drywall, or water pooling on the interior sill.
By the time you reach the top of the window, you should have spent roughly 20 to 30 minutes testing. If the interior remains bone-dry, you can have high confidence in your egress window installation company. This method is the industry standard for verifying that the silicone-latex barriers and the physical flashing are performing their jobs under stress.
Interpreting the Results: What to Look For
When performing the Garden Hose trick, it is important to distinguish between minor condensation and a legitimate seal failure. If the humidity in your basement is high and you are spraying cold water on the outside of the glass, you might see a slight misting on the inside of the pane. This is normal physics, not a leak. However, any liquid water moving across the frame or dripping from the header is a sign of a failed seal.
A “seal failure” typically manifests as a steady drip or a darkening of the concrete or wood buck surrounding the window. If you see water bubbling through the caulk, it indicates an air pocket was left during the application. On the other hand, if you notice that the window well itself is starting to fill with water during your 5-minute spray intervals, you have a much larger problem than a simple window seal. This indicates a drainage failure. A professional Long Island egress company should have installed a gravel bed and a drain that ties into your home’s footing drains or a dry well. If the water doesn’t disappear almost as fast as you can spray it, the well will eventually overflow and flood your basement through the window, regardless of how good the seal is. This is similar to the diagnostic process of the ‘soap suds’ test for finding leaks in a new shower liner, where the goal is to identify the specific point of escape for the fluid.
If the test reveals that water is entering from *under* the window sill, it often points to a failure in the mortar or the sealant between the window buck and the foundation wall. If water is coming from the *top*, it usually means the drip edge or the flashing above the window was not properly integrated with your home’s siding. Identifying these nuances helps you provide clear feedback to your Long Island egress window contractor so they can perform a targeted repair.
Common Failure Points in Long Island Egress Installations
Why do some installations fail the hose test while others pass with flying colors? Often, it comes down to the difference between a DIY attempt and hiring specialized egress window contractors. Long Island’s specific environmental factors, such as the salt air in Shelter Island or the high clay content in parts of Huntington, require specific materials and techniques.
- Improper Caulking Angles: A common mistake is applying caulk in a flat “bead” that doesn’t bridge the gap between the window and the foundation. Professionals use a 45-degree tooling technique that ensures the sealant is pressed into the gap, creating a structural bond.
- Lack of a Gravel Bed: Some basement egress window installation companies might cut corners by not digging the well deep enough to accommodate a 12-inch layer of ¾-inch clean stone. Without this gravel, soil can clog the drain, causing water to back up against the window seal.
- Ignoring the “City of Yes” and Local Soil Conditions: While the “City of Yes” plan primarily affects NYC, the ripple effect on Long Island has led to more rapid, sometimes rushed, basement conversions. Rushed jobs often fail to account for the “settling” that occurs in Long Island’s sandy soil. If the window well isn’t bolted and sealed to the foundation correctly, it can pull away over time, breaking the waterproof barrier.
Furthermore, if your basement floor isn’t perfectly level, water that does manage to seep in will immediately travel toward the lowest point, potentially masking the source of the leak. Understanding how to level a floor that slopes toward your exterior walls is a crucial part of overall basement health, as it ensures that any incidental moisture is managed correctly rather than pooling against your foundation.
Troubleshooting a Failed Hose Test
If your Garden Hose test reveals a leak, don’t panic. Most issues found immediately after a basement egress window installation are easily fixable if caught early. The first step is to contact your egress window installation company and show them exactly where the water is entering. A reputable company will stand by their work and perform the necessary adjustments.
Common fixes include reapplying a high-grade silicone-latex caulk. Unlike standard hardware store caulk, professional-grade sealants are designed to expand and contract with the temperature fluctuations common on Long Island. Another common fix involves the window well cover. If the hose test shows that a massive amount of water is entering the well from the surface, a sloped, polycarbonate cover might be necessary to deflect rain away from the foundation.
If the leak is coming from the masonry itself, the contractor may need to use hydraulic cement to plug gaps in the foundation wall that were disturbed during the cutting process. In some cases, the leak isn’t the window’s fault at all, but rather a symptom of poor exterior site drainage. If your gutters are overflowing directly into the egress area, no seal in the world will hold forever. This is a holistic approach to home maintenance – much like how why your shower niche is the reason your living room wall is damp, seemingly small design choices in one area can have major consequences in another. Ensure your Long Island egress window installers have verified that the well is properly connected to the footing drains to prevent hydrostatic pressure from building up.
Conclusion: Protecting Your Long Island Home Investment
The Garden Hose trick is more than just a DIY experiment; it is the final step in securing your home’s envelope. On Long Island, where weather can be unpredictable and building codes are stringent, you cannot afford to take chances with your basement’s safety. By taking 30 minutes to test your new egress window installation, you are ensuring that your investment is protected, your family is safe, and your home remains code-compliant.
While the hose test is something any homeowner can do, the initial installation should always be handled by a professional Long Island egress installation company. Experts like those at Floorcraft Store and our network of specialized contractors understand the nuances of NY Residential Code Section R319 and the specific geological challenges of our region. Whether you are in Hempstead or the Hamptons, a professional install combined with a rigorous hose test is the gold standard for basement waterproofing.
If you have performed the Garden Hose test and found issues, or if you are ready to start your journey toward a safer, brighter basement with a new egress system, don’t wait for the next big storm to reveal weaknesses. Contact a professional egress window company today to ensure your home is prepared for whatever the Long Island climate throws its way. A dry, safe, and legal basement starts with a quality installation and ends with the peace of mind that only a successful hose test can provide.