The ‘Sunlight’ Test for Checking Your Bay Area Garage Door Seal for Leaks
The ‘Sunlight’ Test for Checking Your Bay Area Garage Door Seal for Leaks
When it comes to home maintenance, bay area garage doors are often the most overlooked component of the building envelope. We think of our garage doors as heavy, impenetrable barriers that keep our cars safe and our homes secure. However, the reality is that your garage door is a moving wall, and like any moving part, it relies on a system of seals to remain effective. In the unique microclimates of Northern California – where the morning fog of San Francisco meets the blistering afternoon heat of San Jose – these seals are under constant environmental assault. If you want to fix garage door issues before they escalate into costly structural damage, you need a reliable diagnostic tool. Enter the “Sunlight Test.”
The Sunlight Test is the simplest, most effective way for a homeowner to identify if their garage door seal is failing. While many people wait until they see a puddle of water after a rare Bay Area rainstorm or notice a rodent scurrying across the garage floor, the Sunlight Test allows you to catch leaks in their infancy. In a region where UV exposure is a primary cause of seal degradation, understanding the health of your weatherstripping is essential for energy efficiency and pest control. This guide will walk you through the test, explain why seals fail in our specific climate, and help you decide when it is time for a professional garage door repair.
What is the ‘Sunlight’ Test?
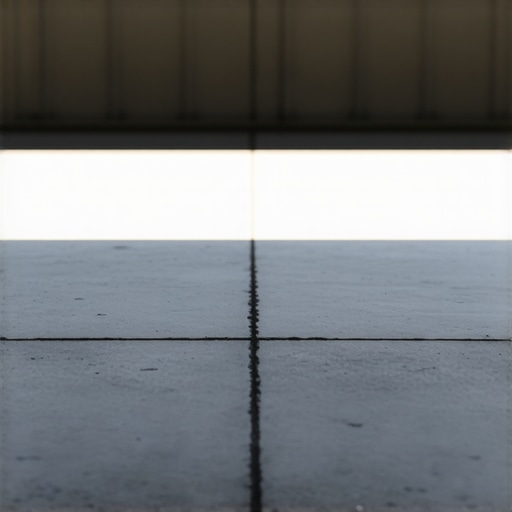
The Sunlight Test is a visual inspection method that uses natural light to highlight gaps in your garage door’s perimeter. Because light travels in straight lines, any gap large enough to admit a draft or a pest will also admit a visible beam of light. This test is best performed during the middle of the day when the sun is at its brightest, particularly in high-sun areas like the Santa Clara Valley or the East Bay hills.
How to Perform the Test
- Wait for a Bright Day: Choose a day with clear skies. Overcast “June Gloom” in Oakland might work, but direct sunlight provides the highest contrast.
- Close the Door Completely: Ensure the garage door is fully cycled down. If you have an automatic opener, let it complete its downward travel and lock into place.
- Turn Off All Interior Lights: This is the most critical step. You need the garage to be as dark as possible. Close any side doors and cover windows if necessary.
- Observe the Perimeter: Stand about five to ten feet back from the door. Look at the bottom edge, the two sides (jambs), and the top header.
- Look for Light Bleeding: Any sliver of yellow or white light indicates a seal failure. Even a “pinprick” of light is enough for a spider or a draft to enter.
While you are performing this visual inspection, it is also a good time to look at the structural components. If you notice light coming from the center of the door panels, you might be looking at a more serious issue. For more advanced visual diagnostics, you might consider The ‘Flashlight’ Trick for Finding Hairline Stress Fractures in Your Garage Door Spring, which helps identify metal fatigue that could lead to a sudden door failure.
Why Garage Door Seals Fail in the Bay Area
Homeowners often ask why their garage door repair bay area needs occur more frequently than in other parts of the country. The answer lies in our environment. The Bay Area doesn’t have the extreme snow of the Sierras, but it has a cocktail of UV radiation, salt air, and shifting soil that is brutal on rubber and vinyl components.
UV Damage and Thermal Expansion
In San Jose and the surrounding South Bay, the UV index can remain high for the majority of the year. Standard garage door seals are typically made of EPDM rubber or PVC. Over time, UV rays break down the chemical bonds in these materials, a process known as photodegradation. This causes the seal to become brittle, crack, and eventually shrink. When a seal shrinks, it no longer reaches the floor or the door jamb, creating the gaps you see during the Sunlight Test. Furthermore, the intense heat causes the door panels themselves to expand and contract. This constant movement can pull the door away from its seals, especially if there is an underlying fix garage door spring issue that is causing the door to sit unevenly in its tracks.
Floor Shifting and Concrete Settlement
The Bay Area is famous for its “expansive” clay soils. In areas like San Mateo and parts of the East Bay, the ground beneath your garage slab is constantly moving. As the soil dries out in the summer and swells in the winter, your concrete floor can settle or tilt. If your floor is no longer perfectly level, a standard straight bottom seal will never be able to close the gap. This is a common reason why homeowners find themselves needing urgent garage door repair after a heavy rain, as water follows the slope of the settling floor straight into the garage. If you suspect your floor is the culprit, you may need to learn how to level a floor that slopes toward your exterior walls to create a proper surface for the seal to meet.
Material Fatigue
In cities like Oakland and San Francisco, many homes feature older garage door systems that have been in place for 15 to 20 years. Rubber is an organic polymer that simply has a shelf life. After a decade and a half of being compressed every time the door closes, the material loses its “memory.” It stays flattened and fails to spring back into the gaps, leading to a loss of the airtight “envelope” your home needs for energy efficiency.
The Four Types of Seals You Must Check
When the Sunlight Test reveals a leak, it is important to identify which specific seal has failed. A garage door system actually utilizes four distinct types of weatherstripping to stay sealed.
1. Bottom Seals (The Astragal)
This is the most common failure point. The bottom seal (often called an astragal) is a U-shaped piece of rubber or vinyl that slides into a track on the bottom of the door. Because it bears the full weight of the door and handles the friction of the floor, it wears out the fastest. If you see light along the floor, your bottom seal is likely compressed or cracked.
2. Side and Top (Perimeter) Seals
These are the seals attached to the door jambs and the header. They act as a gasket between the door and the house frame. In the Bay Area, these are often the victims of UV damage. If you see light “bleeding” from the sides of the door, the perimeter seals have likely warped or pulled away from the door face. This is particularly common in the summer; you can read more about this in our article on The ‘Expansion’ Gap and how heat causes door binding.
3. Threshold Seals
Sometimes, the bottom seal on the door isn’t enough, especially if your driveway slopes toward the garage. A threshold seal is a heavy-duty rubber strip glued directly to the concrete floor. It creates a “hump” that the door closes against, blocking driving rain and wind. If the Sunlight Test shows light even with a new bottom seal, a threshold seal might be the necessary solution.
4. Panel Seals (Sectional Seals)
If you have a sectional door, there are seals between each horizontal panel. While these are less likely to fail than the bottom seal, they can perish over time. If the Sunlight Test reveals horizontal lines of light across the middle of your door, your panel seals are failing. This often indicates that the door is not being pulled tight enough by the opener, which may require garage door opener repair to adjust the “down force” settings.
DIY vs. Professional Repair: When to Call the Experts
Once you’ve identified a leak via the Sunlight Test, the next question is: can you fix it yourself? The answer depends on whether the problem is the “skin” of the door or the “skeleton.”
When DIY is Appropriate
Replacing a rubber bottom seal or nailing in new vinyl perimeter weatherstripping is a standard DIY project for most homeowners. It requires basic tools – a screwdriver, a utility knife, and perhaps a hammer. If the door is balanced and the tracks are straight, replacing these soft components is safe and straightforward.
When to Call for Professional Garage Door Repair
If the Sunlight Test reveals a massive gap on one side but not the other, the problem isn’t the seal – it’s the door’s alignment. This is where DIY becomes dangerous. A crooked door usually points to a mechanical failure in the high-tension system.
- Garage Door Spring Replacement: If a spring has lost its tension or snapped, the door will hang unevenly, creating a gap that no seal can fill. Attempting to fix garage door spring issues yourself can result in severe injury due to the immense torque involved.
- Garage Door Cable Replacement: If you see light at the bottom corner and the door looks “cockeyed,” you likely need garage door cable repair. Cables under tension are just as dangerous as springs.
- Emergency and Urgent Repairs: If the gap is large enough for a person to crawl through or if the door is stuck halfway, you need emergency garage door repair or urgent garage door repair to secure your home.
- Commercial Needs: For business owners, commercial garage door repair is essential for maintaining climate-controlled warehouses and security.
Additionally, if the door isn’t closing tightly enough against the floor, you might need a professional to fix garage door opener settings. Modern openers have sensitive limit switches and force sensors that require precise calibration to ensure a tight seal without damaging the motor.
Step-by-Step: Replacing a Bottom Seal
If your Sunlight Test confirmed that only the bottom seal is the issue, follow these steps to restore your garage’s integrity:
- Identify Your Track Type: Garage door bottom tracks come in various shapes (T-style, P-bulb, or Beaded). You must buy the replacement that matches your specific track.
- Clean the Track: Once you slide the old, brittle seal out, the track will likely be full of Bay Area grit and cobwebs. Use a stiff brush and soapy water to clean it.
- Lubricate: This is the secret to a successful installation. Use a silicone-based lubricant (never WD-40, which attracts dirt) to spray the track. This allows the new rubber to slide in easily.
- Slide and Trim: Have a partner help you pull the new seal through the track while you feed it from the other end. Leave about two inches of excess on each side, tuck it back into the track to prevent shrinkage, and trim the rest.
After you have finished the installation, you can verify your work with The ‘Garden Hose’ Test for Your Geist Concrete Pool Deck Coating (which also works for garage thresholds) to ensure that water is properly diverted away from your interior space.
Conclusion & Maintenance Checklist
The “Sunlight Test” is more than just a quick check; it is a vital part of a proactive home maintenance strategy. By identifying leaks early, you protect your home from the invasive pests common in the Bay Area, reduce your energy bills during the hot San Jose summers, and prevent water damage during the rainy season. While a simple seal replacement is often enough, remember that a gap in the light can sometimes signal a deeper mechanical issue with your bay area garage doors.
Your Seasonal Maintenance Checklist:
- Perform the Sunlight Test every six months (Spring and Fall).
- Inspect perimeter weatherstripping for “cracking” caused by UV exposure.
- Check the garage door opener repair status by testing the auto-reverse safety feature.
- Look for frayed cables; if found, seek garage door cable replacement immediately.
- Perform The ‘Two-Finger Test’ to ensure your door is balanced and the springs are healthy.
Whether you are managing a residential property or need commercial garage door repair, staying ahead of seal degradation is the key to a long-lasting, efficient garage door system. Don’t wait for the rain to tell you there’s a problem – let the California sun show you the way.