The Best Way to Remove Old Carpet Glue from Hardwood
You can smell a carpet glue job before you even see it. It is a mix of stale dust, ancient pet hair, and that sharp, chemical tang of 1970s yellow mastic. I have spent more than twenty-five years on my knees with a floor scraper and a moisture meter, and I can tell you that a floor is not just a surface, it is a structural system. When someone decides to slap carpet over a beautiful white oak floor with heavy-duty adhesive, they are committing a crime against the architecture of the home. I once walked into a house where a 15,000 dollar wide-plank walnut floor was cupping so bad it looked like a potato chip because the installer did not check the crawlspace humidity, and the glue they used to patch the gaps was so thick it acted like a moisture trap. That is the kind of heartbreak that happens when you ignore the science of the subfloor. To do this right, you need to understand the molecular bond of the adhesive and the physical properties of the wood grain. This is not a quick weekend project. This is a battle against chemistry and time.
The yellow nightmare under the padding
To remove carpet glue from hardwood effectively, you must understand that adhesives like yellow mastic or carpet pad residue require mechanical scraping or chemical solvents to clear the subfloor for floor leveling or hardwood refinishing without damaging the wood grain or structural integrity. Most people think they can just rip up the carpet and start sanding. If you do that, you will ruin your drum sander in five minutes. The friction of the sanding belt heats up the glue, turns it back into a liquid, and gums up your expensive 24-grit paper before you can even cross the room. You have to remove the bulk of the material through mechanical force or chemical dissolution before you even think about an abrasive tool. Every 1/8 inch of glue is a barrier between you and a professional finish. If you skip this, the residual adhesive will ghost through your new finish or prevent your next floor from bonding. Whether you are prepping for a carpet install elsewhere or getting ready for laminate, the substrate must be pristine. A floor is only as good as the subfloor beneath it, and deflection is the enemy of every joint.
“A floor is only as good as the subfloor beneath it; deflection is the enemy of every joint.” – Master Flooring Axiom
Identification of the chemical bond
Before you grab a bucket of stripper, you need to know what you are fighting. Yellow carpet glue is typically a resin-based adhesive that becomes brittle with age, while white or clear glues are often latex-based and remain somewhat flexible or rubbery even after decades. The physics of these glues are different. Resin-based glues respond well to thermal shock or mineral spirits. Latex-based glues are more stubborn and often require specialized citrus-based solvents or heavy-duty strippers that can penetrate the polymer chains. Then there is the black stuff. If you pull up a carpet and see black, tar-like streaks, stop immediately. That is often black cutback adhesive, which frequently contains asbestos. You do not scrape that. You do not sand that. You call a professional for testing. The risk of friable asbestos fibers entering your lungs is not worth a pretty floor. In my shop, we treat every black adhesive as a hazardous material until a lab report says otherwise. This level of caution is what separates a master from a weekend warrior who just wants to get to the finish line.
Physical force and the 45 degree angle
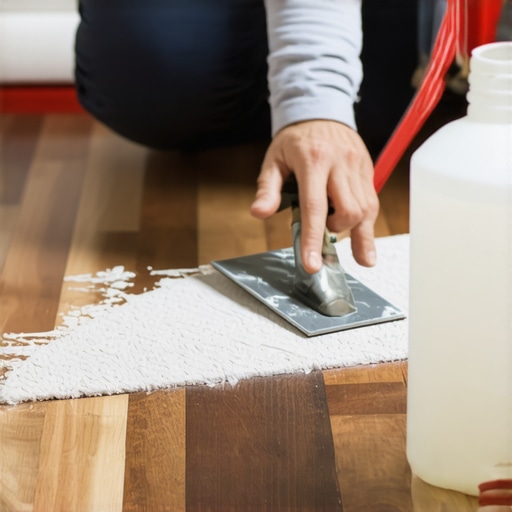
Mechanical removal is the most honest way to clean a floor, but it is also the hardest on your back. You need a heavy-duty floor scraper with a 4-inch replaceable blade. The secret is the angle of attack. If you go too shallow, you just slide over the glue. If you go too steep, you gouge the oak. You want a 45-degree angle. I prefer to keep a stone nearby to keep the blade sharp, because a dull blade is how you end up with splinters in the wood. You are looking for that sweet spot where the glue pops off the surface in flakes. If the glue is soft, it will not flake, it will smear. This is where you have to decide if you are going to use heat or chemistry to assist the mechanical process. Many guys use a heat gun, which is great for small areas, but it can be dangerous. If you get the wood too hot, you risk scorching the grain or, worse, igniting the old finish underneath. You have to keep the gun moving, working in sections no larger than a square foot at a time. It is a slow, methodical process that requires patience and a steady hand.
The danger of heat guns and friction
Thermal disruption is a powerful tool when you understand the melting point of the adhesive polymers. When you apply heat to old carpet glue, you are essentially reversing the curing process, allowing the viscosity of the material to drop until it can be pulled away from the wood tracheids. However, heat also expands the wood. If the hardwood is already near its moisture limit, the localized heat can cause temporary cupping. This is why I always keep a moisture meter on my belt. If the wood is at 10 percent and the subfloor is at 12 percent, you are already in the danger zone. Adding heat can push the vapor pressure within the wood cells too high. I have seen guys blow the grain right off a piece of heart pine because they got too aggressive with a torch or a high-wattage heat gun. If you see the glue starting to smoke, you are too hot. You want it to look like soft taffy, not boiling tar. This balance is what defines the craft. You are managing the physics of the material to save the history of the house.
| Glue Type | Appearance | Best Removal Tool | Risk Level |
|---|---|---|---|
| Yellow Mastic | Hard, amber, brittle | Floor Scraper / Mineral Spirits | Low |
| White Latex | Rubbery, opaque | Citrus Stripper / Heat Gun | Medium |
| Black Cutback | Dark, tar-like | Professional Remediation | Critical |
| Pressure Sensitive | Tacky, clear | Adhesive Remover / Buffing | Low |
Solvents and the science of dissolution
When mechanical scraping fails, you turn to the chemical strippers. This is where the chemistry of the bond matters most. You have two main paths: petroleum-based solvents like mineral spirits or citrus-based strippers containing D-Limonene. Petroleum solvents evaporate quickly and are highly flammable, which makes them a risk in older homes with pilot lights. Citrus strippers are safer and smell better, but they need time to work. They work by breaking down the molecular lattice of the glue. You apply it, cover it with plastic to prevent evaporation, and wait. This is called the dwell time. Most people rush it. If the bottle says wait four hours, you wait four hours. I have seen people apply stripper and then start scraping twenty minutes later, only to complain that the product does not work. You have to give the chemistry time to penetrate the layers of grime. Once the glue has softened, it becomes a slurry that you can scoop up with a putty knife. It is messy, it is gross, and it requires a lot of rags, but it preserves the wood better than aggressive sanding ever will.
“Moisture content in the wood must be within 2 percent of the subfloor before any finishing work begins.” – NWFA Standards Committee
Why floor leveling starts with a clean slate
If you are removing glue because you want to install a new floor like laminate or LVP, do not think you can leave the residue and just use floor leveling compound over it. Most self-leveling underlayments will not bond to adhesive residue. The polymers in the glue will act as a bond-breaker, and within a year, your new floor will be crunching and clicking like a castanet because the leveler has delaminated from the substrate. This is especially true in areas near showers or kitchens where moisture is higher. Any residual glue can reactivate with moisture and cause the leveling compound to fail. You need to get down to the raw wood or the clean subfloor. If the surface is not clean enough to eat off, it is not clean enough for a leveler. I spend three days grinding concrete or scraping wood on some jobs just so the floor will not fail. It is the unglamorous work that ensures the 30-year warranty actually means something. Most homeowners want the aesthetic result immediately, but the structural prep is where the value lives.
Tools for glue extraction
- Heavy-duty 4-inch floor scraper with extra carbon steel blades
- Industrial heat gun with variable temperature control
- D-Limonene based citrus adhesive remover
- Natural fiber scrub brushes for grain cleaning
- Large supply of cotton rags and sawdust for soaking up slurry
- High-quality respirator with organic vapor cartridges
- Plastic sheeting to create a containment zone and manage evaporation
The impact of humidity on residue extraction
Climate is the silent partner in every flooring job. In the swampy humidity of places like Houston or New Orleans, the wood is always thirsty. It expands and the pores open up, allowing carpet glue to sink deeper into the grain. If you are working in a high-humidity environment, you might find that the glue has literally become part of the wood. In these cases, solvent-based removal is often the only way to leach the resins out of the tracheids. Conversely, in the dry heat of Phoenix, the glue becomes so brittle that it can shatter like glass under a scraper. You have to adapt your technique to the room. I always check the ambient humidity and the temperature before I start. If the room is too cold, the chemicals will not react. If it is too hot, they will flash off before they can penetrate. You are looking for a controlled environment, ideally between 65 and 75 degrees Fahrenheit with 40 percent humidity. This is the sweet spot for chemical and mechanical success.
Restoration of the primary wear layer
Once the glue is gone, you are left with the raw hardwood, but it is not ready for finish yet. You have to manage the grain raise caused by the strippers and the mechanical scarring from the scraper. This is where you move to the sanding phase. You start with a medium grit, maybe 60 or 80, just to clean the surface. You are not trying to remove wood; you are trying to remove the memory of the glue. While most people want the thickest underlayment to hide imperfections, too much cushion actually causes the locking mechanisms on new floors to snap under pressure. For the existing hardwood, the goal is a flat, monolithic surface. You sand with the grain, never across it, and you use a buffer for the final pass to ensure the absorption of the stain is uniform. If there is even a microscopic trace of glue left, the stain will not take. It will look like a light-colored splotch on a dark floor. This is why the prep is so vital. You cannot hide bad prep with a good finish. The wood tells the truth in the end.
The final takeaway
Removing old carpet glue is a test of character. It is a messy, exhausting process that requires you to respect the physics of the materials and the chemistry of the adhesives. If you do it right, you can save a floor that has been hidden for half a century. If you do it wrong, you end up with a ruined subfloor and a lot of wasted money. Take your time. Wear your knee pads. Keep your blades sharp. The reward is a surface that will last another hundred years, long after the memory of the cheap carpet has faded. The structure of the home depends on the integrity of the floor, and that integrity starts with the removal of every single molecule of that yellow mastic. Do not cut corners. Do not rush the chemicals. Just keep scraping until you see the wood again. That is the only way to get a result that a master would stand behind. Every 1/8 inch matters. The grain is waiting for you to find it.{“@context”:”https://schema.org”,”@type”:”HowTo”,”name”:”How to Remove Carpet Glue from Hardwood”,”step”:[{“@type”:”HowToStep”,”text”:”Identify the type of adhesive, checking for yellow mastic, white latex, or black cutback containing asbestos.”},{“@type”:”HowToStep”,”text”:”Use a floor scraper at a 45-degree angle to remove large chunks of brittle adhesive mechanically.”},{“@type”:”HowToStep”,”text”:”Apply a citrus-based stripper to the remaining residue and allow it to dwell for the recommended time.”},{“@type”:”HowToStep”,”text”:”Scrape the softened slurry and wipe the area with mineral spirits to clean the wood grain.”},{“@type”:”HowToStep”,”text”:”Sand the floor starting with 60-grit paper to remove any final microscopic glue traces before refinishing.”}]}