Stopping Water from Wicking Up Your Bathroom Drywall
I spent three days grinding concrete on a job last month just so the floor wouldn’t click like a castanet and the homeowner asked me why I was being so picky. I told him that if the subfloor is not dead level, the floor moves. If the floor moves, the caulk joints at the baseboard snap. Once those joints snap, every time your kids splash in the tub, that water is heading straight for the raw edge of your drywall. I have seen the aftermath of the hack jobs where the installer ran the gypsum board all the way to the subfloor. I once pulled back a baseboard and found the bottom six inches of the wall turned to a grey, mushy soup because of simple capillary action. It was a $20,000 bathroom that smelled like a swamp because someone wanted to save ten minutes on a drywall cut. I am a master floor installer with twenty five years of sawdust under my nails and I am here to tell you that the physics of moisture do not care about your bathroom aesthetic. If you do not respect the gap, the water will find a home in your studs. We are going to look at the structural reality of bathroom moisture management and why your current setup is likely a ticking time bomb for mold growth.
The physics of capillary action in gypsum board
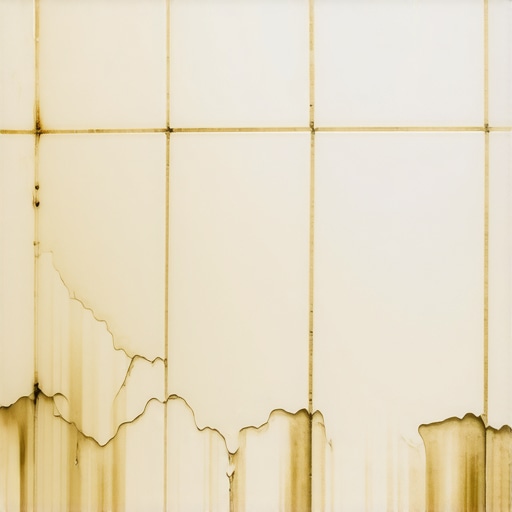
Stopping water from wicking up your bathroom drywall requires a physical break between the flooring material and the wall substrate. Capillary action occurs when water molecules are drawn into the microscopic pores of the gypsum core and the cellulose paper facing. This process is driven by surface tension and the attraction between water and the porous building materials. When you have a puddle on a tile floor that sits against a piece of drywall, the water does not just sit there. It climbs. The gypsum core is essentially a compressed sponge of calcium sulfate dihydrate. Once the paper backing gets wet, it acts as a wick, pulling moisture upward against gravity. This can lift water several inches or even feet into the wall cavity where it meets your wooden studs. Wood rot and black mold thrive in these dark, unventilated spaces. The moisture content of the drywall can jump from a safe 8 percent to a dangerous 30 percent in a matter of hours. You cannot paint your way out of this problem with a bit of semi gloss. You need a structural solution that addresses the point of contact. This is why a floor leveling compound is often your first line of defense. A level floor prevents the pooling that feeds the wicking process in the first place.
“A floor is only as good as the subfloor beneath it; deflection is the enemy of every joint.” – Master Flooring Axiom
The half inch gap that saves your home
A proper drywall installation in a wet area must maintain a half inch clearance from the subfloor to prevent direct contact with standing water. This gap is later covered by baseboards or tile wainscoting but remains a vital air space. By breaking the physical connection between the floor and the wall, you eliminate the primary path for liquid water to travel into the gypsum core. Most installers are lazy. They want to rest the heavy sheets of drywall on the floor while they screw them into the studs. This is a recipe for disaster. I always use a leverage lift or scrap pieces of 1/2 inch plywood to keep that board off the ground. If you are doing a carpet install in a master bath, which is a terrible idea for hygiene anyway, that gap is even more vital. Carpet holds moisture like a reservoir. If that wet carpet is pressed against the bottom of your drywall, the wicking is constant. When I see a carpet install in a bathroom, I know I will be replacing the baseboards within five years. The same goes for laminate floors. Laminate is essentially pressed sawdust. When it gets wet, it expands, and if it is tight against the drywall, it pushes the moisture right into the wall. You need that expansion gap for the floor to breathe and for the wall to stay dry. It is a simple rule of physics that many ignore to their own detriment.
Why your shower curb is a ticking time bomb
The interface between a shower curb and the bathroom floor is the most common point of failure for moisture wicking. If the waterproof membrane does not wrap correctly or if the thin set creates a bridge, water will travel horizontally into the drywall. This often results in bubbling paint and soft spots on the wall directly adjacent to the shower entrance. I have seen guys install showers where they stop the RedGard right at the edge of the curb. That is a mistake. You need to overlap your waterproofing. The shower is a high pressure environment. Every time you step out of that shower, you are dropping a pint of water onto the floor. If your floor leveling was not done correctly, that water runs away from the drain and toward the wall. I always recommend using a cement board for the first eighteen inches of the wall outside a shower instead of regular greenboard. Greenboard is just water resistant paper, it is not waterproof. Cement board will not rot and it does not have the cellulose food source that mold needs to grow. It is about building a defense in depth. You want multiple layers of protection because eventually, the caulk will fail. It always fails. You need a substrate that can handle a little bit of wetness without turning into a science project.
The technical reality of material performance
Understanding the Janka hardness of your floor or the mil thickness of your wear layer is useless if the substrate fails. Different materials handle moisture wicking at different rates based on their density and chemical composition. A comparison of these materials shows that traditional gypsum is the most vulnerable to moisture damage while cement based products offer the highest resistance. When we talk about floor leveling, we are talking about creating a plane where water cannot hide. A dip of just 1/8 inch can hold enough water to keep a drywall edge saturated for days. This leads to the breakdown of the chemical bonds in the gypsum. I tell my clients that spending the extra money on a high quality underlayment is an investment in the bones of the house. People want the pretty tile, but they do not want to pay for the prep. That is how you end up with a floor that clicks and a wall that rots. You have to look at the chemistry of the adhesives too. A modified thin set with polymers will resist water better than a cheap mastic. Mastic is basically organic glue, it is food for mold. In a bathroom, you use thin set. Period.
| Material Type | Wicking Speed | Max Moisture Absorption | Primary Failure Point |
|---|---|---|---|
| Regular Drywall | High | 15 Percent | Paper Facing Rot |
| Greenboard | Medium | 8 Percent | Core Softening |
| Purple Board | Low | 5 Percent | Edge Saturation |
| Cement Board | Near Zero | 2 Percent | Joint Seepage |
The myth of waterproof laminate and carpet install
Laminate and carpet should be treated with extreme caution in bathrooms because they trap moisture against the wall and the subfloor. While some laminate is marketed as waterproof, this usually only refers to the top wear layer and not the core or the joints. Water that seeps through the click lock system will sit on the subfloor and wick into the drywall edges. I have seen people put carpet in bathrooms because they like the feel on their feet. It is disgusting. Every time you get out of the shower, the carpet padding acts as a giant sponge. That sponge is in direct contact with your baseboards and your drywall. You are essentially bathing your walls in a slow drip of grey water. Even with a perfect carpet install, you cannot seal the edges well enough to stop the wicking. Laminate is almost as bad. Once water gets into the HDF core, it swells like a sponge. That swelling puts pressure on the drywall, closing your expansion gap and creating a direct bridge for moisture. If you want the look of wood, use an engineered core or a luxury vinyl plank, but even then, you must maintain that 1/2 inch gap. Do not let anyone tell you that a tight fit is a sign of quality. In a bathroom, a tight fit is a sign of an amateur who does not understand thermal expansion or moisture migration.
“Moisture management is the foundation of structural longevity; ignore the slab at your peril.” – NWFA Field Manual
The 1/8 inch that ruins everything
Precision in floor leveling is the difference between a dry wall and a rotting stud bay. A deviation of more than 1/8 inch over ten feet can cause water to migrate toward the perimeter of the room. This pooling effect ensures that the drywall is constantly exposed to moisture which accelerates the capillary wicking process. When I am on a job, I use a long straight edge and a laser. I do not guess. If I see a low spot near the wall, I fill it. Some guys think the underlayment will hide the dip. It will not. While most people want the thickest underlayment, too much cushion actually causes the locking mechanisms on LVP to snap under pressure. This creates a gap where water can enter. You want a firm, level surface. The goal is to have any surface water stay on top of the flooring where it can be wiped away or evaporated. If the floor is uneven, the water finds the low point. If that low point is at the wall, your drywall is toast. It is a simple chain of events that starts with a bad subfloor and ends with a mold remediation bill that will make your eyes water. Take the time to level the floor. It is the most important part of the job that no one will ever see until it fails.
A checklist for a permanent bathroom installation
Ensuring your bathroom remains dry and structurally sound requires a systematic approach to the installation of both the flooring and the wall substrates. This checklist focuses on the critical points where water typically bypasses surface defenses and begins to wick into the framing. Following these steps will prevent the most common failures I see in the field. It is about doing the boring stuff correctly so the pretty stuff lasts a lifetime.
- Confirm the subfloor is level within 1/8 inch over a 10 foot radius to prevent water pooling.
- Verify that all drywall is hung with a minimum 1/2 inch gap from the subfloor.
- Apply a high quality liquid waterproofing membrane to the bottom 6 inches of the wall studs before installing baseboards.
- Use cement backer board instead of gypsum products in the immediate vicinity of the shower and tub.
- Seal the bottom edge of the drywall with a specialized moisture resistant sealant or wax based coating.
- Ensure all floor transitions use a silicone based caulk rather than rigid grout to allow for movement without cracking.
- Install a moisture barrier over concrete slabs before laying any flooring material to stop vapor drive.
The reality of bathroom construction is that water is a patient enemy. It will find the one spot where you got lazy. It will find the one screw that pierced the membrane. It will find the place where the drywall touched the floor. By keeping a 1/2 inch gap and ensuring your subfloor is perfectly level, you take away the two biggest advantages water has. I have spent my career fixing the mistakes of people who thought a bead of caulk was a substitute for proper engineering. Do not be that person. Build it like you expect a flood, and you will never have to worry about a damp wall again. The smell of floor wax and a job done right is a lot better than the smell of mold and a lawsuit. Keep your floors level and your walls high. That is the secret to a bathroom that lasts fifty years instead of five.