The ‘Tape Secret’ for Cutting Laminate Without Any Surface Chipping
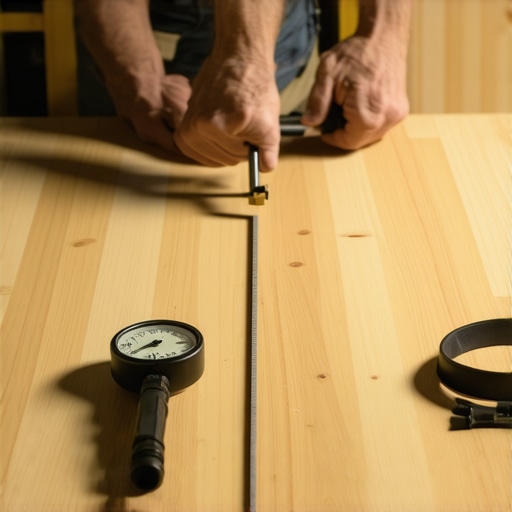
Laminate flooring is a marvel of modern engineering, yet it is simultaneously the most frustrating material for a novice to cut. Most guys think they can just throw a plank on the miter saw and pull the trigger. They end up with a jagged, white-flecked edge that looks like a beaver chewed through it. I have spent twenty five years on my knees with a moisture meter and a level. I have seen every mistake in the book. A floor is not a decoration, it is a structural performance surface. If you do not respect the physics of the material, the material will not respect you. I spent three days grinding concrete on a job last month just so the floor would not click like a castanet. Most guys skip the leveling compound. They think the underlayment will hide the dip. It won’t. That same level of laziness usually extends to the cutting process. If you want a factory edge, you have to understand the chemistry of the wear layer and the mechanical stress of the saw blade.
The truth about brittle melamine surfaces
Laminate chips because the top wear layer consists of aluminum oxide and melamine resin which are extremely brittle materials. When a saw blade tooth exits the plank, it exerts an upward or downward force that shears this crystalline surface away from the high density fiberboard core. High quality masking tape provides the necessary surface tension to prevent these micro-fractures during the cut. The wear layer of a modern laminate plank is designed to withstand thousands of footfalls, but it is not designed for the concentrated impact of a carbide tooth spinning at four thousand revolutions per minute. The aluminum oxide particles are essentially sandpaper glued to the surface. When the blade hits these particles, it generates heat and vibration. This vibration is what causes the melamine to shatter at the edge. By applying a layer of high adhesion painter’s tape, you are effectively creating a temporary sacrificial layer. This tape absorbs the initial shock and holds the brittle surface together as the tooth passes through.
“A floor is only as good as the subfloor beneath it; deflection is the enemy of every joint.” – Master Flooring Axiom
The mechanical reason your saw ruins planks
The secret to a clean cut lies in the relationship between the tooth count of your blade and the direction of the blade rotation. Most installers use a standard forty tooth construction blade, which is far too aggressive for the thin, hard surface of a laminate floor. You need a blade with at least eighty teeth and a negative hook angle. This negative angle ensures that the teeth are scraping the material rather than biting into it. When you use a miter saw, the blade rotates downward and toward the fence. This means the bottom of the plank is usually the cleanest side because the blade is entering the material there. The top side, where the blade exits, is where the chipping occurs. This is where the tape secret becomes a lifesaver. You must wrap the tape around the entire plank at the cut line. This creates a sandwich of support. I have seen $5,000 worth of wide-plank material ruined because someone used a dull blade. Do not be that person.
Pressure sensitive adhesive and surface tension
Applying tape to the surface of the laminate allows you to mark your cut line with precision while reinforcing the melamine resin. Use a blue or green painter’s tape with a medium tack. If the tack is too high, you risk pulling up the finish on cheaper, low quality materials. If the tack is too low, the tape will vibrate loose and do nothing. Once the tape is applied, you must burnish it down with your thumb to ensure there are no air pockets. The mechanical bond between the adhesive and the texture of the laminate is what provides the stabilization. If the tape is not perfectly flat, the blade will catch the edge of the tape and tear it, leading to the very chips you are trying to avoid. This is especially true on hand-scraped or wire-brushed textures where the surface is not flat. You are trying to fill those microscopic valleys with the tape adhesive to create a solid mass at the point of impact.
“Subfloor preparation is the single most important factor in the longevity of any floating floor installation.” – NWFA Technical Guidelines
Subfloor flatness and the click lock failure
While a perfect cut is essential for the perimeter, the subfloor levelness determines if those joints will stay together over time. I once spent an entire week fixing a job where the installer ignored a half inch dip in the living room. The floor looked great for a month, then the locking mechanisms started snapping like dry twigs. Every time someone walked over the dip, the planks would flex. That constant mechanical stress is more than the HDF core can handle. You need to check your floor with a ten foot straight edge. If you see a gap larger than one eighth of an inch, you need to pull out the grinder or the self leveling compound. Leveling is not optional. It is the foundation of the entire system. If the subfloor is not flat, your perfectly cut edges will eventually shift and reveal gaps that no amount of wood filler can hide.
Blade specifications and performance metrics
| Blade Type | Tooth Count | Hook Angle | Result |
|---|---|---|---|
| Standard Rip | 24T | Positive | Maximum Chipping |
| Fine Finish | 60T | Neutral | Moderate Chipping |
| Laminate Specialty | 80T | Negative | Cleanest Cut |
The moisture trap near the shower door
Installing laminate near showers requires more than just a clean cut, it requires a complete moisture mitigation strategy. Even if your laminate is marketed as waterproof, the joints are the weak point. When you cut the plank to fit around a shower base or a toilet, you are exposing the raw HDF core. This core acts like a sponge. The tape secret helps keep the top edge clean, but you must seal that raw edge with a 100 percent silicone sealant before you install the base shoe or the transition strip. In high humidity regions like the Gulf Coast, this is the difference between a floor that lasts twenty years and one that buckles in six months. I have seen planks swell to twice their thickness because a homeowner let a wet towel sit on the floor for two hours. The cut edge is the entry point for disaster. Seal it or lose it.
Transitions to carpet and the height problem
Moving from a hard surface to a carpet install requires a precise understanding of the final floor height and the subfloor transition. Most people think they can just slap a T-molding down and call it a day. That is the mark of an amateur. A real pro will ensure the laminate is cut perfectly straight using the tape method, then they will use a Z-bar transition to tuck the carpet neatly against the laminate. This creates a flush, zero-threshold look that doesn’t trip people. If the heights are different, you may need to shim the subfloor under the carpet or the laminate to create a flat plane. I have spent hours shimming subfloors just to get a transition to look right. It is tedious work, but it is what separates a master from a handyman. Never trust the transition strips that come in the box with the floor. They are usually cheap MDF and will break within a year.
A checklist for the perfect cut
- Check subfloor moisture with a pin-less meter before starting.
- Verify the floor is flat to 1/8 inch over 10 feet.
- Apply 2-inch wide blue painter’s tape to the cut line on both sides.
- Use a sacrificial piece of scrap material under the plank to prevent blowout.
- Set the saw depth to 1/16 inch below the plank thickness.
- Always cut with the finished side up on a miter saw and finished side down on a circular saw.
The expansion gap that saves the floor
A perfect cut is useless if you do not leave enough room for the floor to breathe as the seasons change. Wood and laminate are hygroscopic, meaning they expand and contract with the humidity. If you cut your planks too tight to the wall, the floor will eventually crown or buckle. You need a minimum of one quarter inch expansion gap around the entire perimeter. In larger rooms, you might need a half inch. I have seen beautiful floors literally lift off the subfloor because the installer didn’t leave a gap at the door casing. The floor has to be able to move as a single unit. Think of it as a floating island. If it hits the shore, it’s going to break. Use spacers. Do not guess. The physics of expansion are non-negotiable. If you follow the tape secret and respect the expansion gap, you will have a floor that looks like it was installed by a master architect. Ignore these rules, and you are just wasting your money on a temporary surface that will fail at the first sign of summer humidity.