The Leveling Peg Trick for Massive Rooms with Uneven Foundations
The leveling peg trick for massive rooms with uneven foundations
I spent three days grinding concrete on a job last month just so the floor would not click like a castanet. Most guys skip the leveling compound because they think the underlayment will hide the dip. It will not. I once walked into a project where the homeowner had spent five thousand dollars on premium laminate only to have the locking mechanisms snap within six months. The subfloor was a disaster of high spots and troughs. The air smelled of wet dust and my old WD-40 can as I set up my rotary laser. You cannot cheat physics. If your foundation has a quarter-inch deviation over ten feet, your floating floor is a ticking time bomb. This is where the leveling peg trick becomes the difference between a master installation and a total failure. We are talking about structural engineering here, not just laying down pretty planks. Most installers are lazy. They want to throw down a bucket of self-leveling underlayment and hope for the best. But in a massive room, the liquid finds its own level before you can cover the whole surface. You end up with islands of dried cement and new valleys. The peg trick stops that cold.
The myth of the flat concrete slab
Concrete slabs and plywood subfloors are rarely flat enough for modern laminate or luxury vinyl plank installations without significant floor leveling intervention. The National Wood Flooring Association requires a flatness tolerance of 1/8 inch over six feet or 3/16 inch over ten feet. Most new construction fails this basic metric immediately. You need to understand that concrete is a liquid when it is poured. It shrinks. It curls. It heaves. When you are prepping for a carpet install or a rigid core floor, you are fighting the geological shifts of the house itself. I have seen slabs in new developments that look like the surface of the moon. If you ignore those dips, your floor will bounce. Every time you walk across the room, the joints flex. Eventually, those joints fatigue and break. I have my moisture meter out before I even think about a saw. If the moisture vapor emission rate is too high, your leveling compound will delaminate. It will peel off like a bad sunburn. You need to know the chemical bond between the primer and the substrate is the only thing keeping your reputation intact.
“A floor is only as good as the subfloor beneath it; deflection is the enemy of every joint.” – Master Flooring Axiom
Why your subfloor is lying to you
Subfloor flatness is often masked by old carpet padding or thick adhesive residue that hides the true topographical profile of the room. You can take a ten-foot straightedge and think you are fine, but in a room over five hundred square feet, minor errors compound. This is especially true when transitioning toward showers or wet areas where the subfloor pitch might change intentionally. You need a rotary laser level and a pack of leveling pins. These plastic pegs are graduated in millimeters and inches. You stick them to the floor across the entire room in a grid. Then, you use the laser to trim them to the exact height of your finish level. This creates a forest of tiny markers. When you pour your self-leveling underlayment, you only fill until the tips of the pegs disappear. This is the only way to ensure a perfectly monolithic plane across a massive expanse. Without these pegs, you are just guessing. Guessing is for amateurs. Amateurs get callbacks. Professionals get paid. I use a specific polymer-modified compound that has a compressive strength of at least 4,000 PSI. If your leveler is soft, your heavy furniture will dent it through the laminate.
The science behind the self leveling pour
Self-leveling underlayment chemistry involves high-flow calcium aluminate cements and synthetic polymers that allow the mixture to remain fluid for twenty minutes. This is not standard concrete. It is a high-tech slurry designed for thin-layer applications between 1/8 inch and 2 inches. The surface tension of the liquid must be broken with a spiked roller to release trapped air. If you leave bubbles, you create weak points. Those bubbles are called pinholes. They are the mark of a guy who did not use a primer or did not roll the pour. I have seen laminate floors fail because the leveler underneath turned to powder. This happens when you add too much water to the mix. It is tempting to make it runnier so it spreads easier. Do not do it. You are breaking the chemical chains that give the material its strength. Follow the bag instructions to the milliliter. I use a heavy-duty mixing paddle and a high-torque drill. If you see lumps, you are done. The mixture must be as smooth as heavy cream.
| Floor Type | Tolerance (10ft) | Required Prep | Acclimation Time |
|---|---|---|---|
| Solid Hardwood | 3/16 inch | Sanding/Leveling | 14 Days |
| Engineered Wood | 1/8 inch | Patching/Leveling | 7 Days |
| Laminate Floor | 1/8 inch | Full Leveling | 48 Hours |
| LVP (Vinyl) | 3/16 inch | High Spot Grinding | 48 Hours |
| Carpet Install | 1/4 inch | Minor Patching | None |
The ghost in the expansion gap
Expansion gaps are the most misunderstood structural requirement in the flooring industry, often ignored by installers who want a tight fit against baseboards. A floor is a living thing. It expands and contracts with the changing seasons. If you push laminate tight against a wall, the first humid day in August will cause the floor to peak. It will lift right off the subfloor. This creates a hollow sound that drives homeowners crazy. You need a half-inch gap around the entire perimeter. Do not think your heavy kitchen island will hold it down. If you pin a floating floor under an island, you are asking for the joints to pull apart on the opposite side of the room. I tell my clients that the floor needs to breathe. It is a mechanical system. The leveling peg trick ensures that the surface the floor sits on is smooth enough to allow this movement. If the subfloor is bumpy, the friction will prevent the floor from sliding as it expands. It will bind. Then it will buckle. I have replaced entire living rooms because the installer forgot to leave room for the house to move.
Setting the pegs like a master
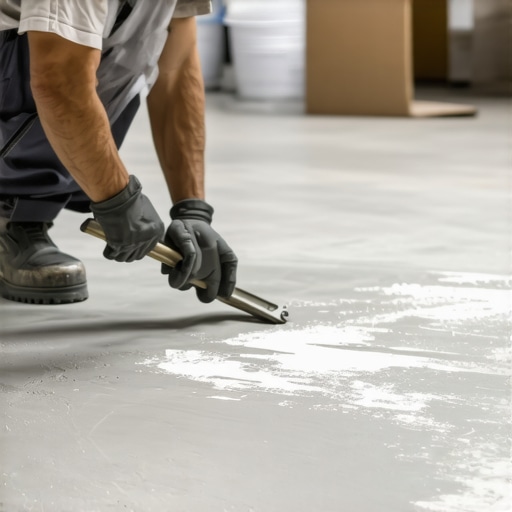
Leveling pins must be placed in a four-foot grid pattern across the entire foundation to provide an accurate visual depth gauge for the underlayment pour. Start at the highest point in the room. This is your benchmark. Use your laser to find this spot. Every other peg will be taller than this one. You want the thinnest possible layer of leveler at the high point, usually about 1/8 inch. Cut the pegs with sharp snips. Do not use dull scissors or you will pull the peg off the floor. I once saw a kid try to eye-ball a three-hundred-square-foot pour without pins. He ended up with a literal wave in the middle of the room. We had to wait for it to dry and then grind it down. That is a waste of time and money. Use the pins. They are cheap. Your time is expensive. Once the pins are set, check them one last time with the laser. A single peg that is too high will leave a bump that you will feel under your feet for the next twenty years.
- Clean the substrate of all oil, wax, and drywall mud.
- Apply a high-solids acrylic primer to prevent substrate suction.
- Set leveling pegs in a grid using a rotary laser level.
- Mix self-leveling compound with a high-torque mixer and measured water.
- Pour and spread with a gauge rake to the top of the pegs.
- Use a spiked roller to remove air bubbles and blend the pours.
- Wait 24 hours before walking or 48 hours before floor installation.
The 1/8 inch that ruins everything
Deflection limits are the primary cause of grout cracking in showers and joint failure in laminate, as subfloors that flex under load destroy the structural integrity of the finish material. While most people want the thickest underlayment, too much cushion actually causes the locking mechanisms on LVP to snap under pressure. You want a firm, flat base. If you put a thick, squishy pad under a click-lock floor, you are creating a trampoline. Every step pushes the joint down. The plastic tongue cannot handle that stress. It will shear off. This is why the subfloor must be flat. The Janka Hardness Scale tells us how tough the wood is, but it does not tell us how the floor will behave on a bad subfloor. Even the hardest Brazilian Cherry will fail if the joists are bouncy or the concrete is wavy. I check for deflection by jumping in the center of the room while watching a glass of water. If the water ripples like Jurassic Park, the subfloor needs more than just leveler. It needs bracing. I do not start a carpet install until the floor is solid. People think carpet hides everything. It does not. It just hides the ugly until the tack strips start to pull out.
“Substrate preparation is seventy percent of the labor but one hundred percent of the success.” – TCNA Handbook Principle
The molecular reality of adhesion
Chemical bonding between the concrete slab and the leveling agent requires a mechanical profile often achieved through diamond grinding or shot blasting. You cannot just pour over a sealed floor. The leveler will pop off. I use a 7-inch grinder with a dust shroud to open up the pores of the concrete. It is a messy, loud job that smells like burnt stone and old pennies. But it is the only way to be sure. If you skip the prep, you are building on sand. The primer needs to soak in. It acts as a bridge. On the molecular level, the polymers in the primer are hooking into the microscopic crevices of the concrete. Then the leveler hooks into the primer. It is a chain. One weak link and the whole thing fails. I have seen laminate installers try to use floor patch to fix a two-inch dip. Patch is for small holes. Leveler is for floors. Use the right tool for the job. If you are doing a shower floor, the rules are even tighter. You need a slope, not just flatness. But the principle of the bond remains the same. Moisture is always trying to push that floor up. You have to fight back with chemistry and physics. Do not let the pretty surface fool you. The real work is underneath where no one ever looks. That is where a master installer lives.