The Spaghetti Rule for Pouring Self-Leveling Underlayment
I spent three days grinding concrete on a job last month just so the floor wouldn’t click like a castanet. Most guys skip the leveling compound. They think the underlayment will hide the dip. It won’t. I walked into that house and saw a living room that looked like a gentle rolling sea. The homeowner wanted laminate. If I had laid it over that mess, every joint would have snapped within six months. This is the reality of the trade. You either do the dirty work of prep, or you watch your reputation crumble with the floor. I smell like WD-40 and oak dust most days because I do it the hard way. It is the only way. A floor is not a decoration. It is a structural performance surface that must be engineered from the slab up. If you ignore the subfloor, you are just building on sand.
Why the Spaghetti Rule governs your floor leveling success
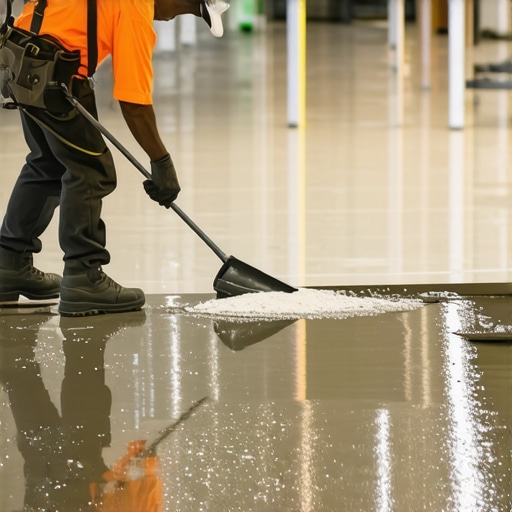
The Spaghetti Rule refers to the specific viscosity of self-leveling underlayment during the pour, ensuring it behaves like fluid rather than sludge. If the mixture is too thick, it fails to find its own level, creating ridges that cause laminate planks to bounce and click over time. Achieving the right consistency is about the molecular ratio of water to polymer. You want it to flow like a rich marinara, not like a clump of cold pasta. When you get this right, the surface tension allows the material to seek the lowest point in the room, filling birdbaths and valleys that are invisible to the naked eye but catastrophic for LVP or laminate. If you mix it too thin, the aggregate separates and the top layer becomes brittle and chalky. You need that sweet spot where the flow is effortless but the structural integrity is maintained. I always use a graduated measuring bucket. Guessing with a garden hose is how you end up with a floor that cracks under the weight of a refrigerator.
“A floor is only as good as the subfloor beneath it; deflection is the enemy of every joint.” – Master Flooring Axiom
The hidden chemistry of self-leveling compounds
Modern self-leveling underlayment relies on calcium aluminate cement rather than standard Portland cement to provide rapid strength and low shrinkage. This chemical profile allows the material to reach high compressive strengths within hours, meaning you can walk on it and begin your carpet install or hardwood layout the next day. The molecular structure of these compounds is designed to resist the tension that occurs during the drying phase. When water hits the powder, a hydration reaction begins that forms needle-like crystals. These crystals lock together. If the slab is too hot or the air is too dry, the water evaporates before those crystals can fully mesh. This is why I always check the ambient temperature. In a humid climate, the cure time slows down. In a dry desert, you might need to mist the air to keep the surface from skinning over too fast. This is the science that retail stores never mention when they sell you a bag of the cheap stuff.
Why your laminate click-lock system is screaming for help
Laminate and LVP systems require a subfloor flatness of 1/8 inch over a 6-foot radius to prevent the locking mechanisms from fatigue. When a floor is laid over a dip, the weight of a person walking causes the joint to flex downward, eventually shearing the thin plastic or HDF tongue. This is the number one cause of floor failure in modern homes. People blame the product. They say the laminate was cheap. Usually, it was the installer who was too lazy to pull a string line. I have seen million-dollar homes where the LVP was floating over a 1/4 inch gap. You can hear the air being pushed out of the underlayment every time someone takes a step. It sounds like a wheezing accordion. To fix this, you must use a straightedge. You find the low spots and you circle them with a pencil. Then you pour. You do not hope the foam pad will fix it. Foam is for comfort, not for structural correction.
The concrete grinding reality that nobody tells you
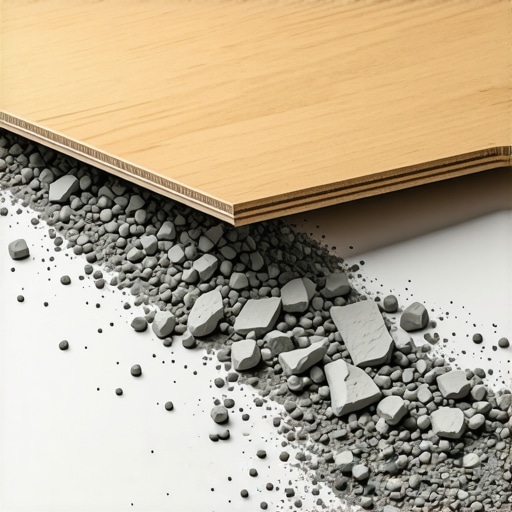
Before you even think about pouring leveler, you must address high spots through mechanical grinding to ensure the underlayment does not have to be excessively thick. Grinding concrete creates a mechanical profile that allows the primer to bite into the surface, preventing the leveler from delaminating or popping off later. It is a miserable, dusty job. I wear a respirator and a headlamp to see the high points through the dust. If you pour leveler over a hump, you just make the hump wider. You have to take the peak off the mountain before you fill the valley. I use a diamond-cup wheel on a 7-inch grinder. It eats through the cream of the concrete and exposes the aggregate. This is where the real bond happens. If you skip this, you are just pouring expensive mud over a slick surface. It will eventually fail. I have seen entire sections of underlayment peel up like an orange skin because the installer didn’t prep the slab.
Comparing subfloor requirements by material
| Floor Type | Tolerance (per 10ft) | Best Leveling Agent | Acclimation Time |
|---|---|---|---|
| LVP Click-Lock | 3/16 inch | High-flow Polymer | 48 Hours |
| Solid Hardwood | 1/8 inch | Cementitious | 7-14 Days |
| Ceramic Tile | 1/4 inch | Fiber-reinforced | None |
| Carpet Install | 1/2 inch | Standard Patch | 24 Hours |
Precision preparation for high moisture zones like showers
Preparing a floor for showers and wet areas requires a different hierarchy of needs, focusing on slope and waterproofing over absolute levelness. You cannot use standard self-leveling compound in a shower pan unless it is specifically rated for submerged environments and can be manipulated to create a 1/4 inch per foot slope. In these areas, we use dry-pack mortar or specialized liquid-applied membranes. The moisture in a bathroom is relentless. It finds its way through the grout and sits on the subfloor. If your leveler is not moisture-stable, it will turn back into mush. I always tell my apprentices that a shower is a tank. You build the tank first, then you make it pretty. The floor leveling in the rest of the bathroom must transition perfectly to the shower threshold. This is where the zero-threshold look is won or lost. It requires millimetric precision and a deep understanding of how water moves across a surface.
The information gain on underlayment thickness
While most people want the thickest underlayment, too much cushion actually causes the locking mechanisms on LVP to snap under pressure. It is a common misconception. You think a 5mm pad will make the floor feel like a cloud. What it actually does is create a trampoline effect. Every time you step, the floor sinks. The joint is not designed for that much vertical travel. I prefer a high-density rubber or a thin, 1.5mm cross-linked polyethylene. It provides sound dampening without sacrificing the stability of the floor. You want the subfloor to be the solid foundation. The underlayment is just the skin. If you have a 1/4 inch dip and you try to fill it with extra padding, you are asking for a lawsuit. The floor will bounce, the gaps will open, and the warranty will be voided the moment the inspector sees the thick pad.
A checklist for the perfect pour
- Moisture test the slab using an RH probe or Calcium Chloride test.
- Vacuum every spec of dust and debris from the surface.
- Apply two coats of acrylic primer to prevent pinholes and bubbles.
- Seal the perimeter with foam sill sealer to allow for expansion.
- Map the high and low spots with a laser level and transit.
- Mix the compound at the exact RPM specified by the manufacturer.
- Use a spike roller to release trapped air and improve the finish.
“The subfloor must be flat to within 3/16 inch in 10 feet or 1/8 inch in 6 feet.” – NWFA Standards
The 1/8 inch that ruins everything
A deviation of just 1/8 inch over six feet can result in a hollow sound when walking on a floating floor, which clients associate with poor quality and cheap materials. This air gap acts as a drum chamber, amplifying the sound of footsteps and making the entire installation feel temporary. When I work on high-end jobs, 1/8 inch is my absolute limit. I use a 10-foot straightedge to check the work. If I can slide a nickel under the straightedge, the floor is not ready. You have to be obsessed with the numbers. The physics of weight distribution means that a floor must be supported across 100 percent of its surface area. If there is a void, the material is under constant stress. Over time, that stress leads to micro-fractures in the core of the plank. Then the clicking starts. Then the boards separate. By the time the homeowner calls me, it is too late to fix. You have to tear it out and start over. Prep is the only insurance policy that actually pays out.
Why your subfloor is lying to you
Subfloors often appear flat to the eye because the brain smooths out gradual slopes, but a laser level will reveal that most slabs are actually shaped like a shallow bowl or a saddle. You cannot trust your eyes when it comes to floor leveling because the perspective of a room hides the structural defects. I always set up my rotating laser in the center of the room. I take readings every two feet. It is a grid of truth. I have seen slabs that looked perfect until the laser showed a 3/4 inch drop toward the sliding glass door. That kind of slope will make your baseboards look crooked and your doors won’t swing right. It ruins the architecture of the space. You have to bring the floor to the level, not the other way around. This is especially true with the trend of large-format tile. If the floor is not perfectly flat, you will have lippage. One tile will be higher than the next. It becomes a tripping hazard and it looks like a beginner did the work. Professionalism is found in the tools you use to measure, not just the tools you use to cut.
Final thoughts on the art of the subfloor
The Spaghetti Rule is not just about the mix. It is about the mindset. You have to care about the things that people will never see. Once the carpet install is finished or the hardwood is nailed down, the leveling compound is hidden forever. But it is there. It is the silent partner in the room. It is the reason the floor feels solid under your boots. It is the reason the house feels like it was built to last. I take pride in the gray, dusty mess of a pour because I know what it means for the finished product. If you want a floor that lasts thirty years, you start with the liquid stone. You measure the water. You grind the peaks. You prime the slab. You do the work that the other guys won’t do. That is the difference between a floor installer and a floor architect. Success is measured in the silence of the joints and the flatness of the path.