Why your shower niche tiles are falling off the wall
Most guys skip the leveling compound. They think the underlayment will hide the dip. It won’t. I spent three days grinding concrete on a job last month just so the floor wouldn’t click like a castanet. That same lazy philosophy is exactly why your shower niche tiles are currently sitting in a pile on the shower floor or sounding hollow when you knock on them. You cannot build a precision structure on a foundation of mud and hope. When a shower niche fails, it is almost never the fault of the tile itself. It is a cascading failure of physics, chemistry, and structural movement that began long before the first trowel of thin-set touched the wall. I have spent twenty-five years fixing the mistakes of installers who treat a shower like a dry closet. You cannot treat a wet environment with the same casual attitude you use for a carpet install or laying laminate in a bedroom. Water is a persistent solvent. It is looking for a way out, and your poorly constructed niche is the path of least resistance.
The unseen movement in your wall studs
Shower niche tile failure occurs when the substrate moves independently of the tile surface due to wood shrinkage or structural settling. When you notch out studs to create a niche, you weaken the vertical integrity of that wall. Without proper blocking and reinforcement, the wood expands and contracts with every change in humidity. This movement snaps the bond of the thin-set. Most residential framing uses kiln-dried lumber that still holds significant moisture. As that wood dries out over the first two years of a home’s life, it twists. If your niche is tied directly to those studs without a decoupling system or a rigid cementitious backer unit, the tile has no choice but to pop off. It is the same reason a floor leveling compound is necessary on a subfloor. If the base moves, the finish fails.
The chemistry of a failed bond
The average homeowner thinks thin-set is just glue. It is not. It is a complex crystalline matrix that grows into the microscopic pores of the tile and the substrate. If you are using a large format porcelain tile in your niche but used a cheap, unmodified thin-set, you have a chemistry problem. Porcelain is dense. It has an absorption rate of less than 0.5 percent. An unmodified mortar relies on mechanical suction to hold. Because porcelain is so dense, there is nothing for the mortar to grab onto. You need high-polymer modified thin-set that creates a chemical bond. I have seen niches where the installer used mastic. Mastic is an organic adhesive that re-emulsifies when it gets wet. In a shower niche, where water sits on the horizontal ledge, mastic is basically a slow-acting eject button for your tile. It turns back into a liquid state, and the tile simply slides off the wall.
“A floor is only as good as the subfloor beneath it; deflection is the enemy of every joint.” – Master Flooring Axiom
The 1/8 inch that ruins everything
The pitch of the bottom shelf in a shower niche must be at least 1/8 inch toward the shower drain to prevent standing water. If that bottom ledge is perfectly level, water will sit. Surface tension keeps that water against the grout lines. Over time, that water migrates through the grout. Grout is not waterproof. It is a porous filter. Once water gets behind the tile and sits on the substrate, it begins the process of hydrostatic pressure. In the winter, if the house cools down, that trapped moisture can exert pressure as it changes density. Even if it doesn’t freeze, the constant saturation weakens the bond of the thin-set. I always tell my apprentices that if they don’t see a visible slope on that niche sill, they haven’t finished the job. A flat niche is a failed niche.
Waterproofing failures behind the tile
Many installers still think that cement board is waterproof. It is not. Cement board is moisture stable, meaning it won’t rot like drywall, but water will pass right through it like a sponge. If you didn’t apply a liquid-applied waterproofing membrane or a bonded sheet membrane over the cement board before tiling, your niche is a leak waiting to happen. The water goes through the grout, through the thin-set, through the cement board, and hits the wooden studs. The studs swell, the board moves, and the tile pops. It is a cycle of destruction that happens behind the scenes. You see a loose tile; I see a rotted 2×4 that has expanded 5 percent in width and sheared the mortar bond. This is why floor leveling is so critical in other parts of the house too. If you don’t control the environment and the substrate, the finish is just a mask for a disaster.
| Material Type | Water Absorption Rate | Required Adhesive | Risk Level |
|---|---|---|---|
| Ceramic Tile | 3% to 7% | Standard Modified Thin-set | Moderate |
| Porcelain Tile | Under 0.5% | High-Polymer Modified | High |
| Natural Stone | Varies (High) | White Stone Mortar | Extreme |
| Glass Tile | 0% | Glass-Specific Thin-set | Critical |
The myth of waterproof grout
Grout is a decorative element and a buffer between tiles but it is never a primary waterproofing layer. People get frustrated when their niche fails because they used a high-end epoxy grout. While epoxy grout is more resistant to water penetration than cementitious grout, it is not a substitute for a waterproofed substrate. If the niche was framed poorly, the house settles, and a tiny crack forms in that epoxy grout. Now you have a funnel. Water gets in through the crack but cannot evaporate out because the epoxy is so dense. You have effectively created a pressurized chamber behind your tile. This leads to what we call ‘latent failure’ where the tile looks fine for three years and then the entire assembly falls off in one piece because the thin-set has been turned to mush by trapped moisture.
The checklist for a permanent niche
- Ensure 2×4 blocking is kiln-dried and doubled up at the niche corners.
- Use a pre-manufactured foam niche or a fully waterproofed CBU assembly.
- Verify a 1/8 inch slope on the bottom sill toward the drain.
- Use 95 percent thin-set coverage in wet areas, leaving no air pockets.
- Apply a topical waterproofing membrane like Kerdi or RedGard.
- Select a modified thin-set that matches the absorption rate of your tile.
The ghost in the expansion gap
In every shower, there should be a change of plane. Where the niche walls meet the back of the niche, that is a 90-degree angle. You cannot use hard grout in that corner. You must use a 100 percent silicone caulk. This is an expansion joint. Every house breathes. The walls move. If you fill that corner with hard grout, the first time the temperature drops or the house settles, that grout will crack or, worse, it will act as a wedge and push the tile off the wall. It is the same principle as leaving a gap at the perimeter during a laminate installation. If you don’t give the material a place to go, it will go up. In a niche, ‘up’ means off the wall and onto your toes. I see this error on 90 percent of the repair calls I take. People want the look of grout, but they ignore the physics of expansion.
“Cementitious backer units are moisture-stable but not moisture-proof; the membrane is the only line of defense.” – TCNA Handbook Principles
Adhesive chemistry and the 95 percent rule
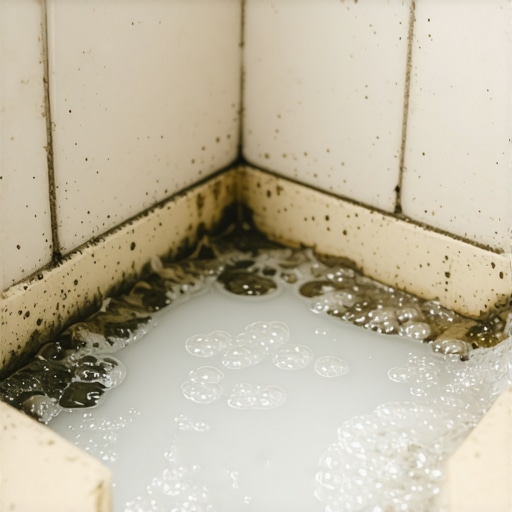
When you are doing a carpet install, you want a good tack strip. When you are doing tile, you want coverage. The ANSI (American National Standards Institute) A108 standard is very clear. You need 95 percent coverage of thin-set on the back of the tile in wet areas. Most installers do a ‘spot bond’ technique where they put five dabs of mortar on the back and press it on. This creates huge air pockets behind the tile. In a shower niche, those air pockets become reservoirs for water. This is where mold grows and where the bond eventually fails. I back-butter every single piece of tile that goes into a niche. I want to see that thin-set squeezing out of the edges. If there is an air pocket, there is a failure point. It is tedious work, but it is the difference between a shower that lasts ten years and one that lasts fifty.
The regional humidity factor
If you are living in a high-humidity environment like the Gulf Coast, the stakes are even higher. The vapor pressure in a hot, humid bathroom can actually push moisture through the walls from the outside in. If you don’t have a proper vapor barrier behind your niche, you are fighting a losing battle. The dry heat of a place like Phoenix has the opposite problem. It sucks the moisture out of the thin-set too quickly during installation, preventing a proper cure. You have to damp-wipe the substrate to prevent it from ‘stealing’ the water from your mortar. No matter where you are, you have to account for the climate. A niche in Seattle needs a different approach to moisture management than one in a mountain cabin in Colorado. I have seen niches fail because the installer didn’t account for the fact that the house was on a pier-and-beam foundation that moved every time it rained. You have to be a geologist and a meteorologist as much as a tile setter.
The structural integrity of the niche frame
When you cut a hole in the wall, you are interrupting the load-bearing or shear capacity of that wall. I always over-engineer my niche framing. I use 2×6 blocking even in a 2×4 wall if I can. I want that niche to be the strongest part of the bathroom. If you use flimsy scraps of wood you found in the garage, don’t be surprised when the tile pops. The vibrations from a slamming bathroom door can be enough to rattle a poorly framed niche and break the bond of a fresh tile job. Think of the niche as a structural insert, not a decorative hole. It needs to be rigid, waterproof, and pitched correctly. If you miss any one of those three, you are just wasting money on expensive tile that won’t stay put. Most homeowners worry about the color of the grout, but I’m worrying about the screw schedule on the backer board. That is the difference between a professional and an amateur. It is about the bones of the shower, not the skin.